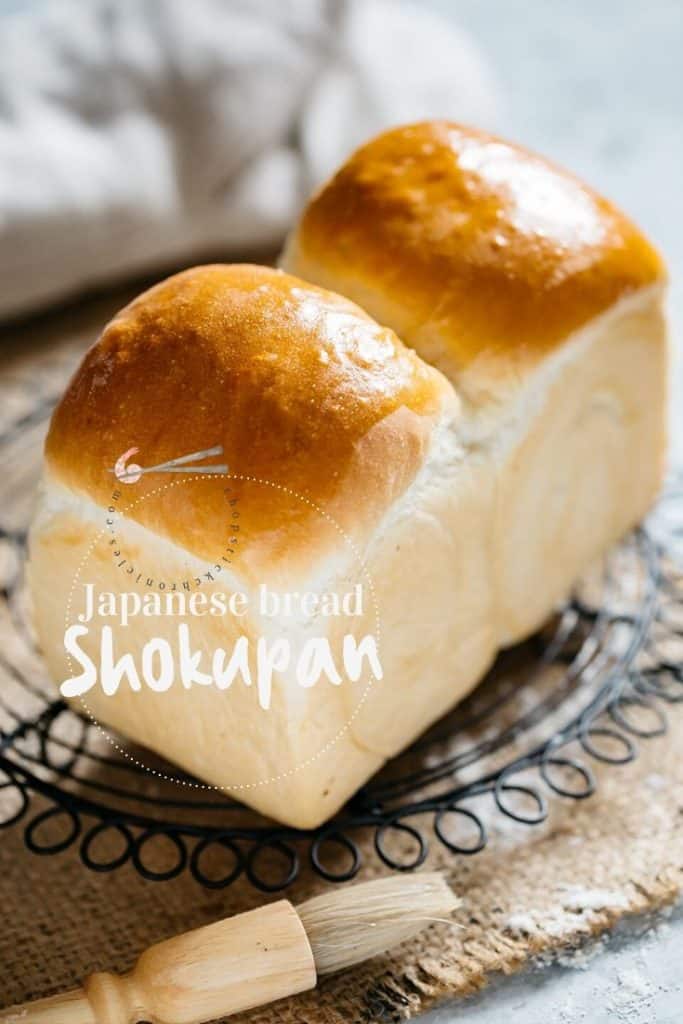
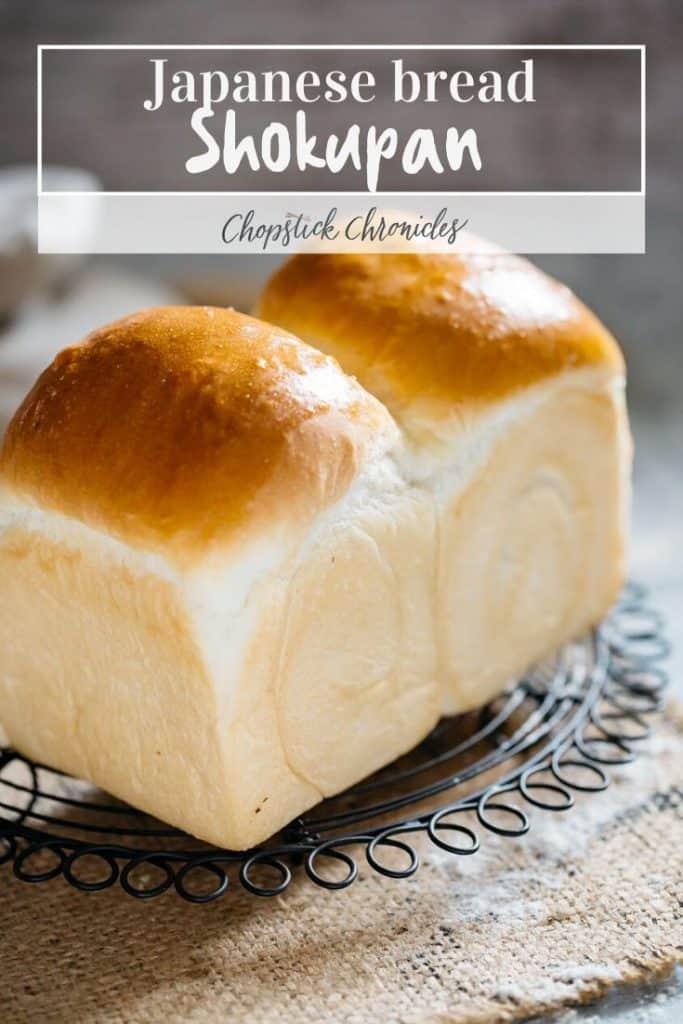

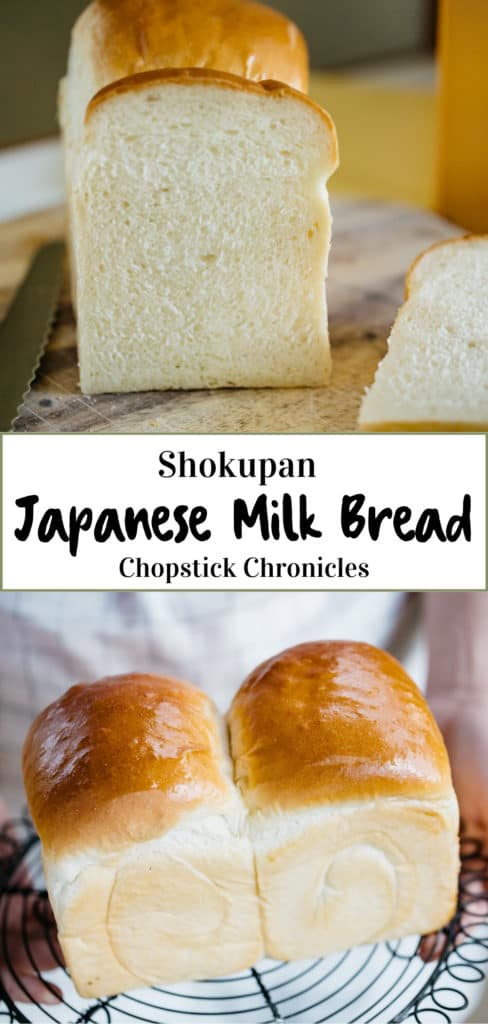
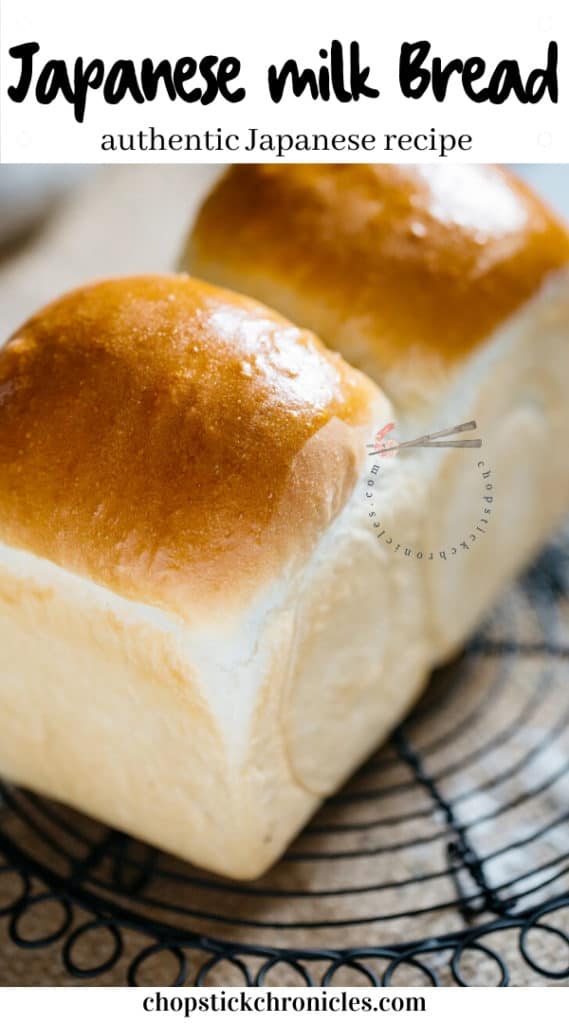
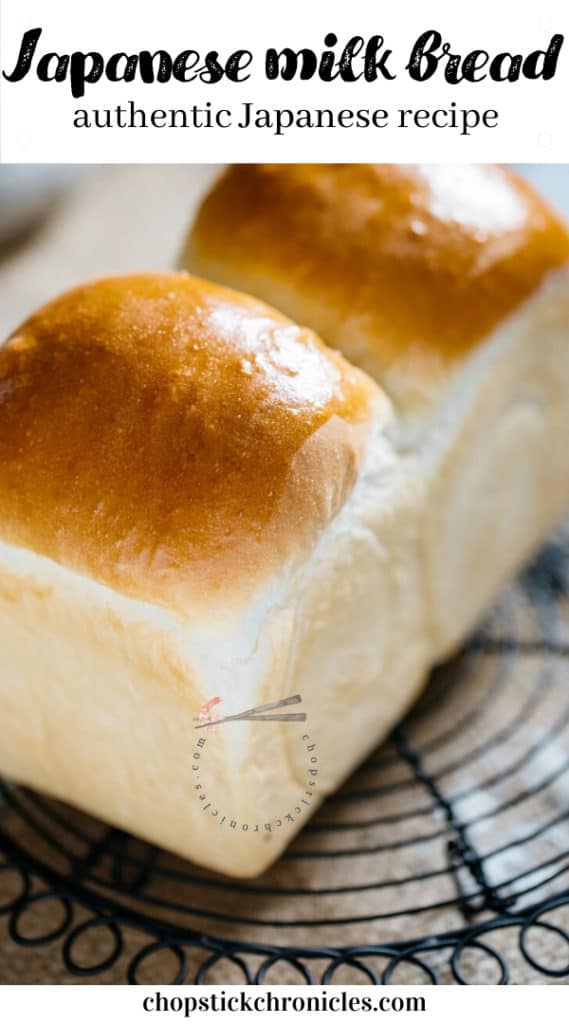
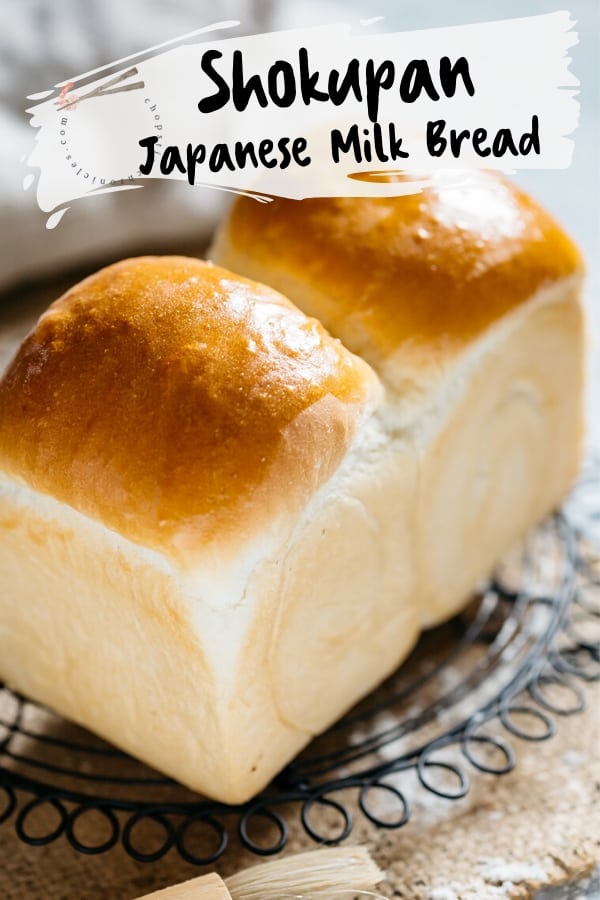
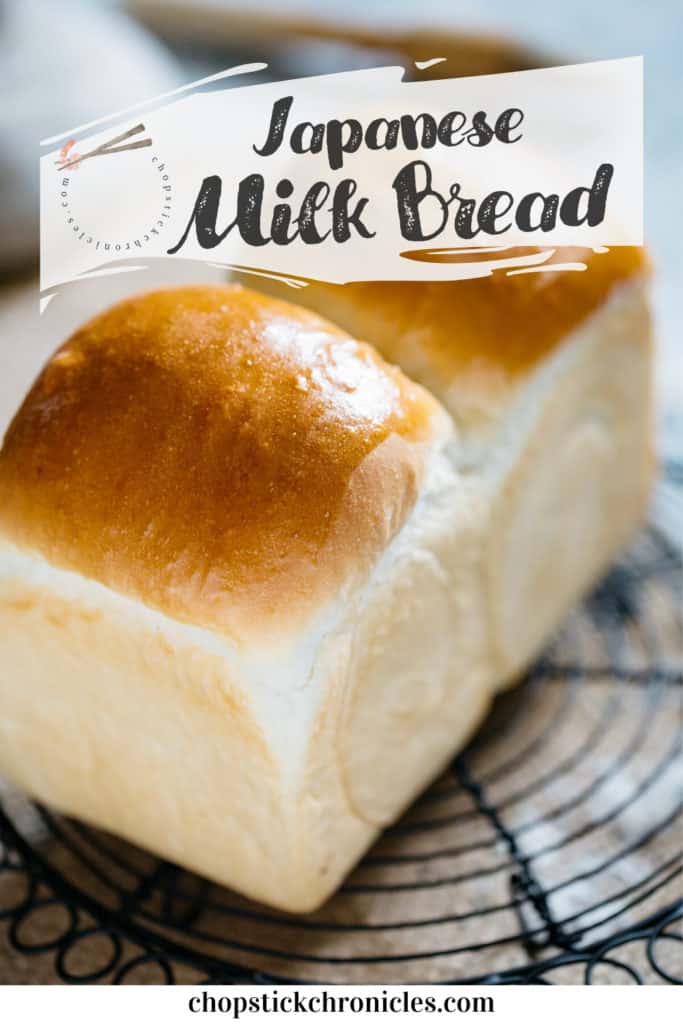
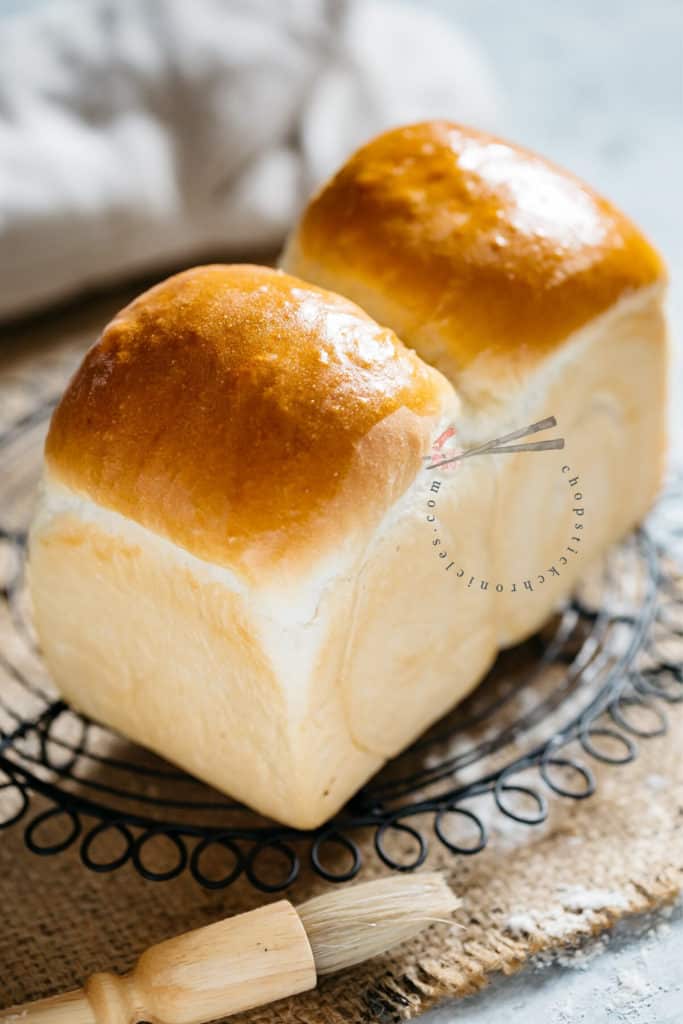

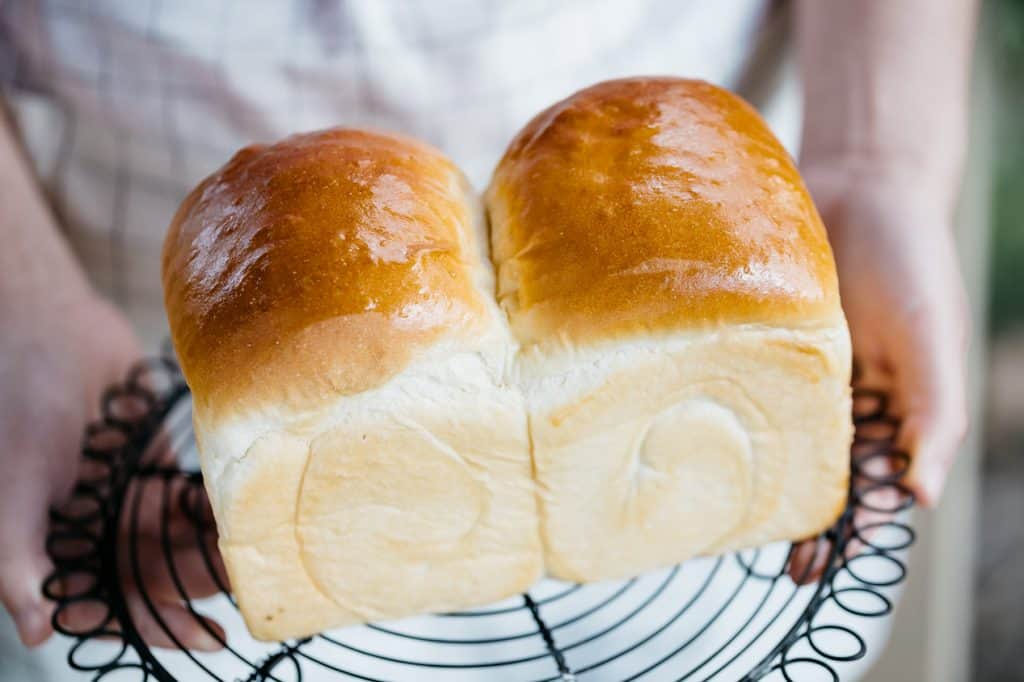
Have you ever eaten Shokupan, the Japanese milk bread? You must try it! It’s the delicious, soft and fluffy white bread loaf that you can get in Japan. The golden brown crust and soft white inside make it irresistible. It is amazingly fluffy and stays moist for longer than ordinary bread because of the Yudane method.

Why is Japanese Bread So Fluffy?
Why is Japanese bread so soft and fluffy and has the mochi-like texture? The answer is because of the “Yudane” method. The Yudane method makes the bread pillowy soft and fluffy and also keeps the bread from drying out quickly. This is because the heated gelatinised starch in the flour keeps the moisture inside the bread.
What is the Yudane Method?
Yudane is made by mixing bread flour and hot boiling water. Adding hot boiling water gelatinises the starch. The gelatinised starch not only allows the starch to take in more water, but also increases the sweetness of it. Therefore by adding Yudane to a bread dough (the yudane method), you can make soft, moist and sweeter bread which lasts longer.
Yudane vs Tangzhong roux
- The Yudane method originated in Japan and it became widespread and the popular way to bake bread in Asian countries when Yvonne Chen introduced “Tangzhong” roux as a secret ingredient to bake the super soft and light Japanese milk bread in her book called “Bread Doctor”.
- Yudane ratio of flour and water is usually 1:1 whereas “Tangzhong roux” is made by 1:5 ratio of bread flour to water. The Tangzhong mixture is made by heating up to 149°F(65°C) then cooled down to room temperature and added to the bread dough. I will explain how to make Yudane in a paragraph below.
- I have often seen this type of bread also called “Hokkaido Milk Bread” or “Japanese Milk Bread” on social media platforms such as Pinterest. Those breads are made by the same principle either adding Yudane or Tangzhong roux to bread dough.
How to Make Yudane?
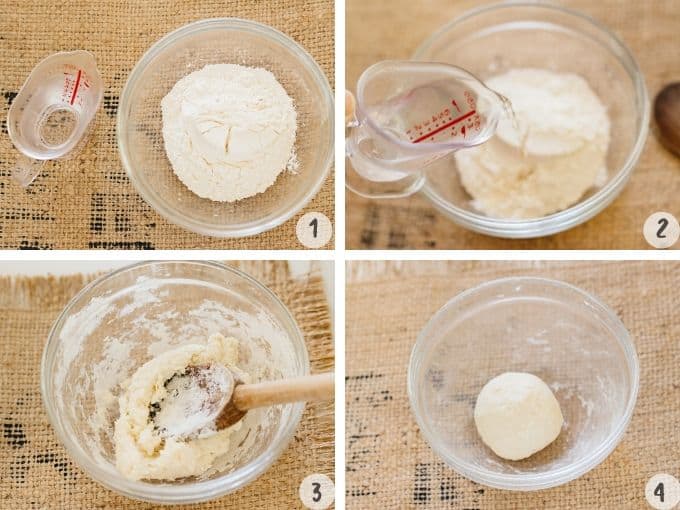
We need to deduct 20% of total flour ingredients to make Yudane. So to make 1 standard loaf size dough, we need 250 x 0.2 = 50g bread flour. Yudane flour to water ratio is generally 1:1, but I found it is easier to make yudane with 1:08 ratio. Then simply add hot boiling water (should be above 194°F/90°C) and combine them with a wooden spatula. The ideal combined dough temperature will be around 122°F/50°C. When it is cooled down, wrap with a sheet of plastic wrap and leave it on the kitchen bench or in the fridge.
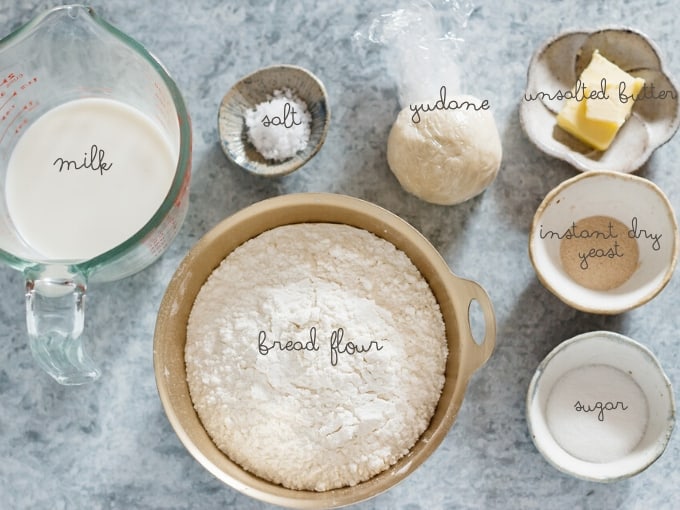
Ingredients
You need to gather bread flour, milk, sugar, unsalted butter, Salt and Yudane that you made the night before. Some ingredients will be further explained as I have received many questions about this.
Flour
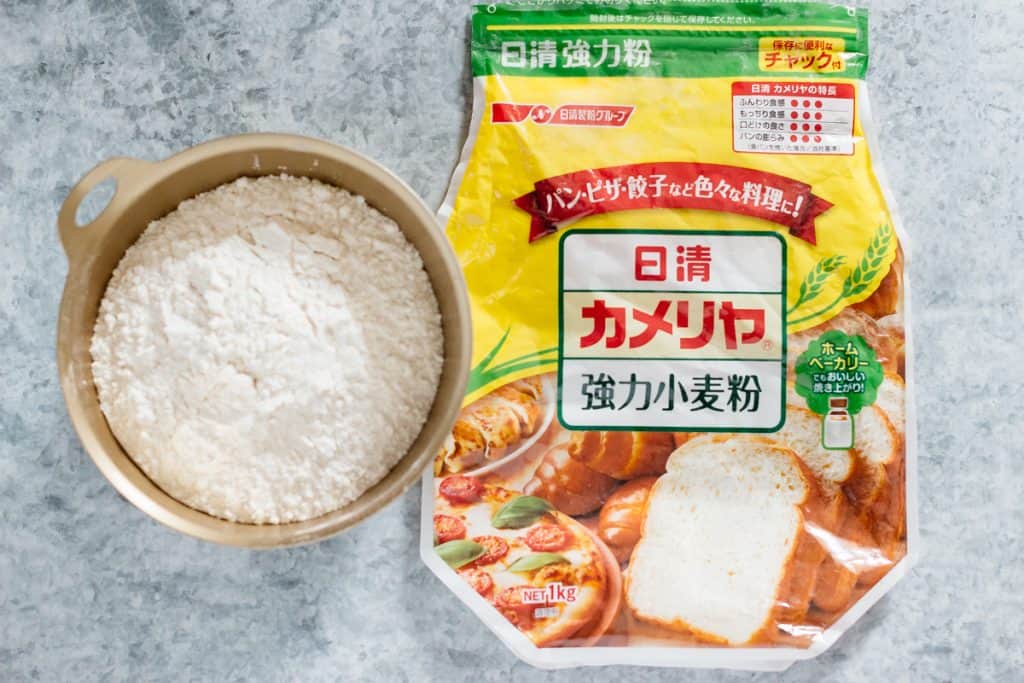
For making fluffy Japanese milk bread, we need to use bread flour that contains around 12% of protein. I use Japanese brand Nisshin flour. You can use all-purpose flour but all-purpose flour has around 10% protein content therefore the bread will not rise as high as the shokupan made with bread flour.
Yeast
I usually use LeSaffre Saf-Instant Yeast Gold for making shokupan Japanese milk bread. If you cannot find instant active dry yeast but can find fresh yeast, you can substitute. This recipe requires 3g of dry yeast, so you would need 3g x 3 = 9g of fresh yeast.

Butter
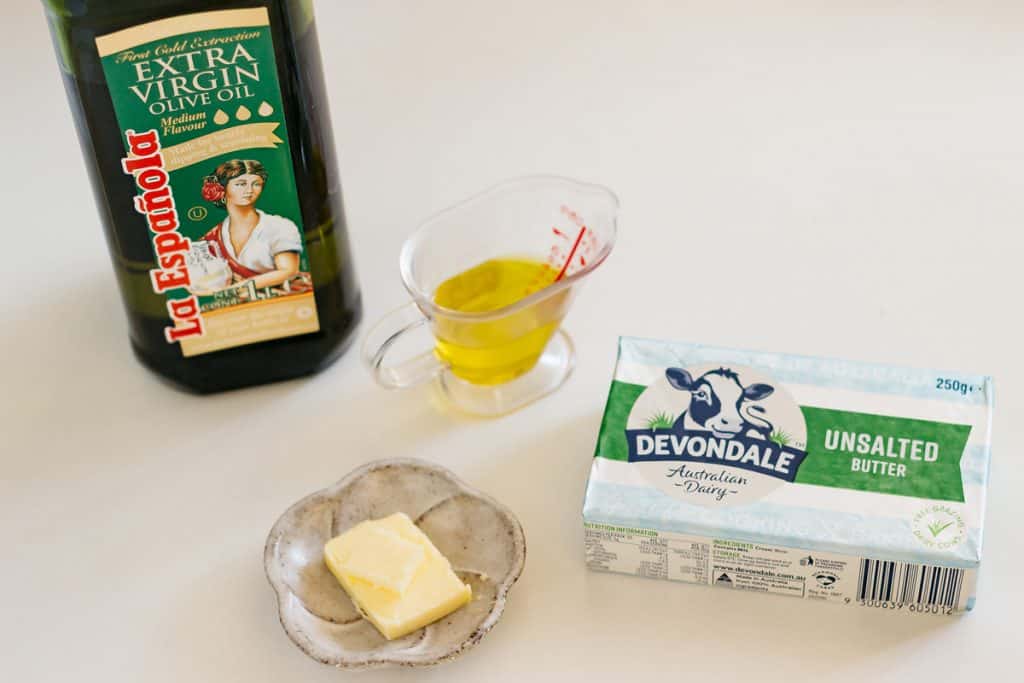
We need to use unsalted butter. Because the salt content of butter will affect the gluten formation. If you don’t have unsalted butter, and would like to use oil instead, you can. However it is a little bit tricky because butter is solid and oil is liquid. Generally speaking, you can replace 3/4 of the amount of butter with oil.
Milk
Some readers have asked if they can replace the whole milk with other types of milk. Using different milk does not affect the fluffiness and lightness of the bread. I tested using coconut milk and almond milk. Read the result in the FAQ.
Bakers Percentages
Some readers have asked to change the amount of the ingredients to make bigger or smaller sized bread loaves. Baker’s percentage is great because it is universal even when each country uses different units of weight. In the table below, is the bread ingredients mixing ratio. Each ingredient is shown as a % of the flour.
| Ingredients | weight | percentage |
| Bread flour for Yudane | 50g | 20% |
| Hot water | 40g/ml | 16% |
| Bread flour | 200g | 80% |
| Milk | 150g/ml | 60% |
| Sugar | 15g | 6% |
| Instant dry yeast | 3g | 1.2% |
| unsalted butter | 10g | 4% |
| Salt | 5g | 2% |
Using Cup Measurement
If you don’t have a kitchen scale, don’t worry. I have figured out measurements for using cups. However, you need to be as precise as you can. For example, when you measure 1 cup of flour, you need to spoon flour to the measuring cup, then level the surface with the back of a knife. The cup measurements are included in the recipe cards’ note section.
How to Make Shokupan Japanese Milk Bread?
This is the basic process of making the shokupan Japanese bread in 8 steps using Yudane method.

- Make Yudane the night before. (8-12 hours)
- Knead all ingredients using a stand mixer, bread machine or by hand (20min)
- The first rise (45-60 min depends on the temperature)
- Divide & roll
- Bench time (20 min)
- Shape
- The second rise (30 min)
- Bake (30 min)

Tips for Making Shokupan Japanese Milk Bread Successfully
- Start making Yudane the night before with boiling hot water. When the mixture combines the temperature of the dough should be around 122°F/50°C.
- Leaving Yudane longer will result in better Japanese bread.
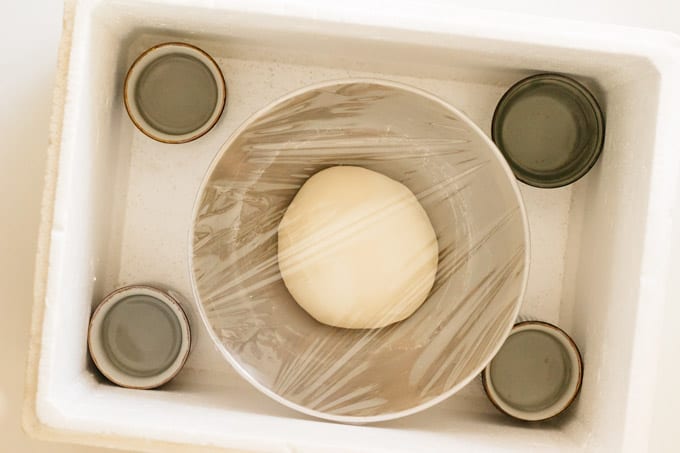
- The dough rising temperature should be around 86°F(30°C). My oven has a defrost function and I set the temperature to 86°F(30°C), so I use that setting for rising. Or use a styrofoam box with 4 little cups with hot water in the corners of the box.
Other Recipes That Call for Shokupan Japanese Milk Bread
The fluffy, soft and moist Japanese milk bread is the basis of other delicious Japanese creations.
- Tamago Sando (Japanese egg sandwich). This egg salad sandwich is super popular and for good reason.
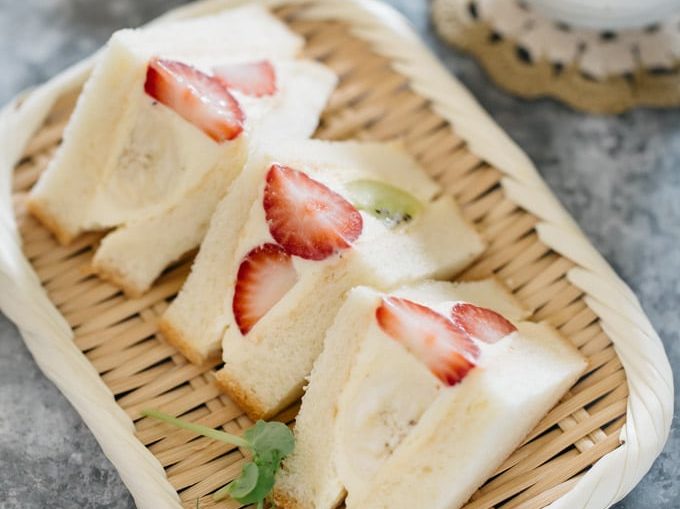
- Fruit Sando (Japanese fruit sandwich). Another popular sandwich in Japan, often made with strawberries and cream.
- Panko (Japanese bread crumbs). You can use this Japanese bread to make Japanese bread crumbs which are so crispy and perfect for using to make pork katsu or chicken katsu.
- Simply toasting the bread with some butter or jam is also great. The bread is so delicious that even eating it simply like this tastes amazing.
- You can also use this recipe to make super soft Japanese bread rolls.

How to Store the Bread?
Another tip that I can give you is that this bread is super soft, so it is better to slice it the following day. I bake the bread on a Saturday and slice it on Sunday. It will stay moist for a few days just sitting on the kitchen bench. In my household, the bread is eaten in a day or two. But if you wish, slice them and individually wrap and place them in a ziplock bag to freeze. It will last about a month.
FAQ
A: Yes, you can. But as you can see the all purpose flour did not rise well in my experiment. The texture of the bread was not fluffy, but rather it was like eating a savoury muffin. 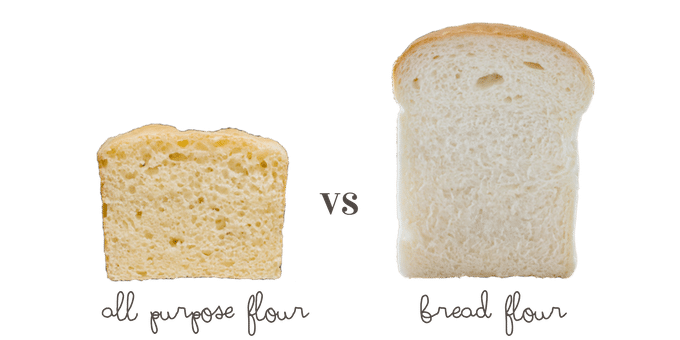
A: Using different milk does not affect the fluffiness and lightness of the bread. The coconut milk I used was the “Ayam Premium Coconut Milk 100 % Natural” which contains 24.3 g fat in 100ml and it is quite rich and thick. The almond milk that I used was “Sanitarium So Good Almond Milk” and contained only 1.4g per 100ml. It was very thin milk. The almond milk bread turned out fluffier and coconut milk bread was denser. Hope these experiments using different ingredients helps you make a decision as to which ingredients to use.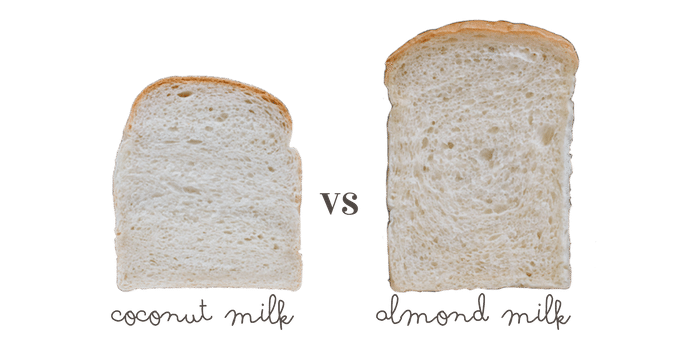
A: You can hand knead, however, because this has yudane in the dough which is very moist, the dough is quite sticky. Therefore, this recipe is more suitable for machine kneading. I usually use either a machine or bread mixer to knead and rise.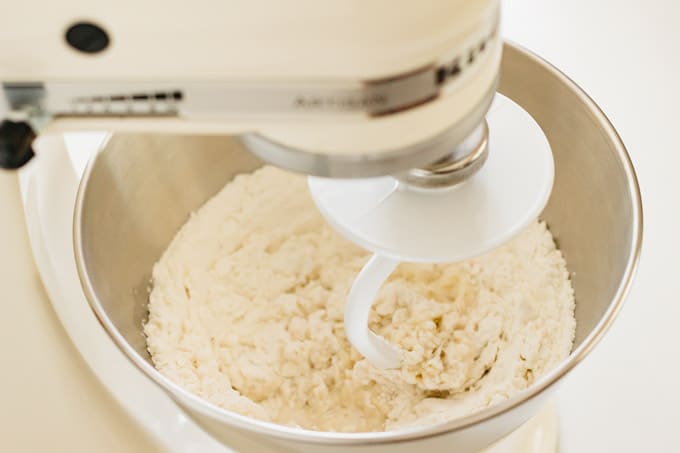
A: Yes you can. Some of my readers and myself have only rested the dough for about a couple hours in the fridge and the bread made with that shorter resting time of the yudane was quite successful. However, the longer you rest the yudane the better the quality of the bread.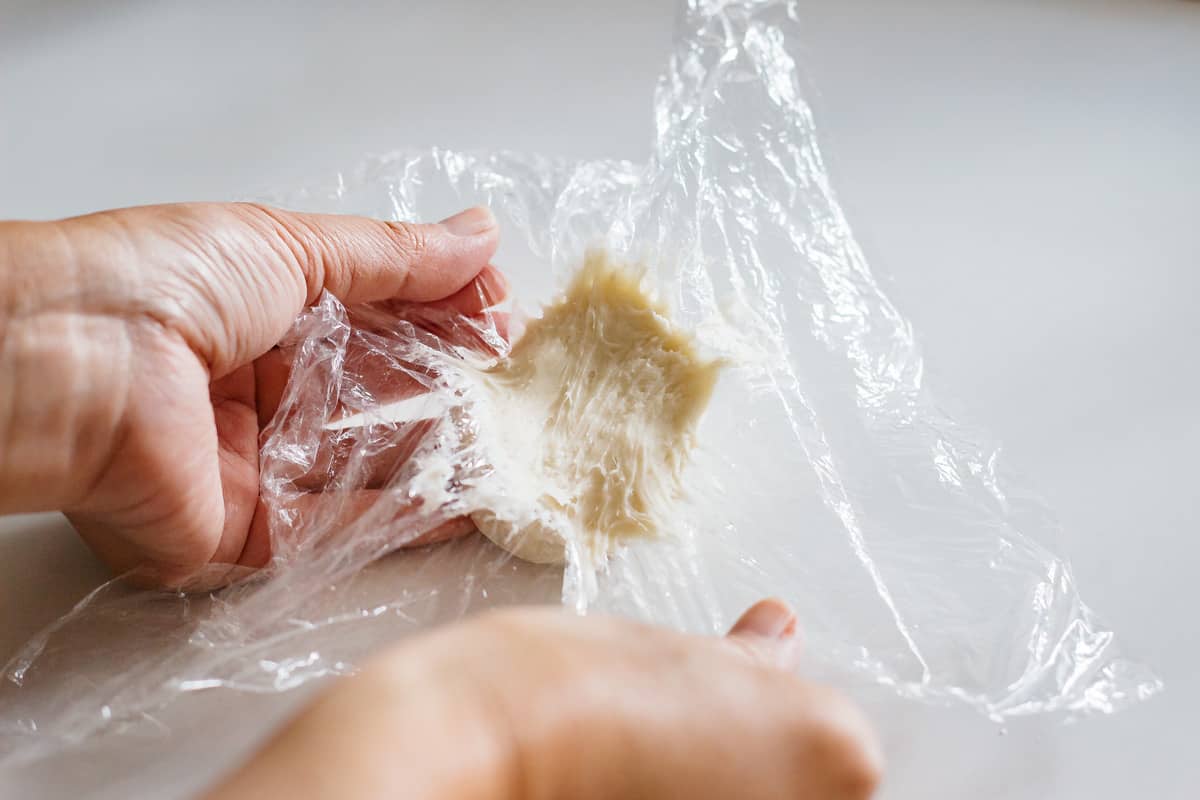
A: My bread form size is 3.9 x 7.9 x 3.5 inch (10 x 20 x 9 cm). I bought it in Japan. This is similar to what I have from Amazon.com.
Stay Connected
This is not a popular effortless “No Knead” type of bread recipe, however, it is worth the effort to bake this bread especially if you love any Japanese baking stuff. This is the bread you must try!

If you liked my recipe for Shokupan Japanese milk bread, please rate it and leave a comment below. Also, don’t forget to follow me on Youtube, Pinterest, Facebook , Twitter and Instagram to keep up to date with all the latest happenings on Chopstick Chronicles. Don’t forget to use the hashtag #ChopstickChronicles so I can see your wonderful creations!

Shokupan 食パン
Video
Ingredients
Yudane
- 50 g Bread flour *1
- 40 ml boiling water above 194°F(90°C)
Bread
- 150 ml milk (room temperature) *3
- 15 g sugar
- 3 g dry instant yeast *2
- 10 g unsalted butter (room temperature)
- 200 g Bread flour *1
- 5 g salt
Instructions
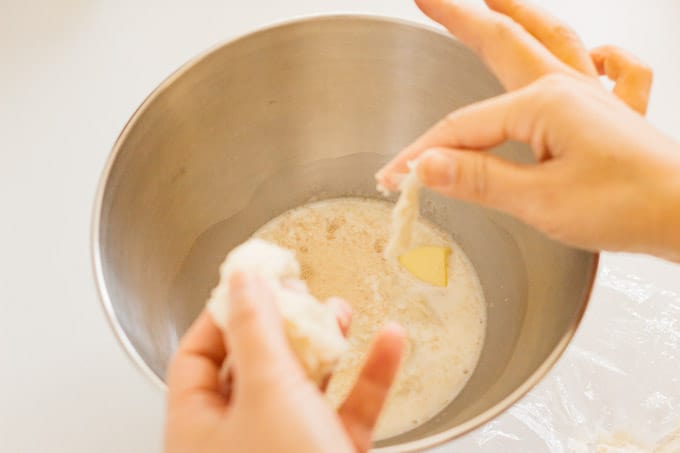
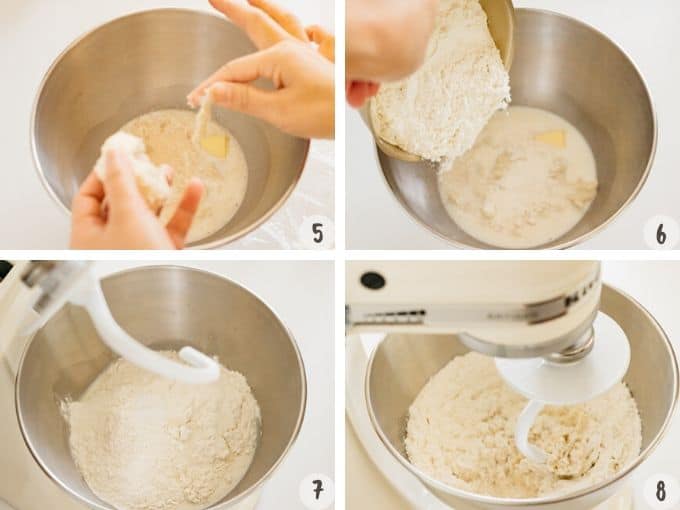
- Make Yudane the night before. Place bread flour in a bowl and add boiling water and mix well. Put cling wrap and refrigerate overnight. *4
- Pour the room temperature milk into a stand mixer bowl.
- Add sugar,butter and yeast to the bowl then add the yudane as you tear it into small pieces.
- Add the bread, flour and salt.
- Attach the kneading hook onto the stand mixer and combine all ingredient on low speed 1.
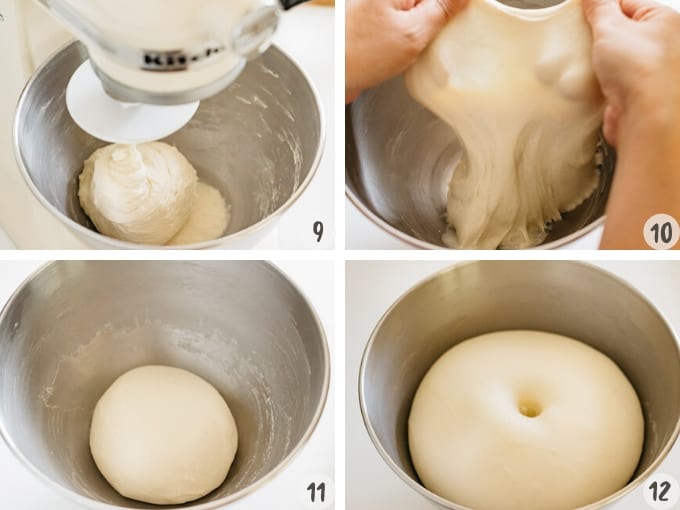
- When all ingredients are combined, turn the speed up to 5 or 6 and knead the dough for 20 min.
- Roll the dough round and place the dough into a greased bowl. Wrap with cling wrap to rise for about 45 min to 1 hour at about 86°F(30°C) or until double the size.
- Use your finger, to test if the dough has risen by dusting your finger with flour and poking the dough. If the dough doesn't bounce back and the hole you poked stays there, it is ready.
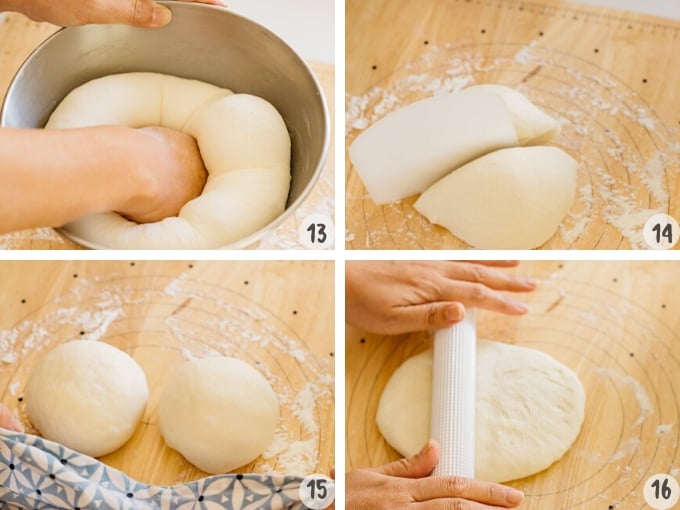
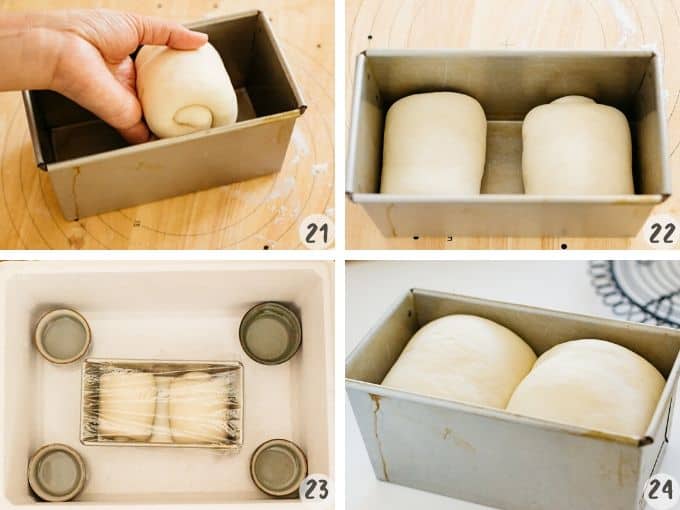
- Punch the dough down and cut the dough into two equal parts with a scraper and roll them.
- Cover the rolled doughs with a wet cloth and stand it for 20 minutes bench time.
- Roll out each dough to about 5.9×7.8inch (15 x 20 cm) rectangle with a rolling pin.
- Fold the dough tightly not letting any air in towards the centre from left and right.
- Rotate the dough 90 degrees and roll it from one end.
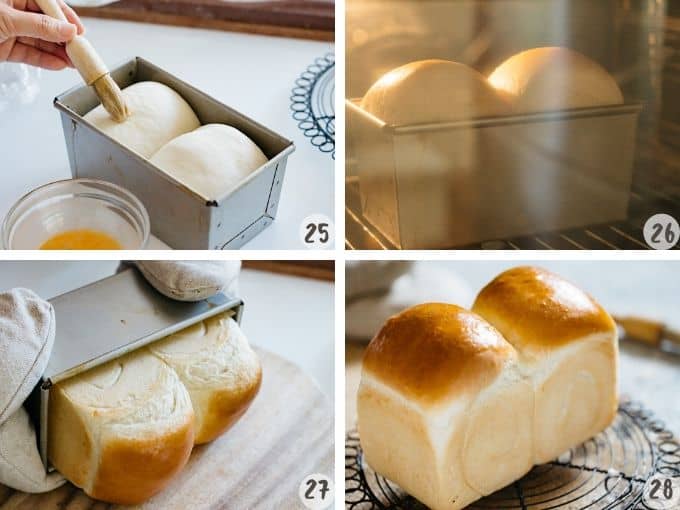
- Spray one loaf bread tin lightly and place the rolled dough in the end of the tin facing the centre.
- Cover it with a wet cloth and let the dough rise for a second time until the dough rises to the size of the bread tin about 30 min.
- Start to preheat the oven to 365 °F(185°C).
- When the dough has risen to be level with the tin, it's ready to bake.
- Bake the dough for about 25 -30 minutes in preheated oven.
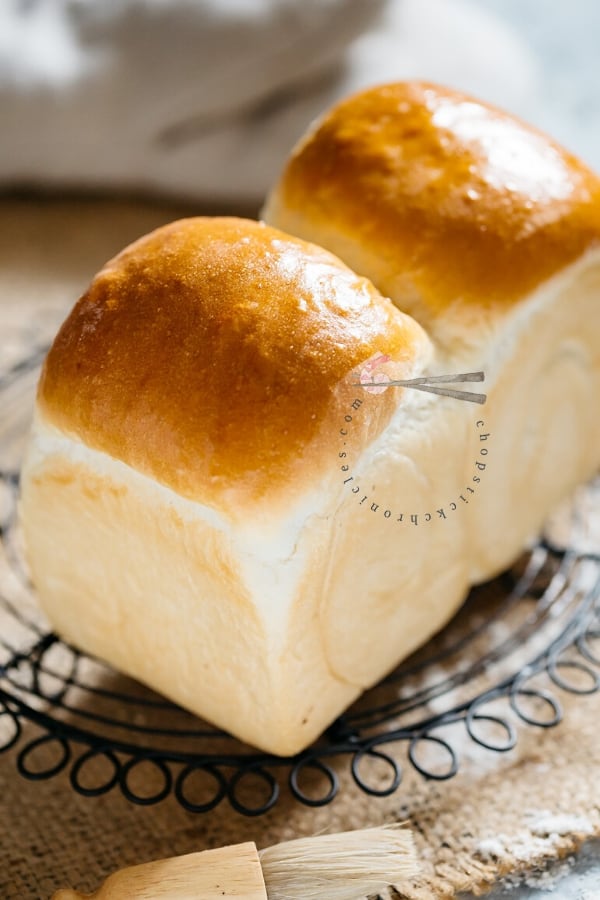
- Remove the bread from the tin and cool it down on a rack. * 5
- Whisk an egg, rightly brush over the bread dough.(Optional)
Notes
Nutrition
Chopstick Chronicles is a participant in the Amazon Services LLC Associates Program, an affiliate advertising program designed to provide a means for sites to earn advertising fees by advertising and linking to Amazon.com. As an amazon associate I earn from qualifying purchases.
This recipe was originally posted in 2017, since then had received so many questions and suggestions. So I have decided update the post and the recipe in order to answer all the questions asked. Thank you for those who left comments below and rate the recipe highly.


Hi,
I have a question. If I use a pullman loaf pan that is SLIGHTLY bigger in dimension (7.6×4.1Wx4.4H), can i use same recipe or need to adjust the quantity of ingredients? Thank you!
If the pan is only slightly bigger, I don’t think you need to adjust the quantity of ingredients.
I used this recipe and had a fantastic loaf of bread. I substituted dry milk as someone recommended it and was a great idea. I also ordered the proper pans. cannot wait till later to make more!!!!
I made your Milk Bread recipe a few weeks ago and my household LOVED it about to make more this weekend
(probably a triple batch). Thank You I am really enjoying your site 🙂
That is fantastic to hear. Thank you for making my bread recipe 😀
This Shokupan recipe looks absolutely delightful! I’ve always wanted to try making Japanese milk bread at home, and your step-by-step instructions seem really easy to follow. Can’t wait to give it a go! Thank you for sharing this wonderful recipe!