
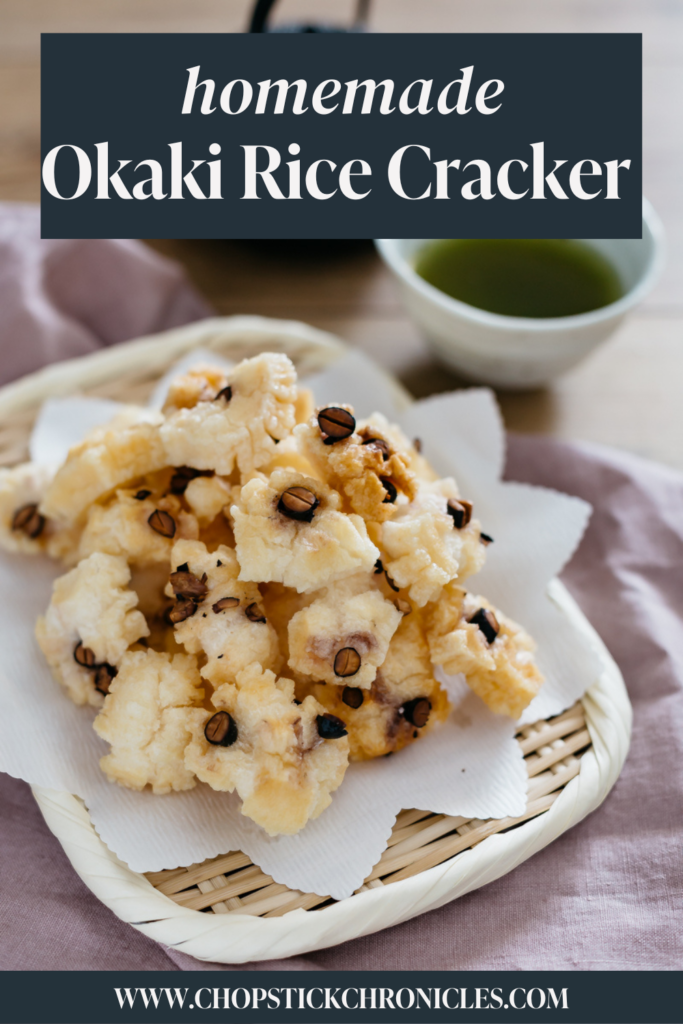
If you love traditional Japanese snacks then you’ll love Okaki! These crunchy little rice crackers are not only delicious but also surprisingly easy to make in the comfort of your own kitchen. They’re only made from two ingredients: rice and salt, so they’re not full of odd flavours and additives and make a healthier crunchy snack alternative to potato chips. Okaki is typically savory but can be sweet too and flavoured however you like!
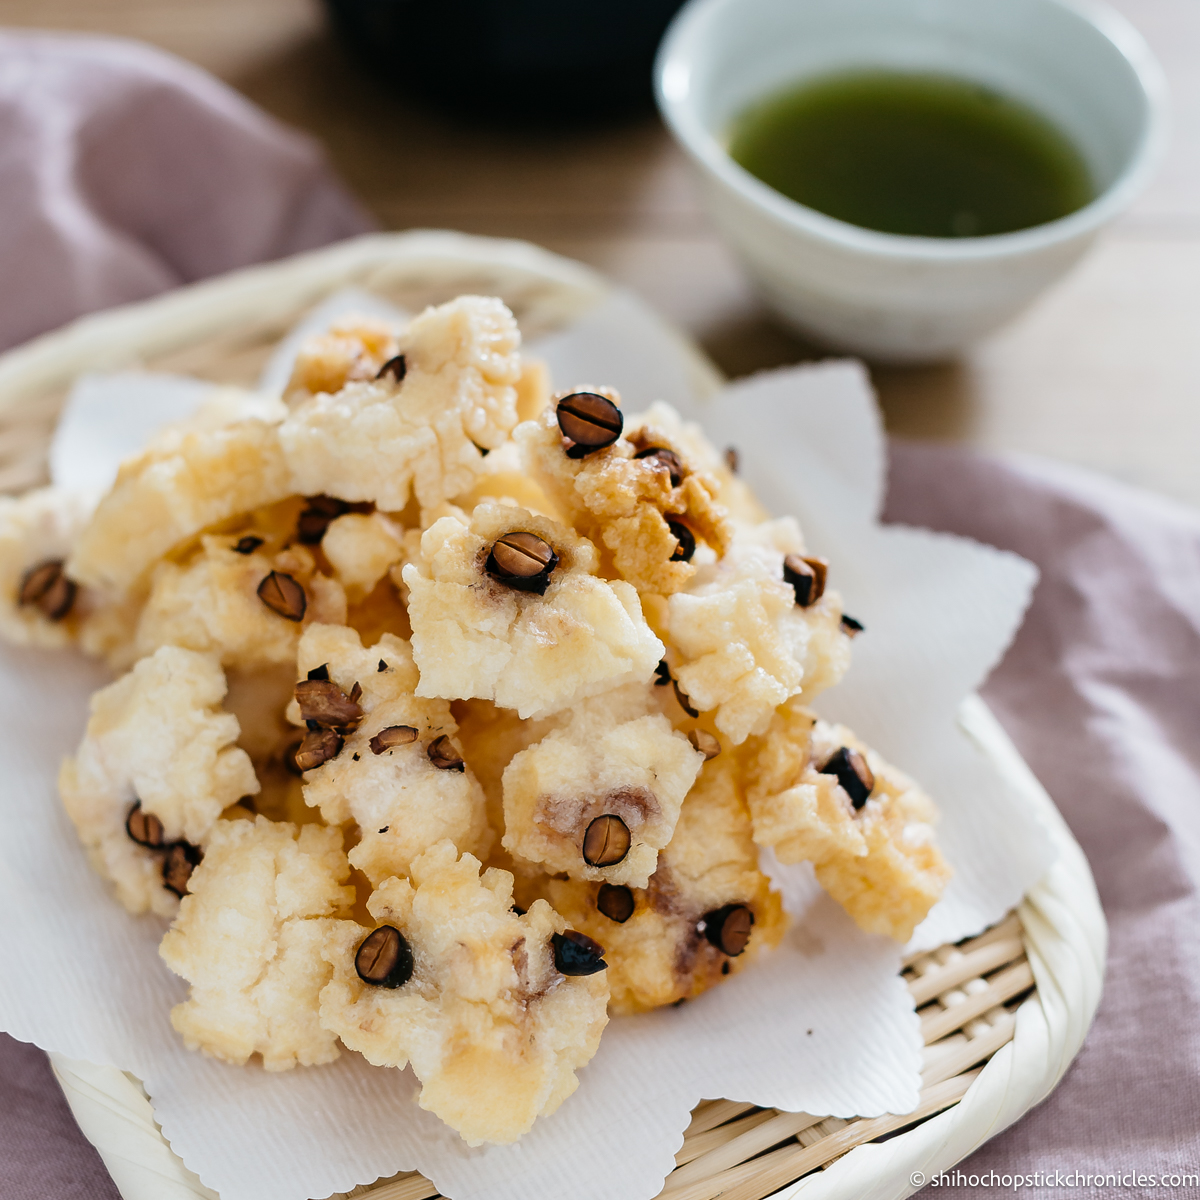
Table of contents
What is Okaki Rice Crackers
Okaki is a type of Japanese rice cracker snack with a crunchy crispy texture and delicious flavour. There are mainly three types of rice crackers we eat in Japan: Senbei, Okaki, and Arare. The difference between the three is the size and ingredients. Senbei is made from “uruchimai (non-glutinous rice) and it is traditionally a flat round disk shape. Okaki and Arare are made from glutinous rice but the size differs. Okaki is bigger and chunky and Arare is small pieces. The making process of Okaki and Arare is the same. They both are essentially cut, dried, deep-fried mochi rice cakes.
The Benefits of Homemade Rice Crackers
Rice crackers are a very popular Japanese snack so they’re readily available not only in Japan but other countries too. While they’re easy to find nowadays at Japanese supermarkets and even local super markets, making your own rice crackers at home offers numerous benefits.
All-Natural Ingredients
When crafting your own rice crackers, you have complete control over the ingredients used. Unlike store-bought versions that may contain additives or unhealthy preservatives, homemade rice crackers allow you to use fresh and natural ingredients. This means no artificial flavors or harmful chemicals.
Customization Options
One of the greatest advantages of making homemade rice crackers is the ability to customize them according to your preferences and dietary needs. You can experiment with various seasonings like black sesame seeds, sea salt flakes, chili powder, or even incorporate herbs like rosemary or thyme for added flavor complexity. Additionally, you can choose between brown rice or other whole grains for increased nutritional value.
Lower Sodium Content
Processed snacks usually contain excessive amounts of sodium as a preservative that can negatively impact health if consumed in excess over time. By making your own rice crackers at home, you have full control over the amount of salt used during baking – allowing you to enjoy a low-sodium alternative without sacrificing taste.
Allergy-Free/Gluten-Free Option
Making this snack at home means you can ensure there’s nothing inside that can trigger reactions for allergies or gluten intolerances. For anyone with gluten sensitivities or celiac disease, homemade rice crackers are a perfect gluten-free snack (depending on seasonings). They also don’t contain wheat, nuts, dairy, or other animal products because the base is just salt and rice and the flavourings are all up to you.
Customizable Flavors
Another benefit of making rice crackers at home is being able to experiment with various flavors and spices according to your taste preferences. Traditional okaki are seasoned with just salt or soy sauce but you can choose whatever flavourings you like. You can add herbs like rosemary or thyme for an aromatic twist or incorporate spices such as paprika or garlic powder for a savory kick.
Ingredients
With just two base ingredients, you’ll have homemade okaki in no time. Here’s what you’ll need to make homemade rice crackers:
Mochi rice cakes
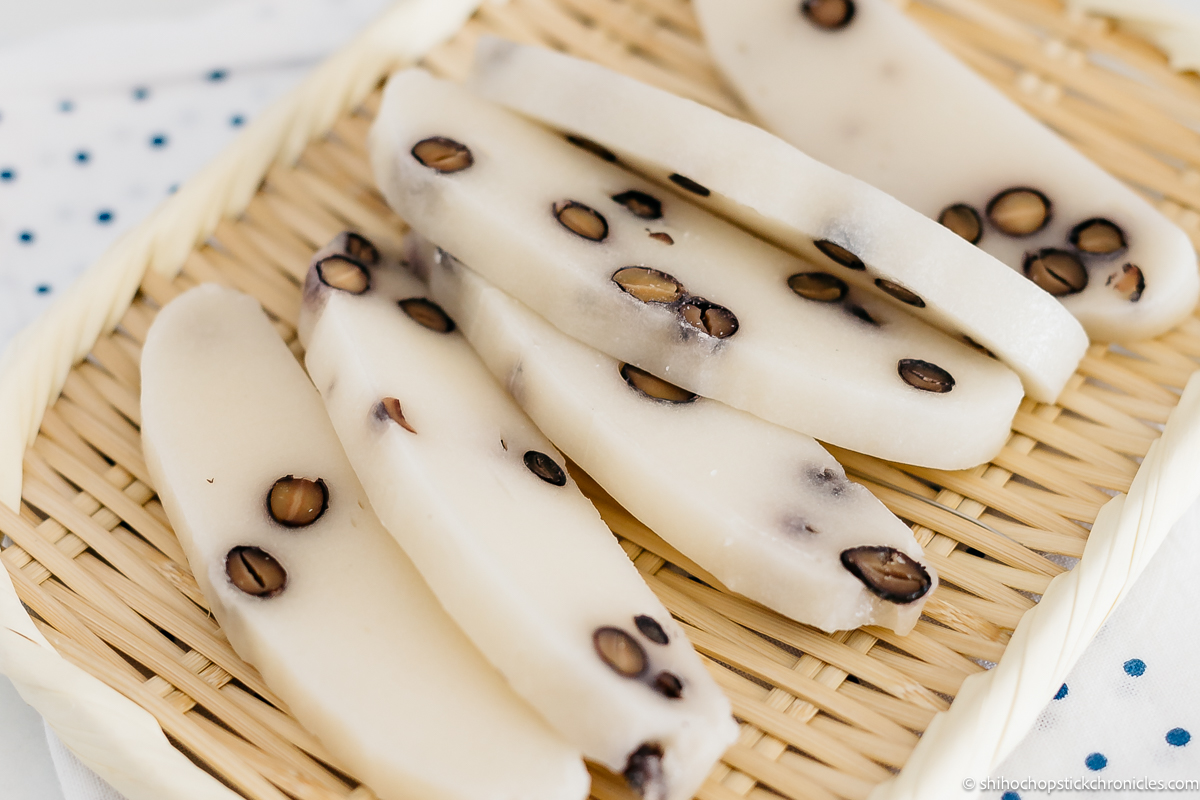
Okaki and arare are made from sliced or cut mochi rice cakes. You can buy ready made mochi individually packeted from Japanese or Asian grocery stores. Japanese people often make this after new years, because they have plenty of leftover rice cakes from the new years feast.
Oil
Choose a neutral oil such as vegetable oil or grapeseed oil to avoid overpowering the natural flavors of the rice cake.
Seasonings
Feel free to experiment with different seasonings depending on your preferences and dietary restrictions. My recommendation of Japanese flavour options are: sea salt, nori (seaweed) flakes, soy sauce, or kinako soybean flour. Other options include: garlic powder, onion powder, paprika, chili flakes, or dried herbs like rosemary or thyme.
How to make Japanese rice crackers at home?
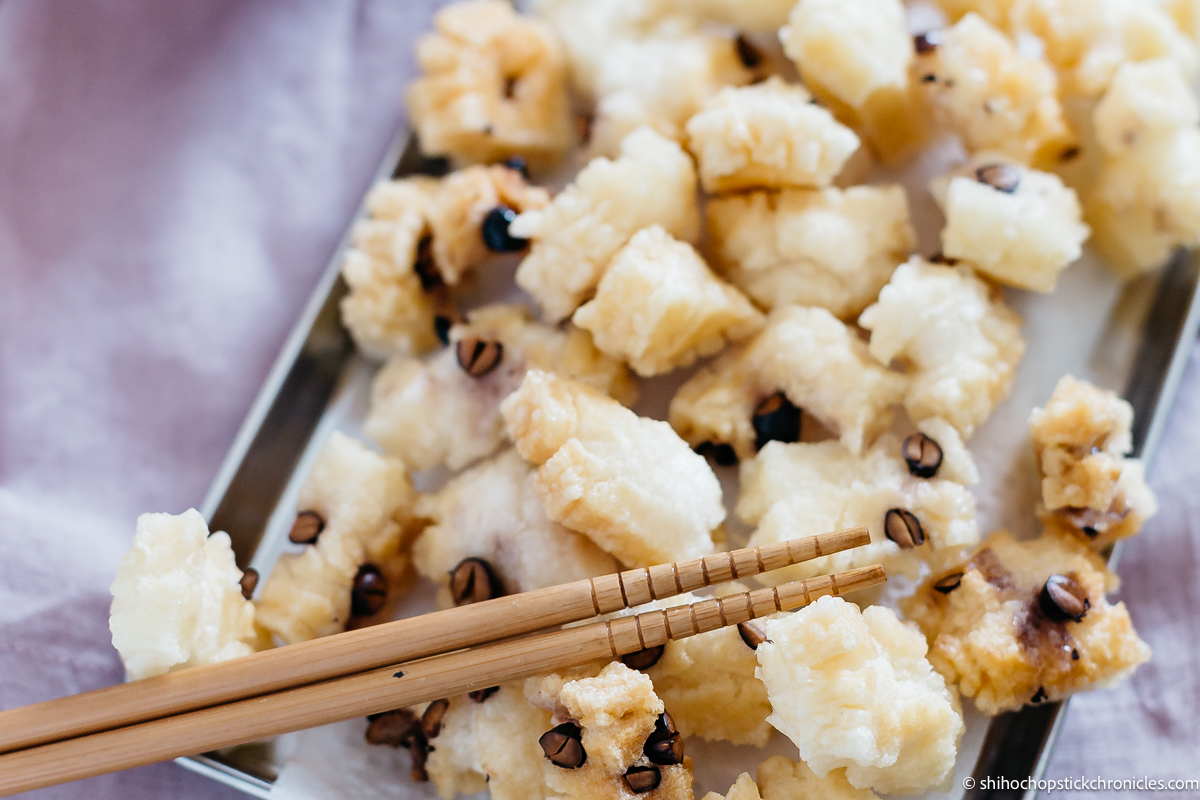
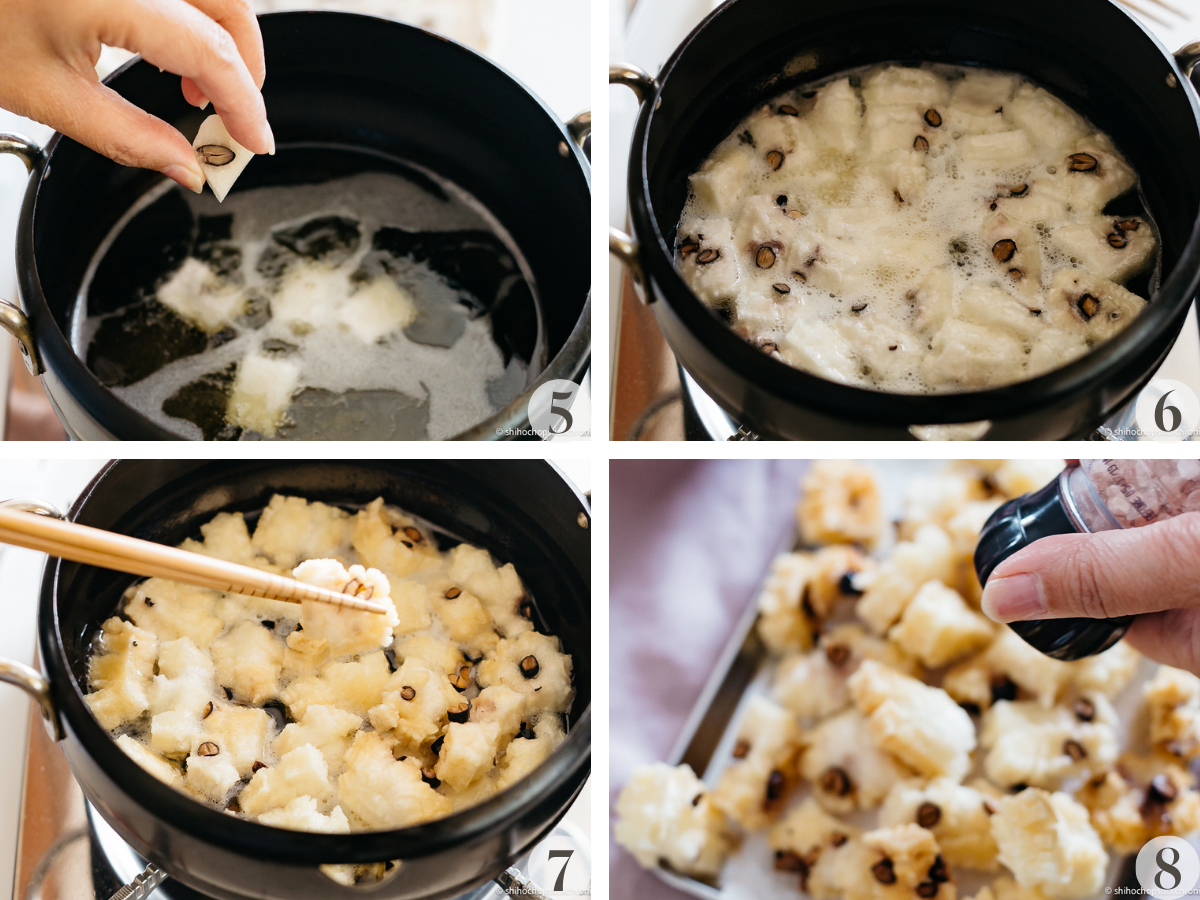
The mochi rice cakes are cut into small pieces and sun dried for a week. After it is completely dry, you will see small cracks on the mochi surface, you deep fry it at a low temperature. Add any flavour you like and you will have delicious freshly made Japanese rice crackers.
2 tips for making crispy and crunchy Japanese rice crackers
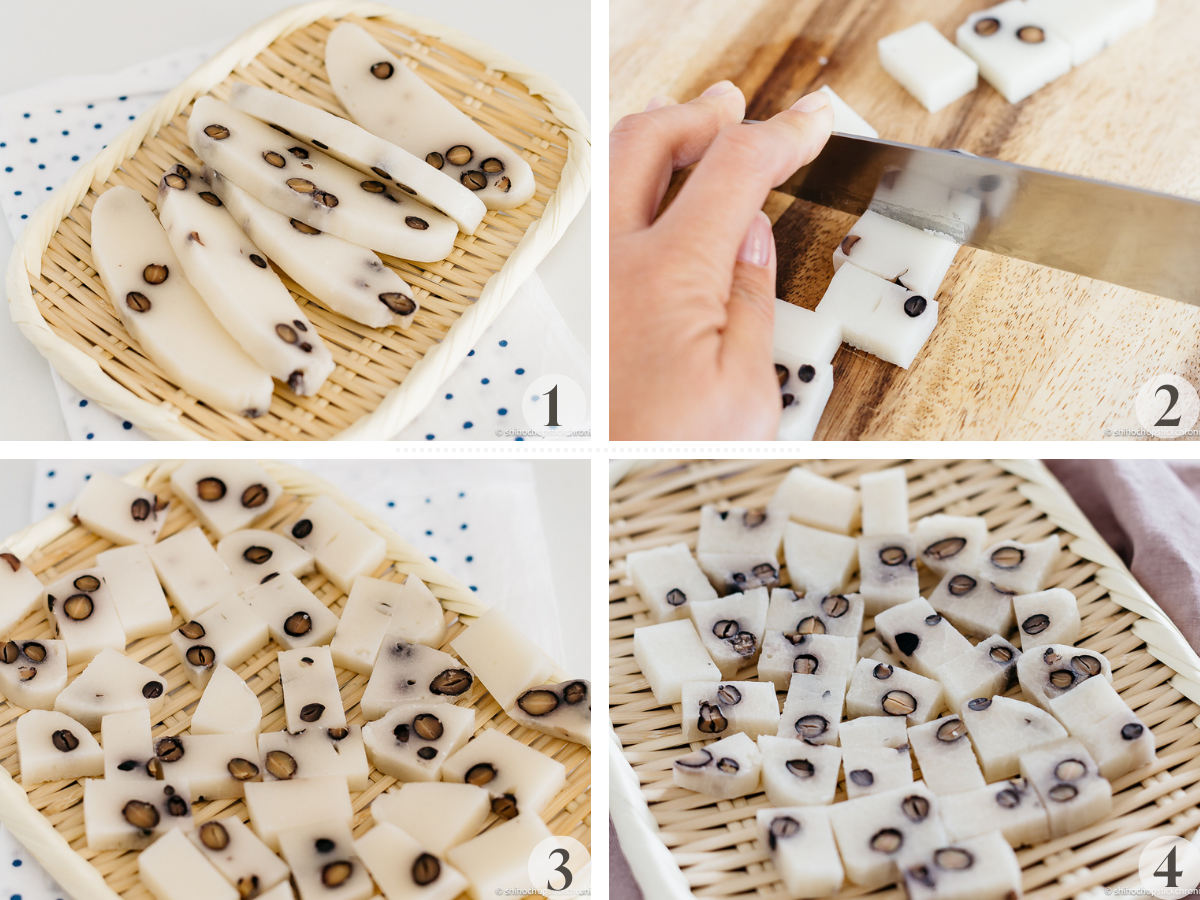
- Cut mochi rice cake about 3mm thin and spread out on a rack to sun dry for at least a few days or till a lot of small cracks appear on the mochi surfaces. Drying the mochi completely will minimise any splash from the cooking oil when it is being fried. Also it guarantees to make crispy and crunchy Japanese rice crackers.
- Deep fry the cut and sun dried mochi rice cakes slowly at a low temperature (about 160 Degree Celsius) and constantly turn the mochi rice cakes in order to brown evenly.
Flavours of Japanese Rice Crackers
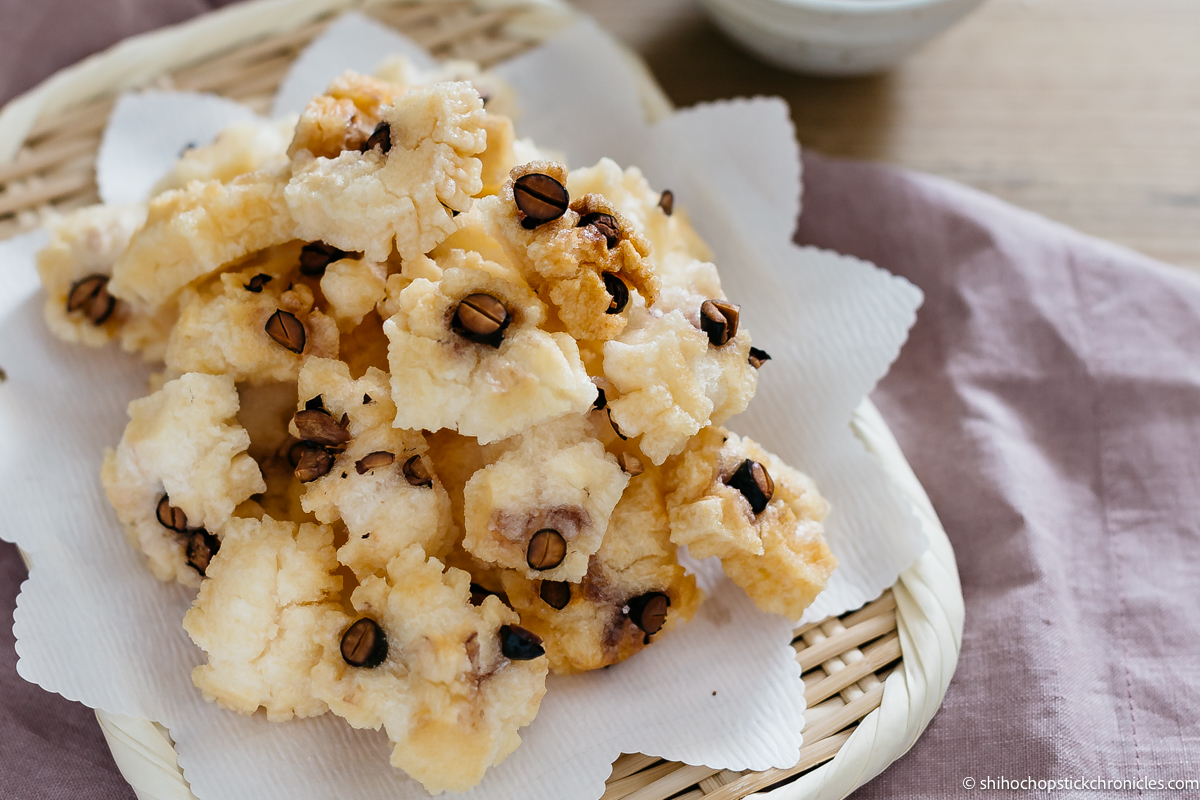
I personally like a subtle sea salt flavour so I just sprinkle some salt immediately when the crackers are cooked and the oil has drained. But there are many different flavours to try. You can either flavour the mochi rice cakes before cooking or season after the rice cracker is cooked. You can flavour mochi itself with Yomogi and black beans (like in the photos) before cooking. After frying the rice cakes you can season with soy sauce, nori seaweed, curry powder, or for a hint of sweetness you can sprinkle sugar or some matcha (green tea) powder.
Healthier Option
Deep fried snacks are not really good for your health. And since Japanese rice crackers are addictive and high in carbs, a healthier version is always great. The good news is that you can bake instead of frying the okaki! The process of drying mochi rice cakes remains the same. The next step is to bake them in an oven instead of deep frying. Pre heat the oven to 180 degrees celsius. Spread out the cut and sun dried mochi rice cakes on an oven tray lined with parchment sheet. Bake it for about 20 to 25 minutes or till brown.
Storage
It’s best to eat the rice crackers when they’re freshly made for optimal flavour and crunch. However you can store them in an airtight container and keep in a dry place to prolong the shelf life.
Here is my recipe for Okaki! If you liked it, please rate it and leave a comment below. Also, don’t forget to follow me on Youtube, Pinterest, Facebook , Twitter and Instagram to keep up to date with all the latest happenings on Chopstick Chronicles. Don’t forget to use the hashtag #ChopstickChronicles so I can see your wonderful creations!
Okaki Japanese Rice Cracker
Ingredients
- 2 Mochi cakes dry
- Oil to fry
- Salt to taste
Instructions
- Cut the mochi cakes into 3mm thick slices
- Spread out the cut mochi cakes on a tray and sun driy for at least a few days or till a lot of small cracks appear on the surface. *1
- Heat oil in a frying pan to 160 degree Celsius and deep-fry the cut and dried mochi cakes till golden brown by constantly turning all. *2
- Take them out of the frying pan and place on top of a paper towel to absorb the excess oil and dry.
- Sprinkle some salt to taste and serve! *3
I am the maker of OKAKIS. I will teach you how to make the lice crackers if you want. I want to eat OKAKIS that you made.
Konnichiwa Kazuhisa san, I would love to learn how to make rice crackers from a professional maker. I am in Brisbane and miss all Japanese food, and not able to buy them because they are not cheap. That’s why I make my own and spreading the love of Japanese food on this blog 😀
Are any of the pictures above of some crackers that were baked, or were they all fried? I’ve never deep fried anything so I’m a little nervous about trying it! Would like to try baking them but I do hope they taste similar 🙂
Hi Jessica, I fried them all but just splay oil and bake in an oven 😀
so interesting i like it !
Japanese mochi is the best!!
WOW! So interesting.
I watch Mochi being made in a Japanese friends house but I never realised that rice cakes take 5 days to make from mochi 🙂
Thanks so much for sharing
Julie
Gourmet Getaways
Hi Julie, Mochi is rice cakes and to make rice cracker, you need to leave it about 5 days in order to dry them out 😀 Very easy to make and very simple Japanese snack 🙂
Thank you, thank you for posting this! I love snacking on these too, but I have never tried to make them myself! The next time I go our Japanese market, I’m definitely picking up some mochi cakes. Oh, and my dad will love these! Every time my parents come out to visit, we HAVE to get mochi 🙂
This is my childhood snack too. I am sure your dad will love them. Surprise him that you know how to make them:D