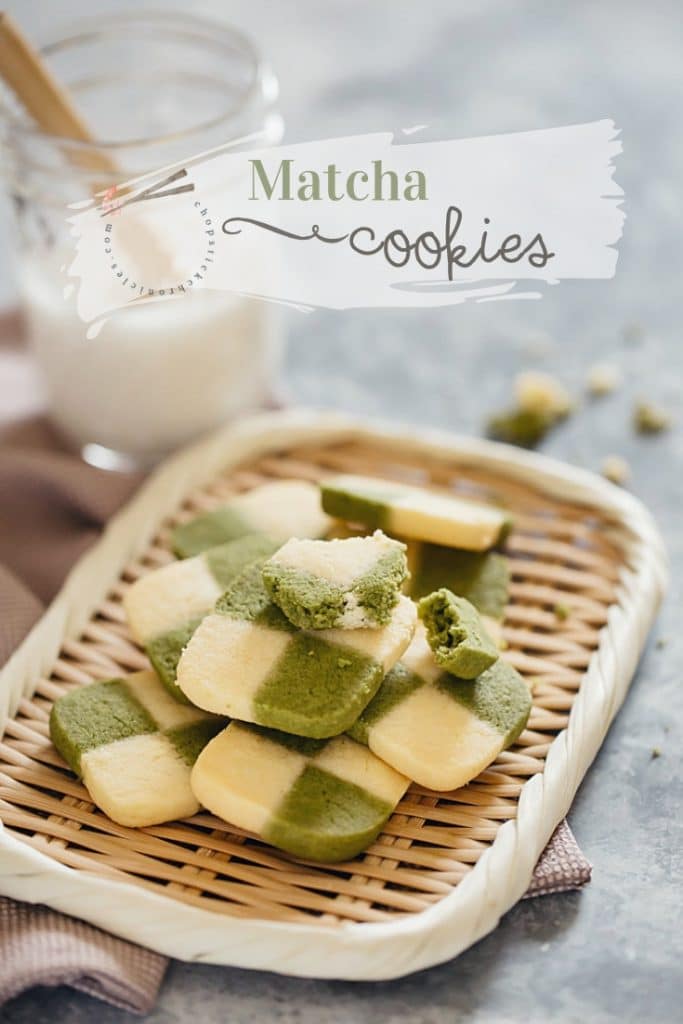
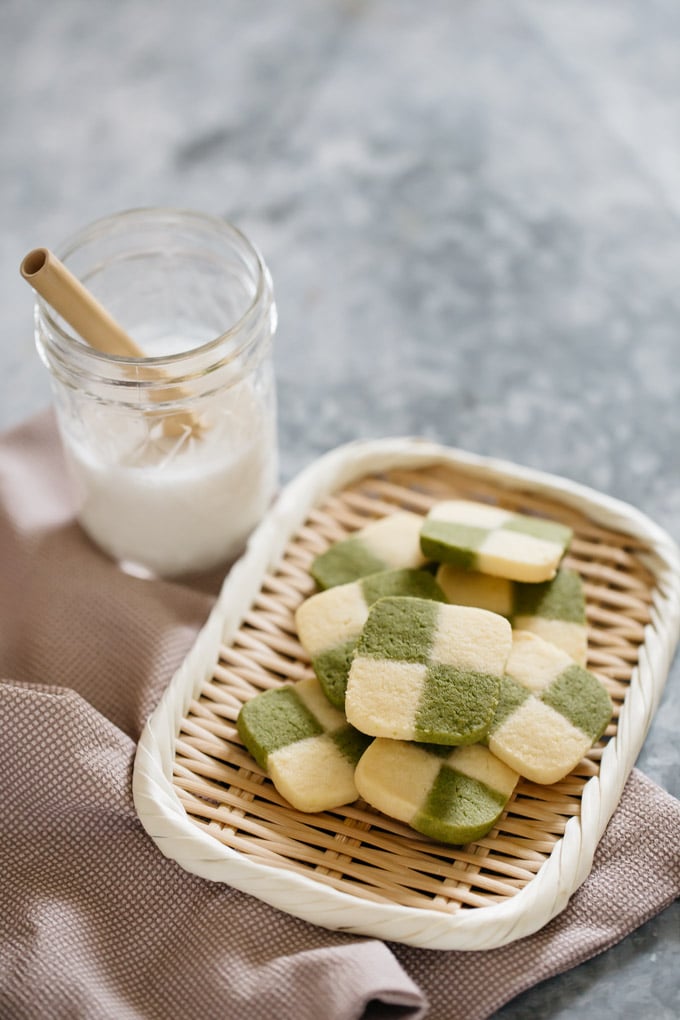
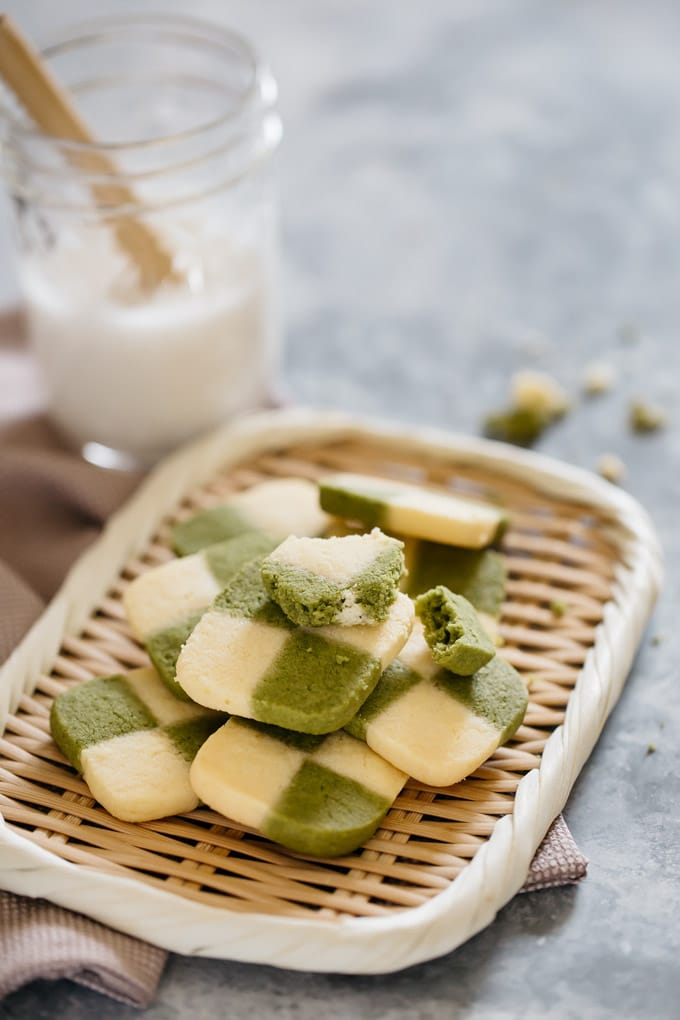
Matcha cookies subtle green, perfectly match the traditional colour of the festive season. I am going to share my secret to make the perfect checkerboard Matcha cookies with basic icebox cookie dough. Because I have received many questions from readers about how I make these neat checkerboard cookie patterns.
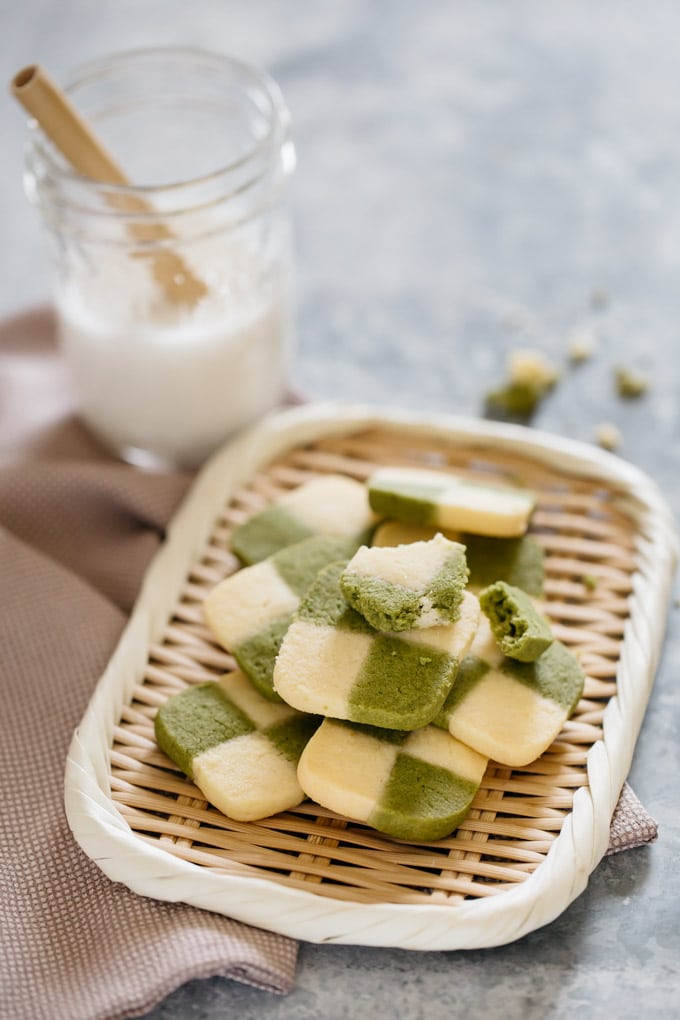
Classic subtle festive colour : Green
To give some Japanese infusion, I used Matcha green to this festive season. This checkerboard cookie pattern is made with subtle matcha green and plain cookie dough. So make some Matcha Cookies this weekend.
What is Matcha?
Matcha is a type of green tea in powder form, packed with a load of antioxidant. Matcha is not just for drinking but they are used often for flavouring baking and cooking.
Health Benefits of Matcha green tea
Matcha green tea has a lots of health benefits. For example, Matcha detoxifies your body naturally and burns calories, hence it’s good for losing weight, enhances the immune system, and is high in Antioxidants.
Different grades of Matcha
Matcha comes in a wide variety of quality and grades. Uji, Kyoto and Nishio, Aichi Prefectures are famous for producing Matcha. Usually higher grade Matcha are used for tea ceremony and lower grade matcha are for cooking and baking.
How to choose Matcha for your Cookies
You can not see the colour nor smell the aroma of the Matcha because it is sold in a vacuum pack to prevent oxidation. Therefore, Japanese people choose Matcha from where they are produced. Matcha from Uji,Kyoto and Nishio, Aichi Prefectures are generally speaking vivid dark green in colour and melow bittersweet with a rich flavour.
Tips to make perfect checkerboard pattern
1. make square board shape before resting in fridge
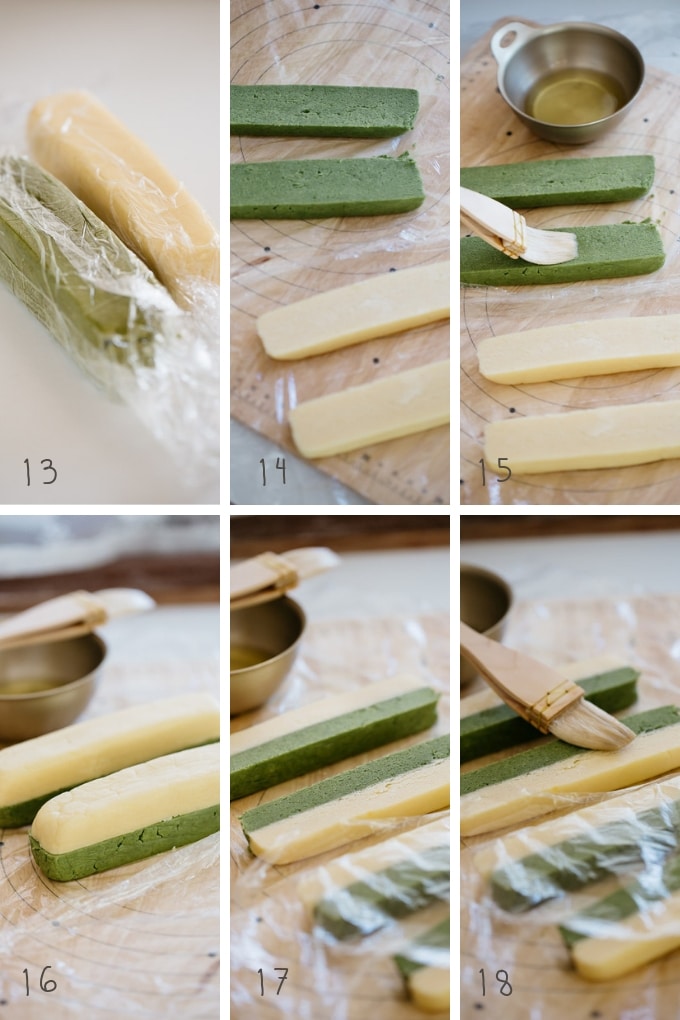
When you wrap each coloured dough, shape the dough 2 x 4 x 20 cm (0.8 x 1.6 x 7.9inch) board by dropping them from 1-2 cm (0.4-0.8 inch) high each side. Each side should be perfectly flat, then refrigerate. After resting, cut the dough into half with a sharp knife. Glue different coloured halves together with egg white.
2. use egg white as glue
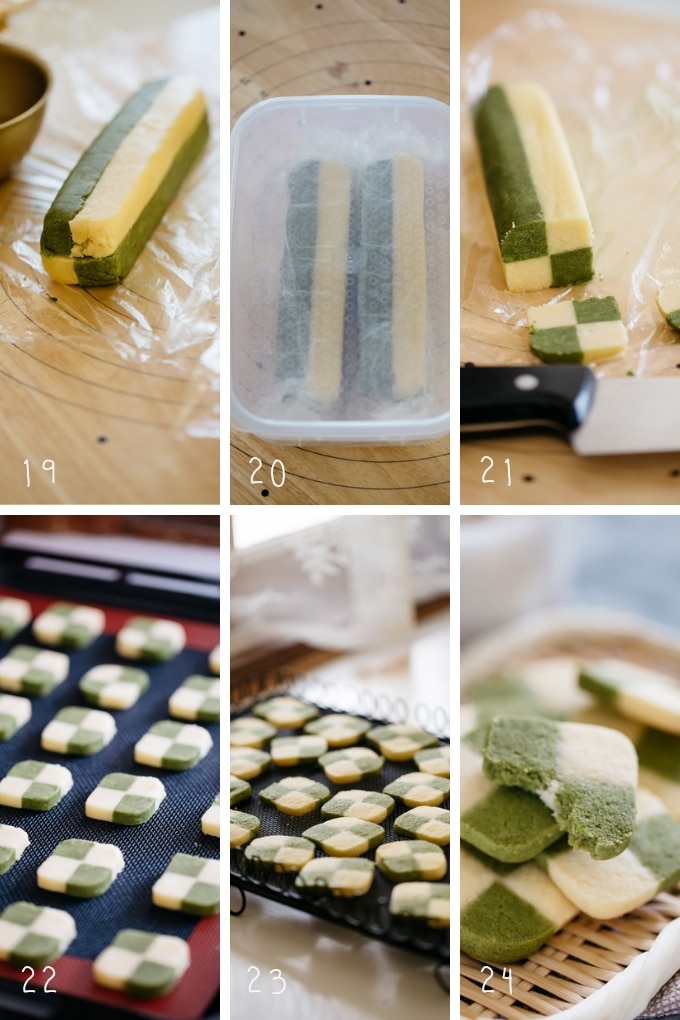
After resting, cut the dough into half with a sharp knife. Glue different coloured halves together with egg white. Cut it again in half and glue them together by brushing egg white on cut sides. Stack together in the way the colour alternate to create checkerboard pattern.
affiliate disclaimer
The site and our mobile application may contain links to affiliate websites. We receive a small affiliate commission for any purchases made by you on the affiliate website using such links.
We are a participant in the Amazon Services LLC Associates Program. This is affiliate advertising designed to provide a means for us to earn a small advertising fee by linking to Amazon. com and affiliated websites.
Here are my instructions for Matcha Cookies. So if you like it, please rate it and leave a comment or any questions below. And don’t forget to check out my other Matcha recipes such as Matcha Madeleines, Matcha Ice cream and Matcha Muffins.
Also, don’t forget to follow me on Youtube, Pinterest, Facebook , Twitter and Instagram to keep up to date with all the latest happenings on Chopstick Chronicles. Don’t forget to use the hashtag #ChopstickChronicles so I can see your wonderful creations!

Matcha Cookies - Checkerboard Pattern 抹茶市松模様クッキー
Ingredients
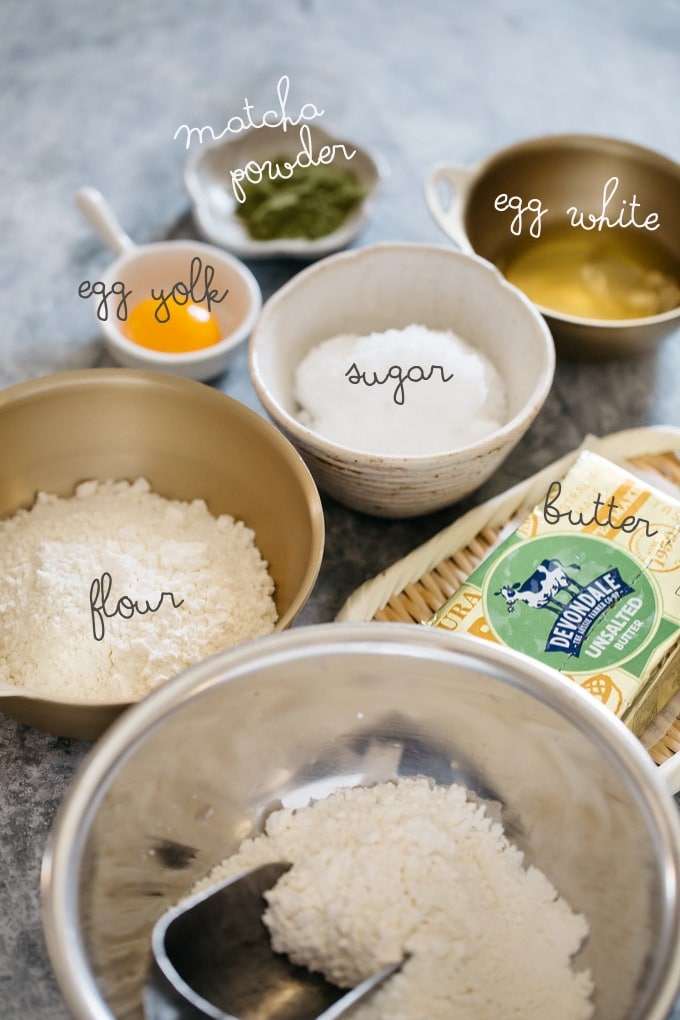
- 100 g unsalted butter softened in room temperature
- 90 g caster sugar
- 1 egg yolk *1
- 195 g plain flour *2
- 5 g matcha powder
Instructions
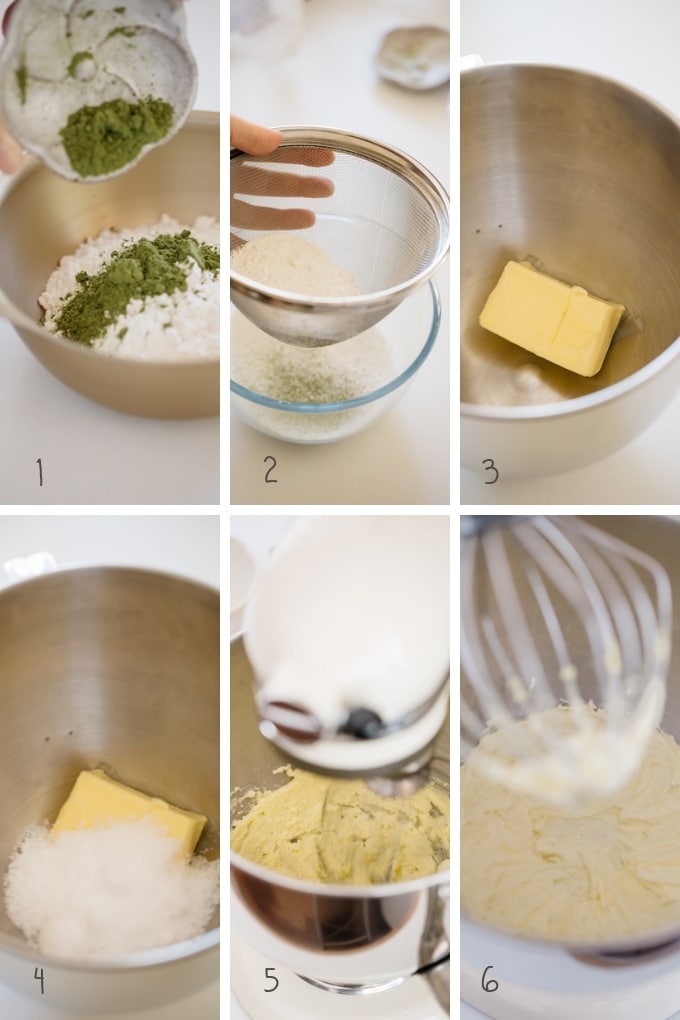
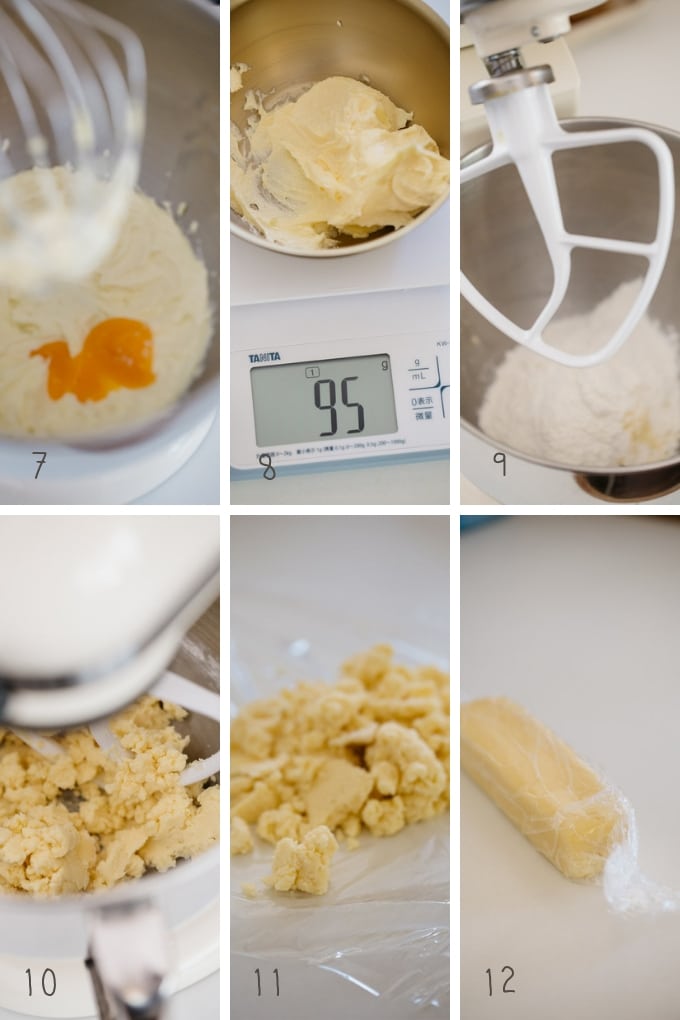
- Measure and sift 100 g of plain flour and set aside.
- Measure 95g of plain flour and 5g of matcha powder. Sift together and set aside.
- In the bowl of an electric mixer fitted with the whisk attachment, cream the butter and sugar until it becomes a white creamish colour.
- Separate the egg yolk and egg white. Set aside the egg white for later use to glue the cookie doughs together.
- Add the egg yolk to the electric mixer and blend the egg yolk on low speed for a minute.
- Divide the creamed butter mixture into half. *3 Leave half in the electric mixer bowl. Change the attachment to a flat beater attachment and gradually add the 100g of plain flour with the mixer on low speed.
- When all the flour is combined and has become crumbly, take out the dough onto a sheet of cling wrap. Wrap the dough with the cling wrap and shape the dough into 2x4x20cm long board and refrigerate for 30 minutes.
- Repeat step 7 for the remaining creamed butter and matcha powder combined flour.
- Take out both dough and remove the cling wrap.
- Place the plain dough on a clean work surface.
- Using a sharp knife, slice the dough in half.
- Brush the cut surface of the palin dough with leftover egg white, then place the matcha dough on top of the plain dough.
- Cut it in half again.
- Place the half of the dough on the clean surface, brush the top with egg whites. Place another half on top of it in a way that the plain colour and matcha colour alternate.
- Gently press together and wrap with a cling wrap sheet and rest it in the fridge for at least one hour. (I left it in the fridge overnight)
- Preheat the oven to 160°C (338°F).
- Line a baking tray with a baking sheet. Take out the cookie dough from the fridge.
- Slice it about 5mm(0. inch) thick and place on the baking tray.
- Bake them for 20 minutes
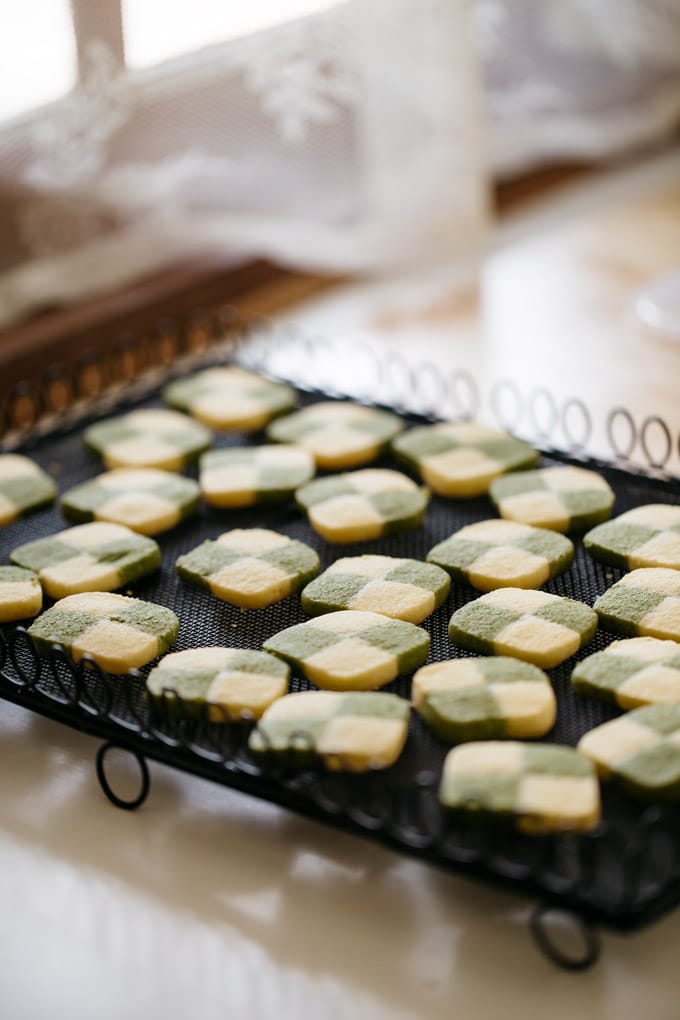
- Remove baking tray from the oven and let the cookie cool on a cooling rack.
Notes
Nutrition





The recipe is fantastic. Thank you so much for it. I made it with matcha and then I made a 2nd batch with chocolate orange.
The only think I would like to say is that the measurements for the logs confused me a bit. I tried to follow it with the first batch where I did the 2x4x20cm and when I cut it as it is in the recipe, I got rectangular shape cookies instead of the nice square ones,so next, I tried to cut it in half only once but then I found the cookies a bit too big. So with the chocolate ones I came to the conclusion that I made the logs 3x3x20 instead of the 2x4x20 and they turned out perfect this time.
Again,thank you for the recipe! 🙂
Hi Susiesv, Thank you for your feedback on the recipe. I am glad that you made it and liked the cookie 😀
This recipe was delicious! I did mess up while shaping the dough so the cookies turned out a bit crumbly, but still very good!
Thank you Alex for making Checkerboard Cookies 😀
Turned out too crumbly, couldn’t form into anything. Not sure what happened as I measured by listed grams.
The recipe needs some adjustments… it says to mix the flour and sugar/egg mixtures until it becomes a sandy texture so I used that to make the shape of the dough in difficulty but after refrigerating it, it ending up just cracking and breaking. Based on the other comments, other people had the same issue and added some moisture but I ended up sticking to the recipe and it ultimately failed. I added some other ingredients and it turned out great in the end.
I had to add a little egg white to mine to add moisture because the dough was a little crumbly. The cookies turned out amazing and so yummy! Just the right sweetness.
Last week I’ve tried this recipe, It’s really good . 🙂
Thank you ChaOm, please rate the recipe if you liked it too 😀
Hi, I tried making these cookies today and my plain dough kept cracking and I couldn’t cut it 🙁 Do you think you can help me?
Mi Moeka, you could add a little bit of moisture if it keeps cracking 😀
I love your recipes and I thoroughly appreciate the details, photos, and tips you always take the time to add! I made these cookies yesterday and they turned out beautifully
Thank you for making the Matcha Cookies Nova 😀
Thank you Nova 😀
Just did mine today, it was quite hard for me to wrap the dough together as it was quite crumbly. Now it is in the freezer. Praying that it will turn out well
Hi Joey Thank you for making it hope it turns out great.
This recipe worked out really well! First time making checkerboard cookies so I was expecting it to not go to well…Used the exact measurements for the dough – for the green tea part it was more crumbly and harder to shape than the plain one so I was a bit worried but it was fine after being refrigerated (i did add abit more butter in hopes that it wouldn’t be so cracked, not sure how much it helped). however it is more prone to breaking off while cutting the dough so be extra careful!
Only thing I would expand on is instructions on cutting. without thinking I cut the 4×2 into 2×2, and alternated the pieces so that it became 4×4 again…but I don’t think thats what the author intended…So I had to do some re-arranging and more extra cuttings to make 2×2 doughs (except one, I left it at 4×2 because I thought it would break and become a mess haha)
I THINK what the author did was cut into 4×1 first, put together the plain and green to make it 4×2 again and cut that into 4s (2×1) and alternate the pattern to get 2x2s. So in total you would get 4 (2×2)
Thank you Heather 😀
think the recipe might need to add more flour to it in general. Also, does the temperature of the kitchen affect the cookie? seems like it it meltish even though, I followed the steps.
No you don’t need to add any more flour. What’s your kitchen temperature like?
differently from Rylei, my dough was a bit too crumbly and it was hard to smother the cracks but i hope it will work out
Hi i just tried baking these but my cookies turned out to be too soft…. what may the cause?
Hi PQ, did you measure all ingredients precisely? Did you use just egg yolk? or whole egg? size of the egg? Did you cool it in fridge overnight?
Hi! I left it in the fridge for about 5 hours and used egg yolk! I added 175g of flour instead..thanks for the prompt reply!
You are welcome…. ???? 175g on top of 195g already? did it work?
? ?? Only added 175g! Not 195g.
Hi there! These look absolutely delicious! But do you weigh the flour before sifting or after sifting? The weight of the flour comes out a little different for each method. Thanks!
Hi Lena, I weigh before shifting 😀
My cookies are very crumbly but moldable although after I molded them, they still have some cracks is that ok?
Hi Katie, it sounds very dry. Make sure you measured dry ingredients correctly?
I added some water into the dough because it seemed too dry. After they are completely cool, the cookies are super delicious. They are perfectly crispy just as I like. I moved the tray to the bottom rack for the last 5 minutes. Still got some brown on some thin pieces but the rest came out perfect. Will definitely do this again. Thanks for sharing the recipe, Shihoko.
Hi Bo, That’s great! Everyone’s oven are different. I am glad you figured out the trick for you to get the best result 😀
Seems I got carried away in the kitchen today and also made these. I will never use another biscuit recipe again. They are so delicious!
Perfect for Christmas 😍
Yes It’s Christmas colour 😀 Thank you Jorja <3
I made these but one difference for the Christmas season. I used red colouring in the plain dough to make Green and Red checker board s.
Great idea Kathleen 😀
The matcha gives such gorgeous color! I can’t wait to try these cookies!
Thank you Wilhelmina, subtle matcha green shade is my favourite green colour.
These are the prettiest matcha cookies I’ve ever seen! I’m excited to make this recipe ASAP!
Thank you Renee 😀