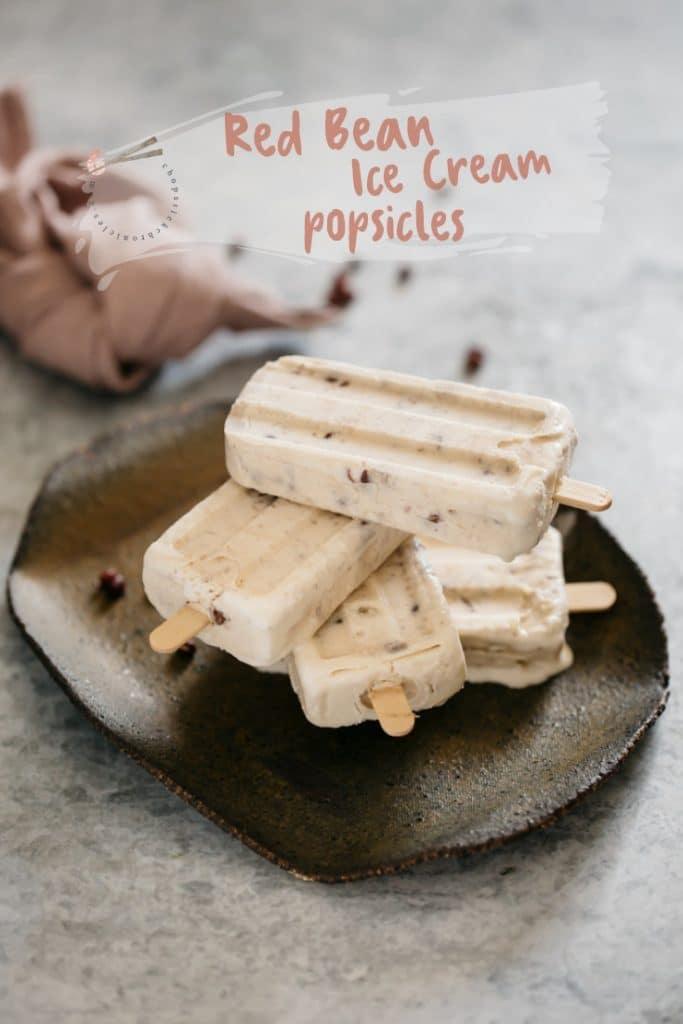
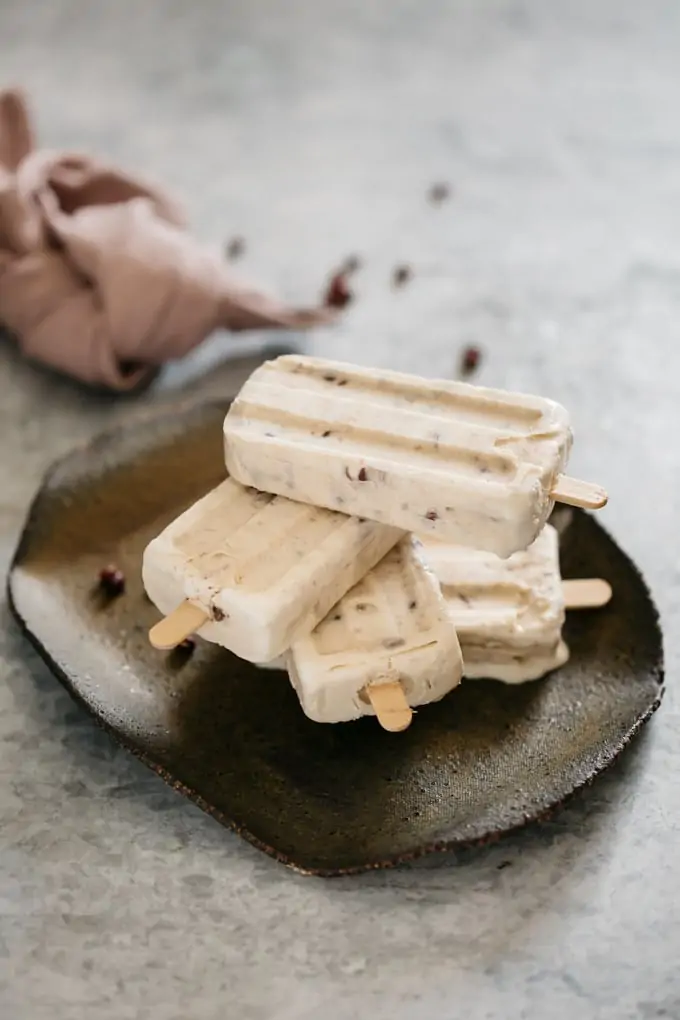
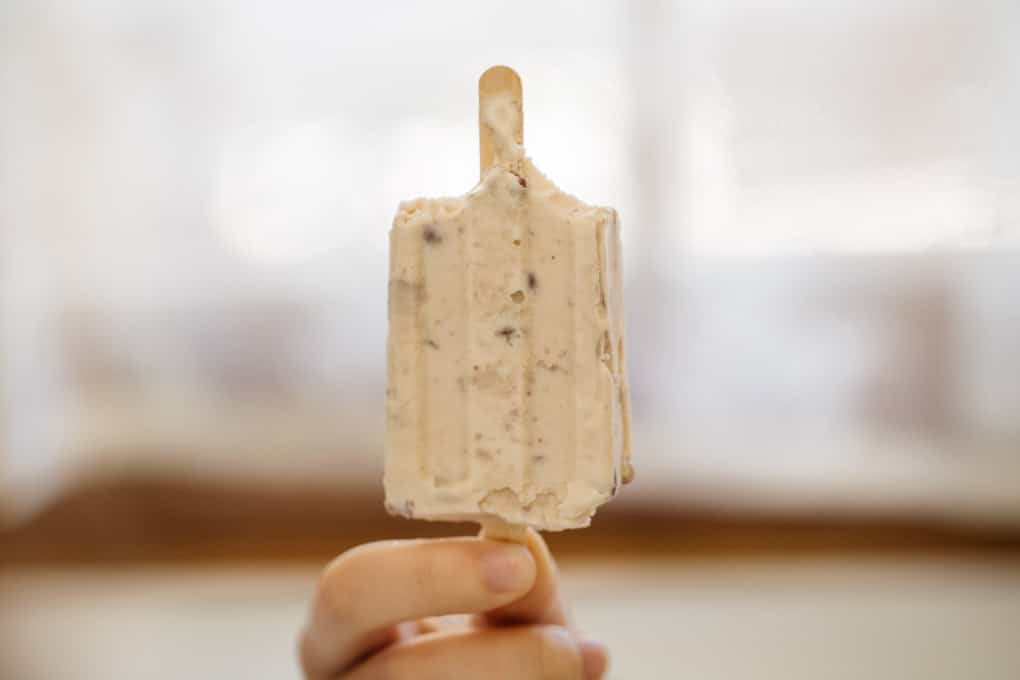
Red bean ice cream popsicles, called “Azuki Bar” in Japan, are such a creamy and refreshing treat to eat in the hot summer months. They have a sweet, slightly nutty flavour and are just so delicious. They bring back so many memories of my childhood in Japan.
Hot Summer Treat
Summer in Japan is very hot and humid. This summer seems to be no exception. Red bean icecream popsicles would be the perfect summer treat. It certainly had been a special treat in my childhood.
Imuraya Azuki Bar vs Red bean ice cream
The classic summer treat my mother often bought and kept in the freezer was Imuraya Azuki Bar. It is made with red bean paste, sugar, cornstarch and corn syrup. It is quite icy and I always wanted more of these creamy and soft popsicles. As much as I loved these Azuki bars, my recipe makes an even tastier and healthier red bean icecream.
How to make creamy red bean ice cream?
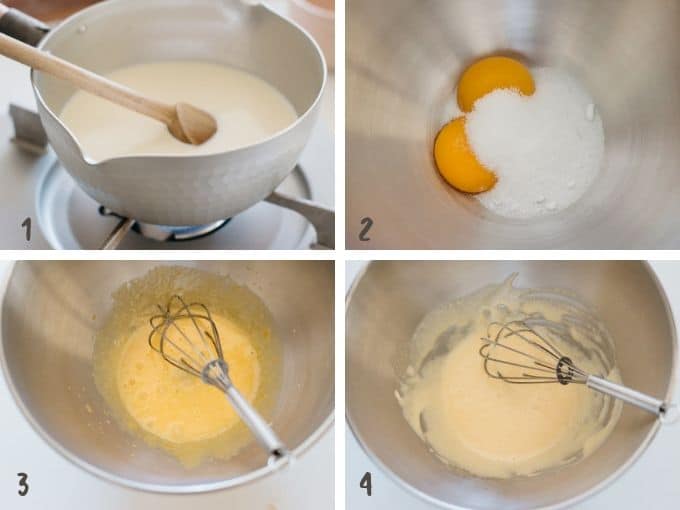
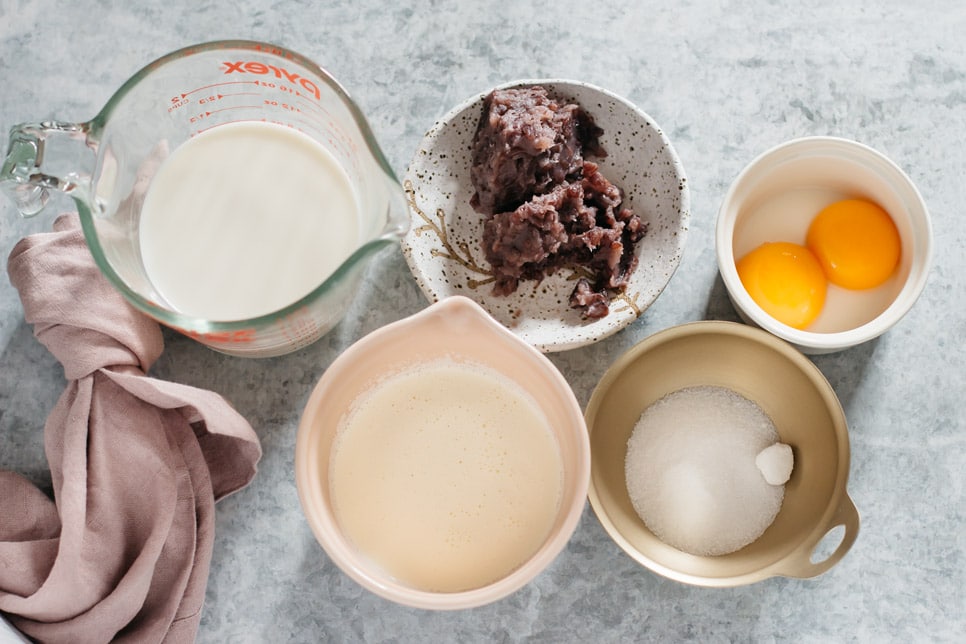
The Ice cream base is milk and cream mixture. I use the same ice cream making method for my Green tea ice cream and Black sesame ice cream recipes. So after whisking the egg yolks and sugar, just add red bean paste which is sweetened red beans (adzuki beans).
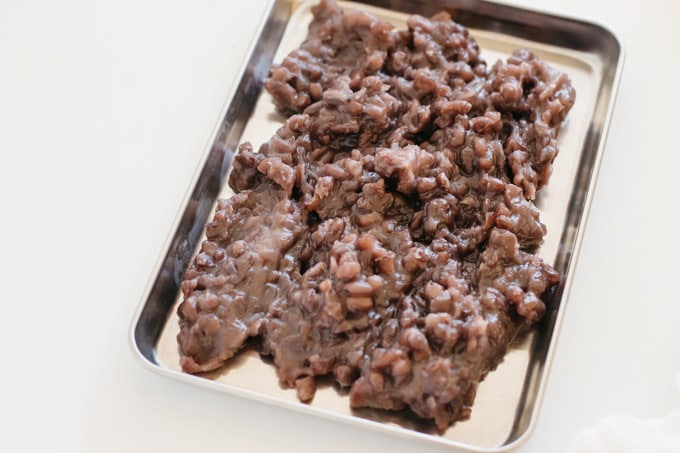
Red bean Paste
Red bean paste is made from Azuki beans (adzuki beans). There are two types of this bean paste and both of them are sweetened with sugar. They are also known as ‘An’ or ‘Anko’ in Japanese. You can buy this in tins but also you can make this easily at home. If you would like to know more about this paste, read my previous post.
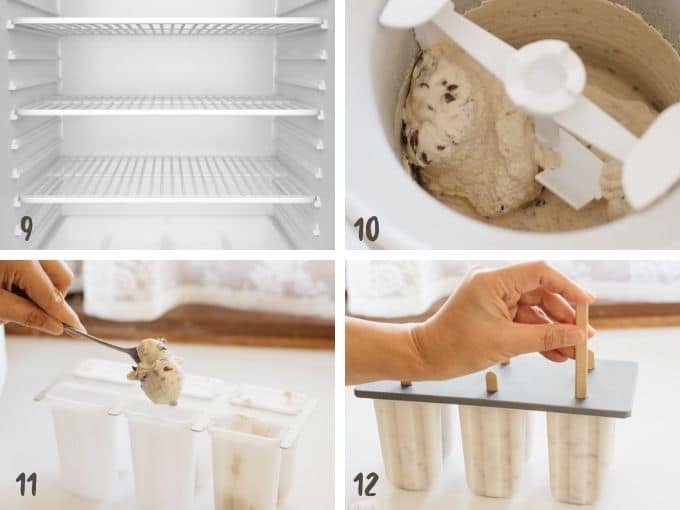
Useful equipment to make red bean ice cream
If you have an ice cream maker or ice cream machine, churning the mixture will be easier. I don’t have an ice cream maker but I have a stand mixer which came with an ice cream making bowl. If you don’t have this equipment, don’t worry you can still make it. You need to freeze the mixture in the freezer and whisk the mixture every few hours to break any ice crystals.
Or also you could just freeze the mixture in a Popsicle Mould![]() if you don’t mind the red bean segments to precipitate at the bottom of the mould. I wanted to make it look like the “Imuraya Azuki Bar”, so I used a mould but of course, you can just scoop the ice cream to serve.
if you don’t mind the red bean segments to precipitate at the bottom of the mould. I wanted to make it look like the “Imuraya Azuki Bar”, so I used a mould but of course, you can just scoop the ice cream to serve.
Removing a popsicle is a little difficult. You need to leave it at room temperature for a couple of minutes then remove it carefully. Otherwise, the tip of the popsicles may break off. If it is summer you may not need to wait a couple of minutes of course.
Stay Connected
If you like the recipe please rate the recipe and leave comments below. Also don’t forget to follow me on Youtube, Pinterest, Facebook, Twitter and Instagram. This way you keep up to date with all the latest happenings on Chopstick Chronicles. Don’t forget to Sign up for a weekly newsletter so you never miss out on new authentic delicious Japanese recipes!
affiliate disclaimer
The site and our mobile application may contain links to affiliate websites. We receive a small affiliate commission for any purchases made by you on the affiliate website using such links.
We are a participant in the Amazon Services LLC Associates Program. This is affiliate advertising designed to provide a means for us to earn a small advertising fee by linking to Amazon. com and affiliated websites.

Creamy Red Bean Popsicles あずきバー
Ingredients
- 250 ml milk
- 125 ml cream
- 2 egg yolks
- 25 g caster sugar
- 100 g sweet red bean paste Azuki bean paste (Store bought or home made Azuki bean paste)*1
Instructions
- Bring the milk and cream to a simmer over low heat in a sauce pan.
- Turn the heat off and set aside.
- Whisk 2 egg yolks and sugar in a bowl until the colour of the mixture becomes pale and fluffy.
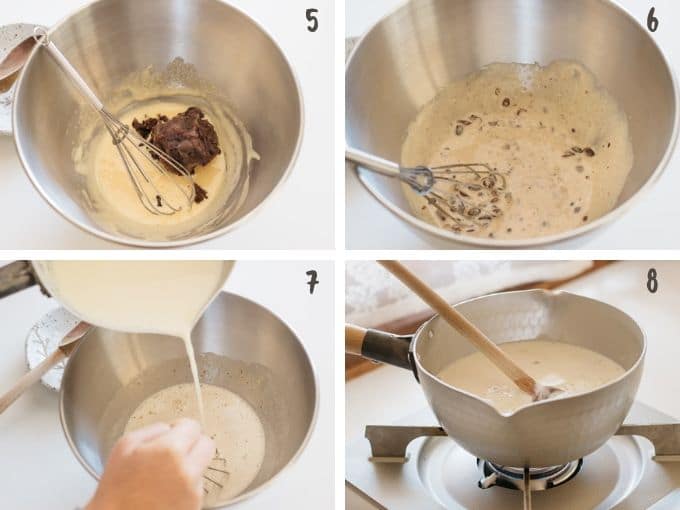
- Add the sweet red bean paste to the sugar and yolk mixture and mix well.
- Gradually pour the warm milk mixture into the egg mixture and keep whisking until smooth.
- Pour the mixture into a clean sauce pan and place over low heat for 5 minutes, continuously stirring.
- Leave it in the fridge to chill.
- Pour the chilled mixture into an ice cream maker (or you can pour the mixture straight into the mould if you don’t mind the segments precipitating at the bottom).
- Run the ice cream maker for about 20 minutes, and once the mixture has become thicker, pour it into a popsicle mould and freeze it overnight or 7-8 hours.


I love the idea of red bean ice cream popsicles! They sound refreshing and perfect for summer. Can’t wait to try out the recipe and enjoy a taste of something unique and nostalgic. Thanks for sharing!
This red bean ice cream popsicle looks absolutely delicious! I love how you’ve shared the recipe and the step-by-step process. Can’t wait to try making these at home, especially with the warm weather approaching. Thanks for sharing!
I absolutely love this idea! Red bean ice cream popsicles sound delicious and perfect for a hot day. I can’t wait to try making them myself, and I appreciate the step-by-step instructions. Thanks for sharing such a unique treat!
This red bean ice cream popsicle looks absolutely delicious! I love the combination of textures and flavors. Can’t wait to try making these at home—thank you for the detailed recipe!
I absolutely love the idea of red bean ice cream popsicles! They sound like a perfect blend of creaminess and sweetness with a unique twist. I can’t wait to try making them at home, and I appreciate the detailed instructions you provided! Thank you for sharing this delicious recipe!
I never thought red bean could taste so refreshing in a popsicle! Love how you’ve combined traditional flavors with a fun twist. Can’t wait to try this recipe!
I absolutely love the idea of red bean ice cream popsicles! They sound like such a refreshing treat, especially during the hot summer months. I can’t wait to try making these at home. Thanks for sharing such a unique recipe!
I never thought red bean ice cream would taste so good in popsicle form! The combination of flavors sounds delightful, and I can’t wait to try making these at home. Thanks for sharing such a unique recipe!
Have had these before, they are great!
Great Calvin, now you can make your own 😀
delicious ! i need it for this heat!
Yes it’s perfect when it’s hot weather! 😀