
Cooking rice can be a challenge, but with a rice cooker, it becomes easy to make perfect rice every time. This handy kitchen appliance takes the guesswork out of preparing rice and once you’ve learnt how to use it, you’ll never go back. Learn all about the simple steps to achieve delicious results including picking the right type of rice and the ideal water-to-rice ratio to make cooking rice in a rice cooker a breeze. Say goodbye to burnt bottoms and mushy grains – with a rice cooker, you’re just a few button presses away from a staple side dish that goes with every meal!
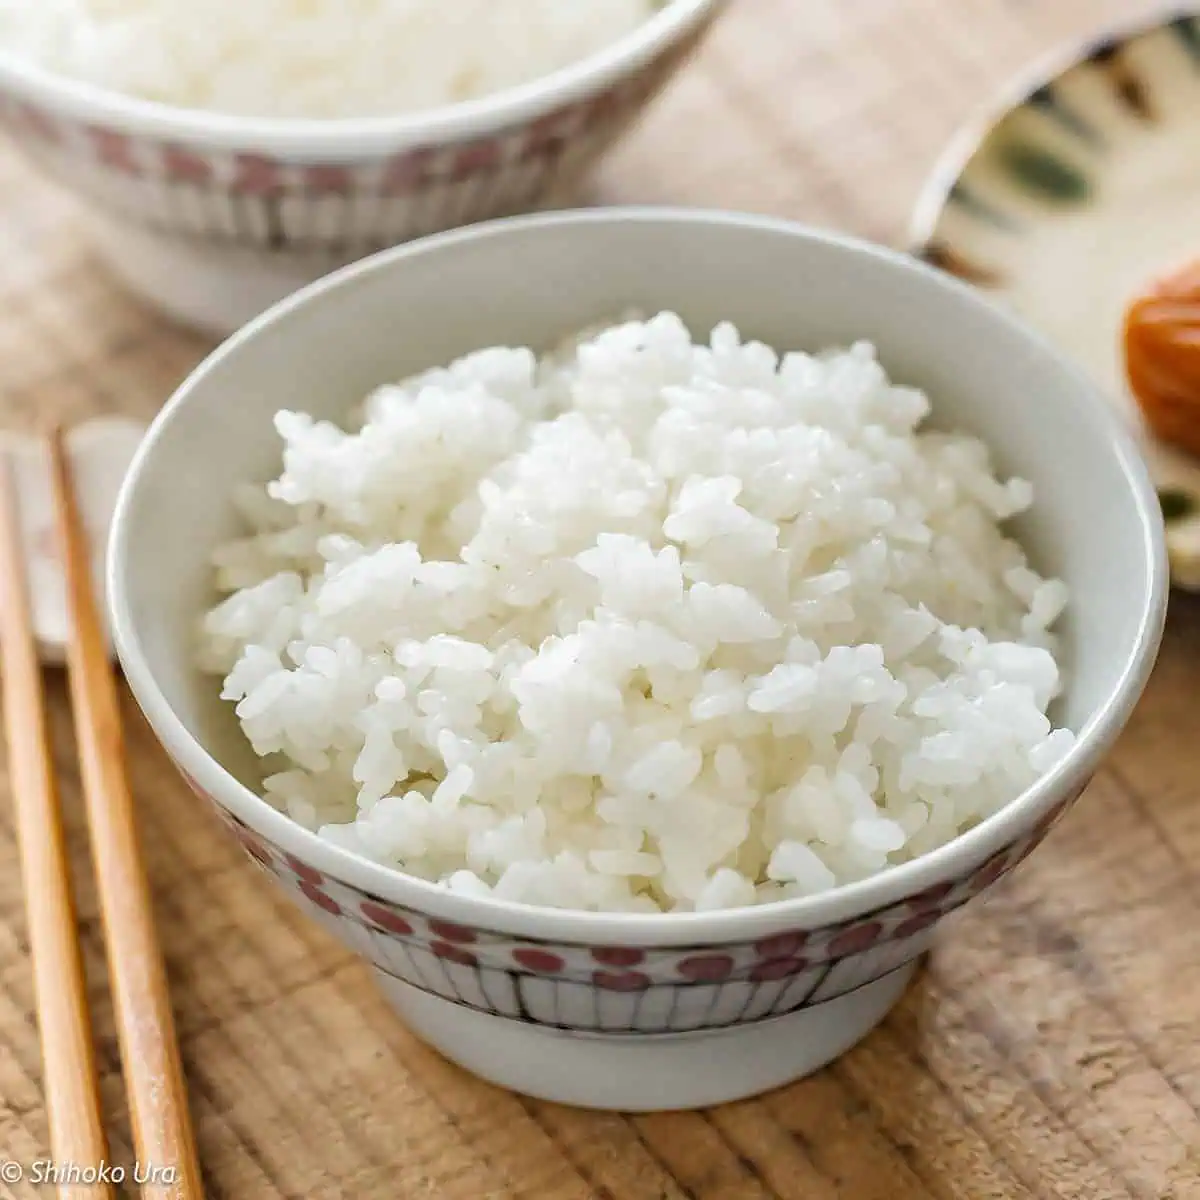
Table of contents
Reasons to use a Rice Cooker
A rice cooker is a staple appliance in any Japanese household and something that gets used nearly everyday. It’s an invaluable and necessary device for anyone who wants perfectly cooked rice without the hassle. Here are a few reasons to use a rice cooker:
- Consistent results: with a rice cooker you can achieve consistent results every time you cook rice so you can avoid burnt bottoms, undercooked grains, and mushy watery texture.
- Simple and convenient: using a rice cooker is very simple and fuss free. All you need to do is add the rice and water, press a button to the setting you want, and walk away. The cooker will handle it all for you so there’s no need for you to keep an eye on it and frees up your stove and attention for preparing other dishes.
- Extra functions: rice cookers also often have several other features. They can keep the rice warm for hours without overcooking, making them perfect for busy households or when timing meals. Many models also come with additional features like steaming vegetables, delay timers, and multiple cooking settings for different types of rice and for cooking other grains such as quinoa. Some Japanese rice cookers also come with bread and cake making functions.
Ingredients to Cook Rice in a Rice Cooker
Japanese Rice
Selecting the right type of rice is crucial for achieving the perfect texture and flavor even when using a rice cooker. Different varieties of rice have distinct characteristics that make them suitable for specific recipes. Long-grain rice, such as Basmati rice or Jasmine rice, is drier and the grains stay separated after cooking making it ideal for dishes like pilafs or alongside curries. Medium grain rice, like Arborio or Carnaroli, is perfect for creamy risottos due to its higher starch content. Japanese short-grain rice, such as Koshihikari, sushi rice or glutinous rice, sticks together when cooked and has a fluffy texture making it excellent for sushi rolls, rice bowls, and other Japanese dishes. Consider the dish you’re preparing and the desired texture when choosing your rice. It’s important to know which type of rice you plan to use because the water amount will differ.

Water
The amount of water can affect the rice texture significantly. Too little water can result in undercooked, crunchy rice, while too much can lead to a mushy, overcooked texture. The ideal water-to-rice ratio varies depending on the type of rice you’re cooking. Japanese style rice (which is generally used when using a rice cooker) has a water ratio of 1:1 (1 cup of rice to 1 cup of water). In a rice cooker, the water not only cooks the rice but also creates steam, which is crucial for even cooking and preventing the rice from drying out. Also if possible, using mineral water (soft water hardness of below 50 degrees) will make the rice taste better.
Equipments to Cook Rice in a Rice Cooker
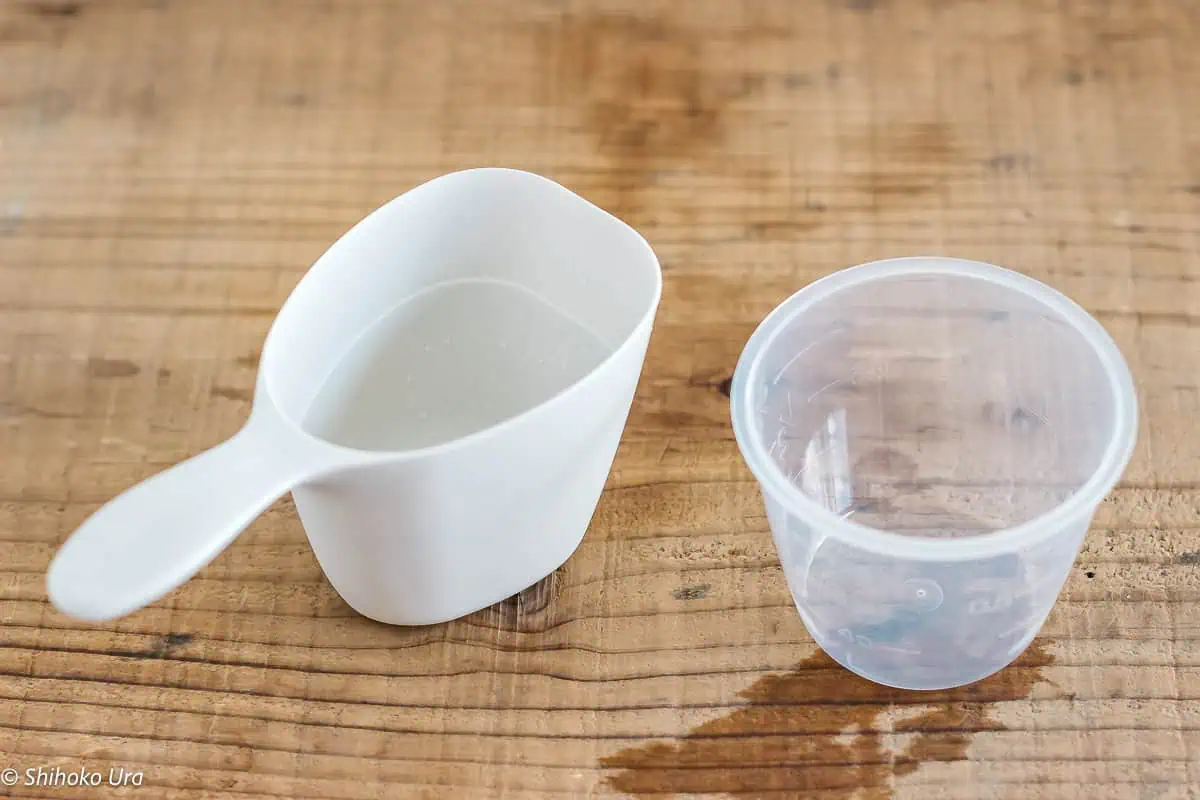
Measuring Cup
A measuring cup is necessary to ensure precise measurements when cooking the rice. Most rice cookers come with their own measuring cup, which is typically smaller than a standard cup (usually about 180ml). It’s important to use this specific cup as the rice-to-water ratios in the cooker’s instructions are based on it. If you’re using a different measuring cup, you may need to adjust the ratios.
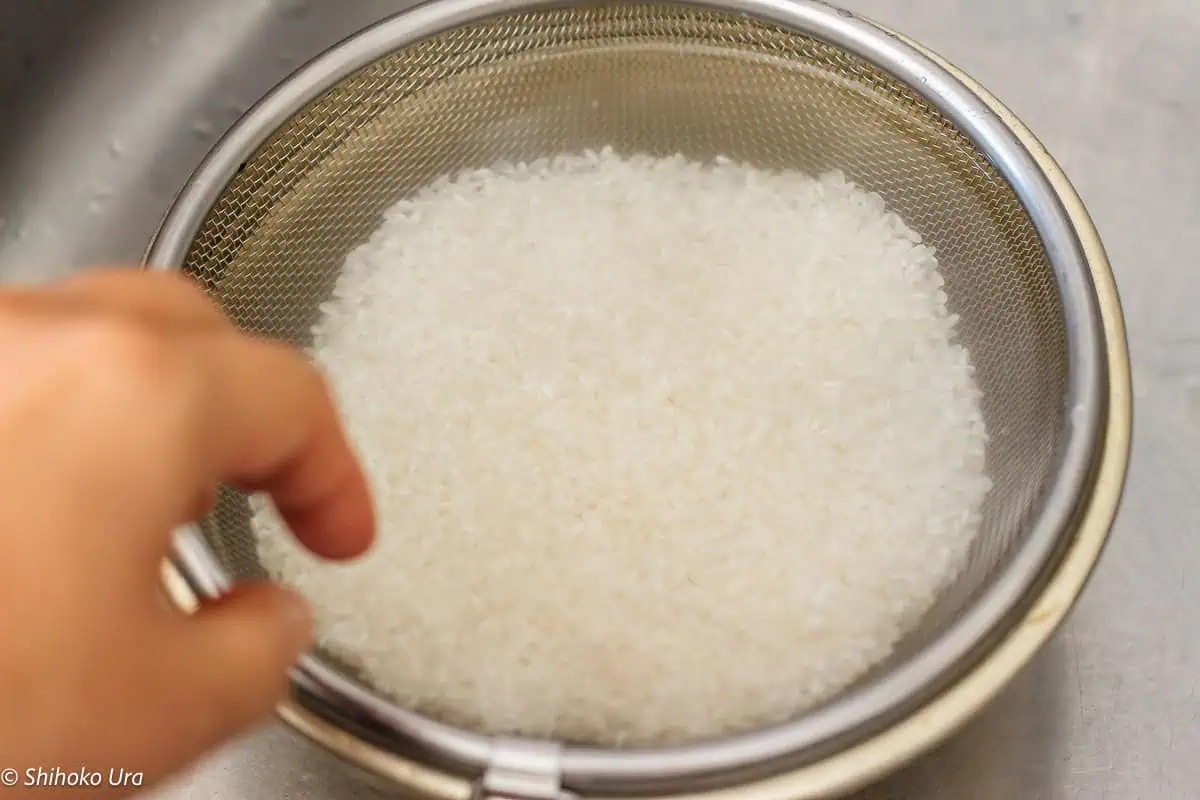
A Fine-mesh Strainer
Some people use the rice cooker bowl to wash the rice but this isn’t a good idea. It can create scratches on the rice cooker’s coating and cause damage and can also break the rice grains. Using a fine-mesh strainer for rinsing rice before cooking is better because it allows you to rinse the rice thoroughly, removing excess starch and any impurities. It also makes it easier to strain out the excess water because the fine mesh ensures that even the smallest grains of rice don’t slip through while allowing the water to flow freely.
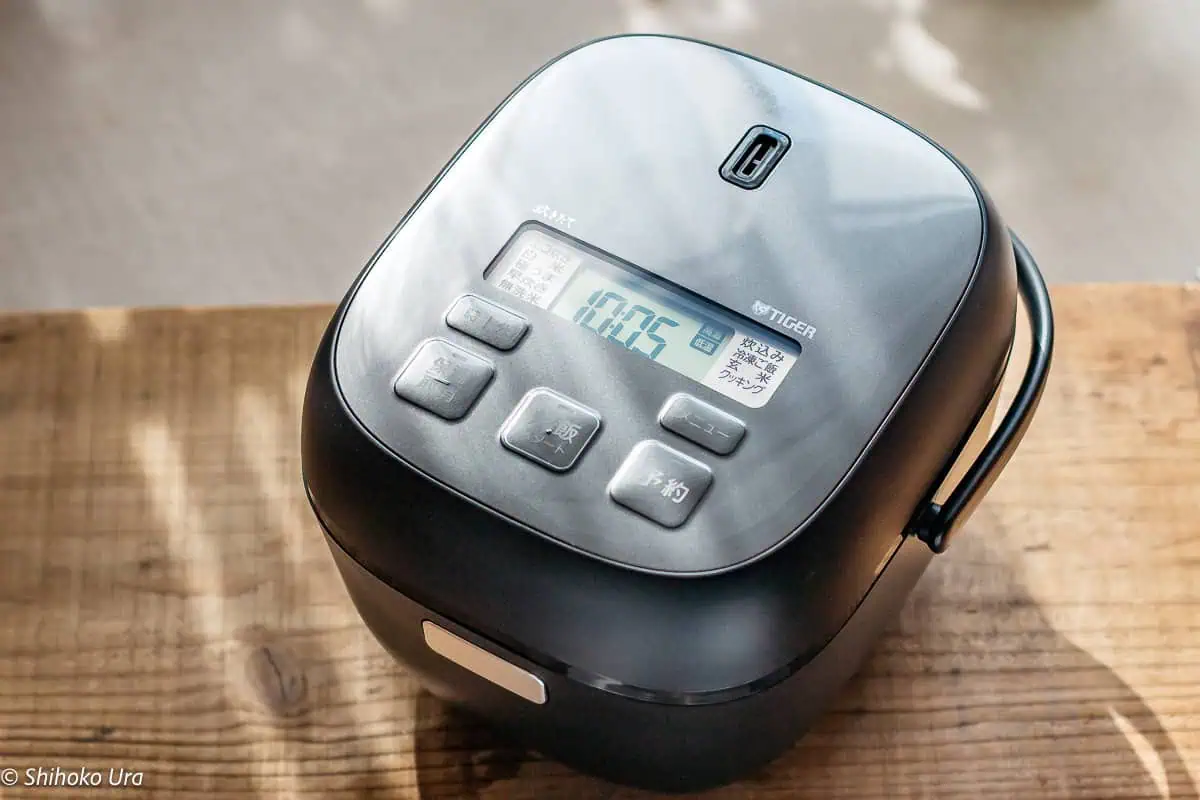
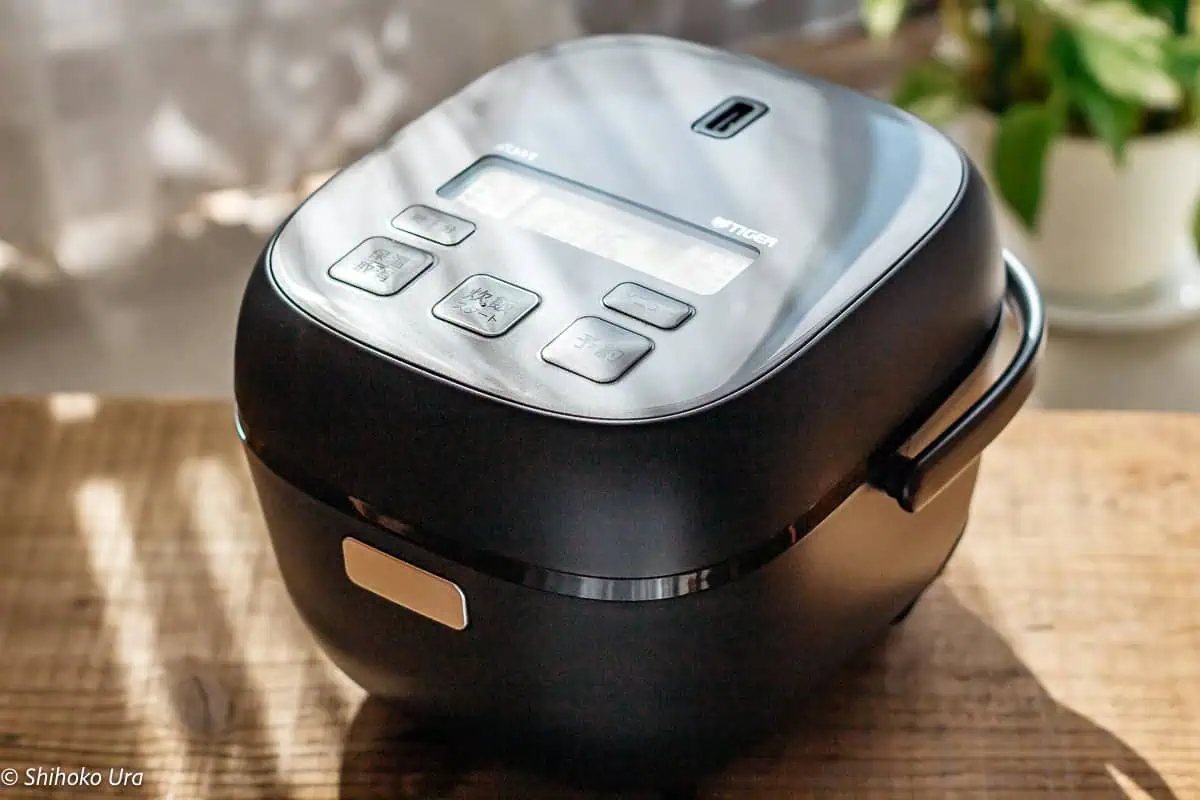
A Rice Cooker
A rice cooker is of course the main tool needed. Rice cookers typically consist of a heating element, a cooking pot, and a thermostat. Using a rice cooker makes everything simple because all you need to do is wash the rice and set the machine then press a button and wait for it to be done.
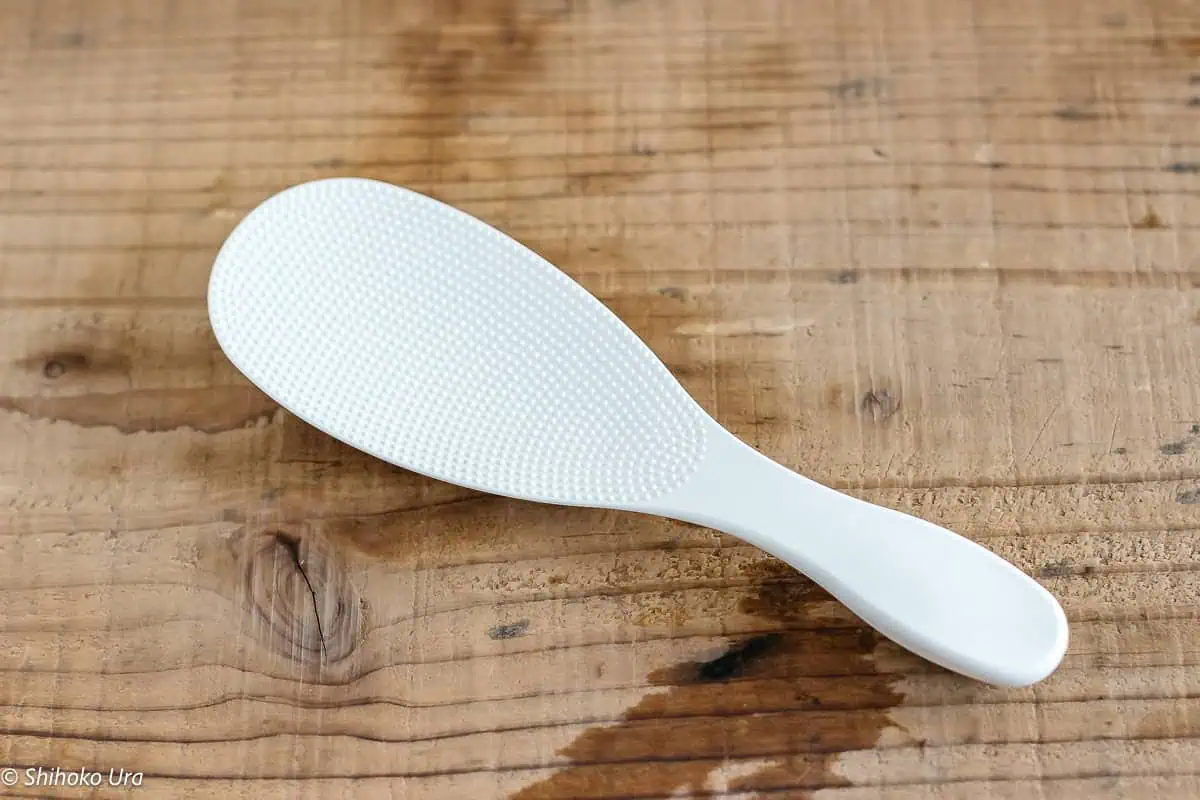
A Rice Paddle
Also known as a rice spoon or ‘shamoji’ in Japanese, a rice paddle is designed specifically for rice. It’s usually made of plastic or wood and has a flat, slightly curved and round shape. This design allows you to scoop and serve rice easily without crushing the grains. Using a rice paddle instead of a regular spoon or fork helps maintain the texture and integrity of the cooked rice.
How to Cook Rice in a Rice Cooker?
1. Measure the Japanese Rice
Use the measuring cup that came with your rice cooker. Scoop the cup of uncooked rice from the rice container and carefully level the uncooked rice with the back of a butter knife or something similar. One measuring cup is 180ml which equals 150g of rice. I don’t recommend tapping the bottom of the measuring cup to remove any air pockets because this will make the surface slightly indented and make you think to add more rice. But this is a bad idea because it will probably add around 10g more rice and then the water to rice ratio will be off. The best way to measure the rice precisely is using a scale and measure 150g of rice.
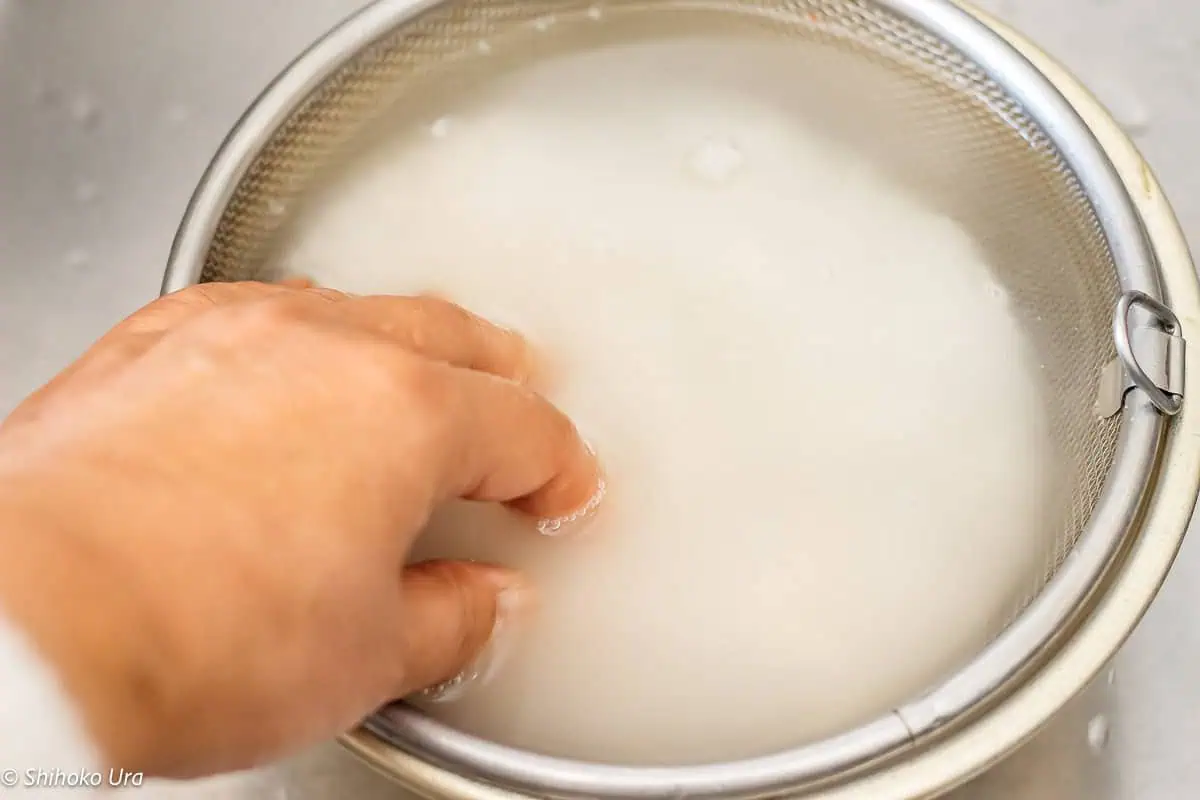
2. Rinse the Japanese Rice
Rinse quickly once first to avoid soaking up any cloudy water. Place the measured rice in a fine-mesh strainer and rinse in cold water in a mixing bowl (do not use the rice cooker’s internal pot) to remove excess starch. This first rinsing of the rice needs to be done fairly quickly as it is said that the dry rice absorbs 70% of the first rinsing water. We don’t want the rice to absorb too much of this water.
3. Wash the Japanese Rice
With modern rice milling techniques, today’s rice is sold in a nearly pristine state, free from most impurities. This means vigorous scrubbing is no longer necessary when you wash the rice. In fact, applying too much force when washing rice can be counterproductive because it can potentially damage the rice grains and compromise their taste. A gentler approach is now recommended to preserve the rice’s quality and flavor.
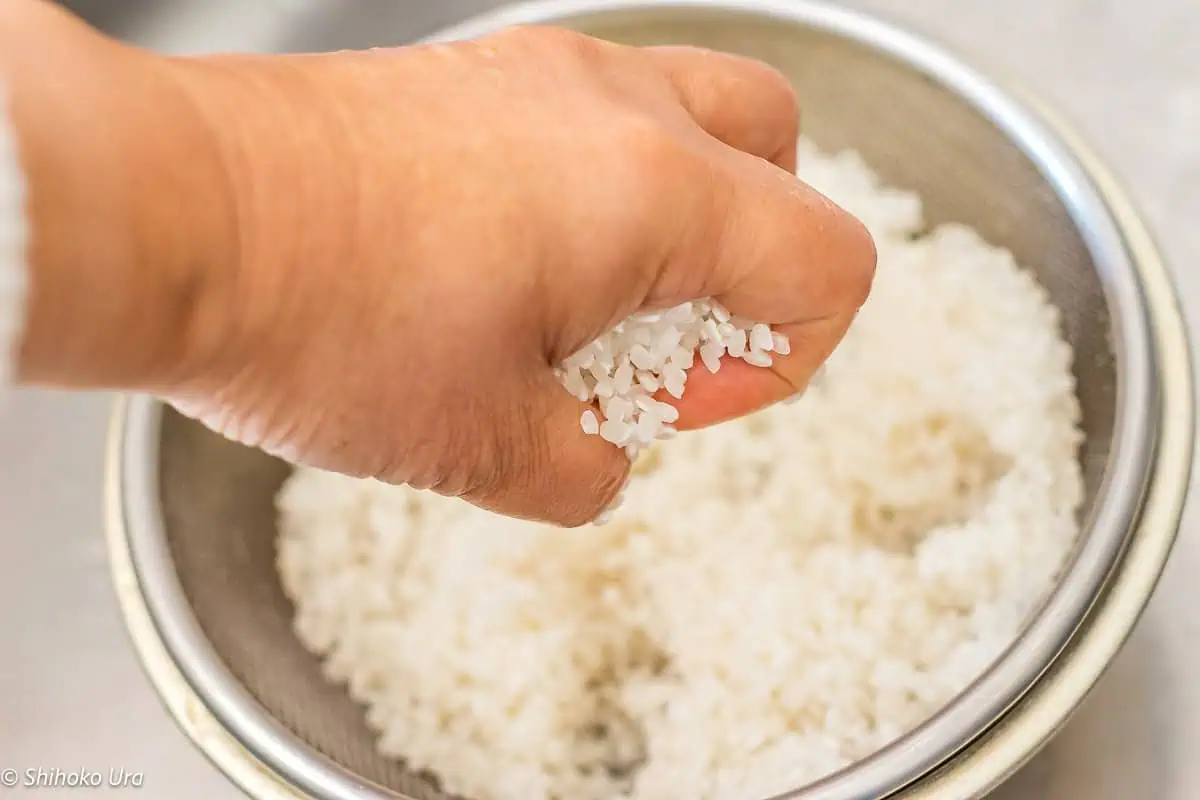
- After draining the rice from the first rinsing process above, gently squeeze and release rice grains about 30 times in the washing bowl without water. This gentle hand-squeezing process helps remove any remaining bran and excess surface sugars from the grains. It’s crucial to drain the water completely before this step. Attempting this process with water still present will prevent the necessary friction between rice grains which makes the cleaning ineffective. Without water allows for better contact between the grains which helps to remove unwanted particles and residues from the rice surface.
- Rinse the rice by changing the water only a few times. Be mindful not to over-wash, as excessive rinsing until the water runs completely clear can strip away flavor from the grains.
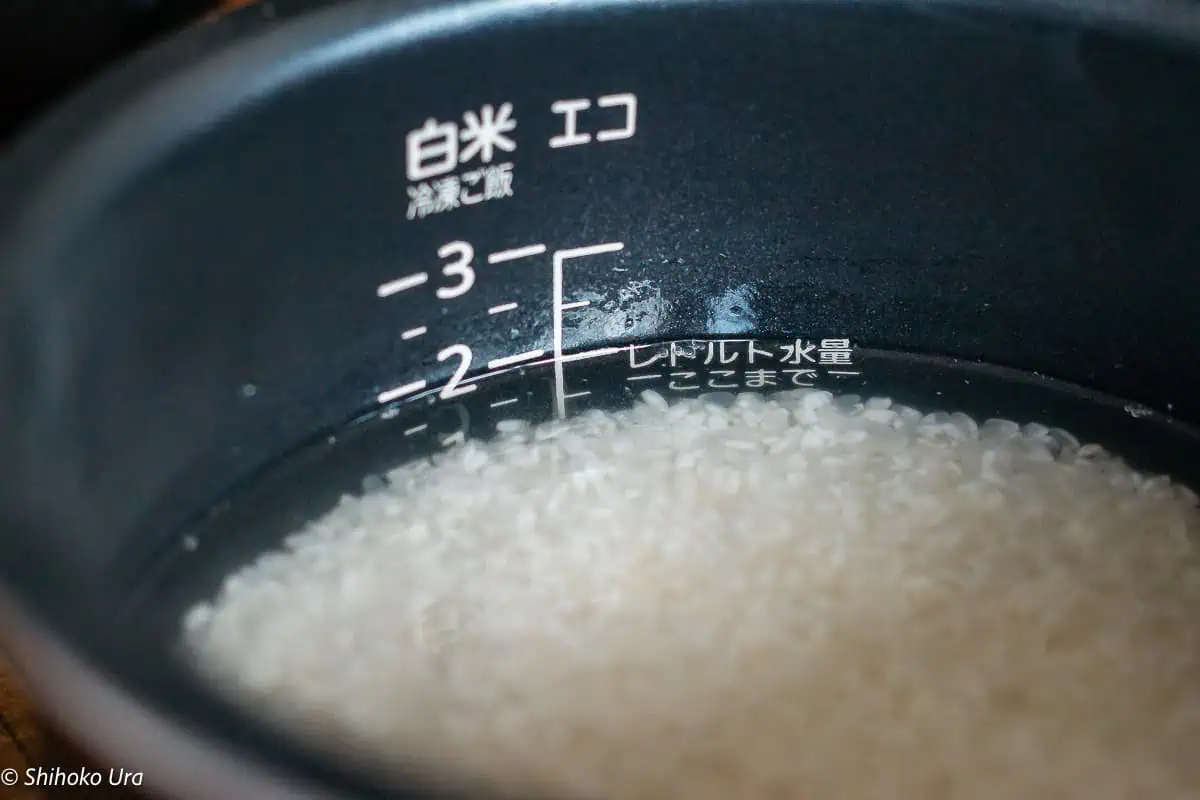
4. Adjust the Water Level
Put the rinsed rice into the inner pot of your rice cooker. Add water. For most Japanese white rice, use a 1:1 ratio of water to rice (e.g. 2 cups of water for 2 cups of rice). Check your rice cooker’s instructions for specific ratios for different rice. Check the water gage in the rice cooker’s inner pot and adjust the water level. Many rice cookers have water gages in two locations. Place the inner pot on a level kitchen bench surface and check the water by both gages for more accuracy. Also, if you look at the scale from above, it will shift and you will not be able to measure it correctly. Be sure to lower your eyes and look at the scale as closely as possible.
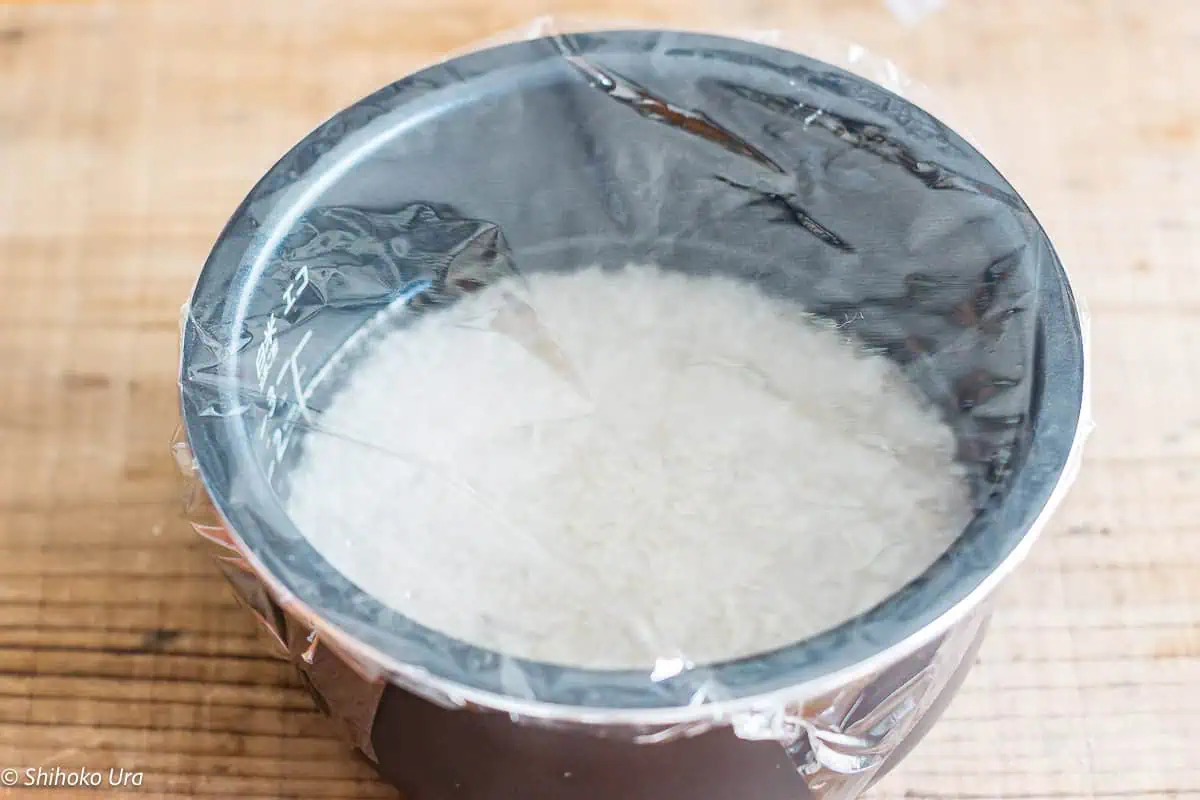
5. Let the Rice Soak
Cover the rice cooker inner pot with plastic wrap to prevent fridge odors from affecting the rice. Soak in the refrigerator for about an hour. This cold environment allows water to penetrate the rice grains fully. This method also ensures thorough hydration of the rice, which creates a better texture when cooked.
The cold soak and careful rinsing and washing process can significantly improve the final quality of your rice cooked in a rice cooker.
6. Cook : Select the Cooking Setting
Pre-soaked rice: for rice that’s been pre-soaked for an hour, choose the “fast cooking mode” on your rice cooker. This is because regular cooking modes typically include both soaking and cooking times. By pre-soaking in the refrigerator, you’ve already completed the soaking phase. Be cautious when using normal cooking mode for pre-soaked rice. It can lead to excess moisture in rice due to excess water absorption.
No pre-soak: if you have chosen not to do the pre-soak in the fridge, you can select the standard cooking mode.
Press the start button or switch to begin the cooking process.

7. Let it Rest
Most rice cookers will automatically switch to “keep warm” mode when the rice is done. After your rice is fully cooked, immediately disable the rice cooker’s keep-warm function and allow the rice to rest undisturbed for 5-10 minutes. This resting period is crucial, especially if your rice cooker lacks a built-in steaming function. However, if your rice cooker is equipped with a dedicated steaming function, you can skip this resting step, as the cooker will handle the moisture redistribution automatically. So, it’s safe to open the lid and fluff the rice right away.
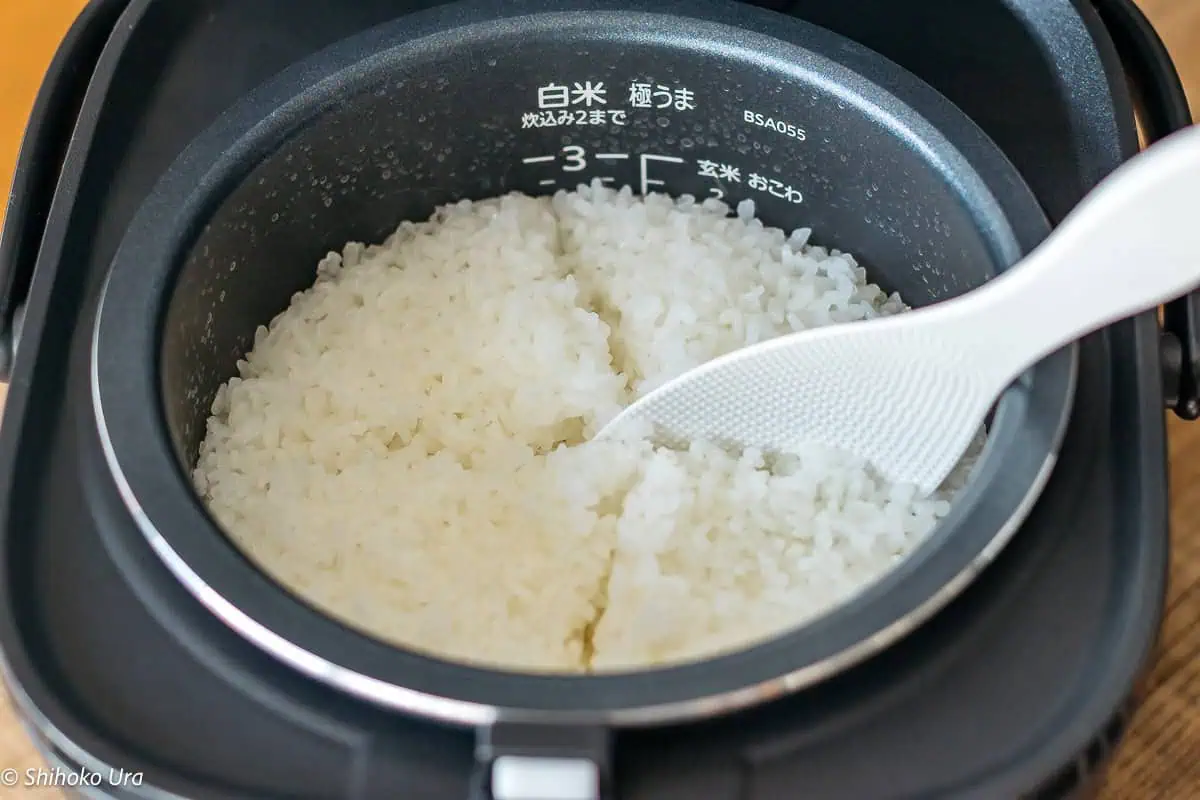
8. Fluff and Serve
After the rice has finished steaming, follow these steps to achieve perfectly fluffy and delicious rice:
- Open the rice cooker lid and cut the rice crosswise. This allows air to circulate through the grains making them firmer. Then divide the rice into four sections.
- For each section:
– Use a rice paddle to lift the block from the bottom.
– Gently turn it over.
– Carefully loosen the overturned rice. - Repeat this process for all four sections.
Tips to Cook Rice In a rice cooker
- Measure correctly: when measuring rice, once you put it in a cup, be careful not to press down on the rice or tap the bottom of the cup. It is important to add it gently and use a level to avoid overfilling.
- Don’t over wash the rice: as rice milling technology at factories has improved, there is less bran adhering to rice. Therefore, vigorous scrubbing and rinsing the rice until the washing water becomes clear is no longer necessary.
- Use mineral water: there is no problem with tap water, but if you use mineral water (soft water with a hardness of 50 degrees or less), it will make the finished rice taste better.
- Soak the rice: soak in the refrigerator for about 1 hour. By soaking rice in a cold environment, water can penetrate to the center of the rice grain.
- Be sure to use another bowl to wash the rice instead of the inner pot of the rice cooker to avoid scratching it.
- Place the inner pot on a level kitchen bench surface when adding water to the rice and check the water at eye level by using both measurement gages on the inside of the rice cooker pot for more accuracy.
How to Store Cooked Rice
Properly storing leftover rice is crucial for maintaining its delicious taste and ensuring food safety. After cooking, rice tends to lose moisture rapidly, so it’s best to set aside only the portion you plan to eat immediately and freeze the rest promptly.
For larger batches of cooked rice, you should wrap it in plastic while it’s still warm. To retain the heat and flavor, you can add a layer of aluminum foil over the plastic wrap. The aluminium foil serves a dual purpose when freezing rice. It helps the rice cool down quickly which helps it to freeze faster. This method of wrapping also helps protect the rice from absorbing flavors or odors from other foods in the freezer.
To enjoy frozen rice at its best, start by thawing the wrapped rice in the microwave for approximately 90 seconds. After this initial heating, open the plastic wrap and use chopsticks to gently separate the rice grains. Then, reseal the wrap and heat it once more. This two-step warming process will make the rice taste more fresh like newly cooked rice.
Serving Suggestions
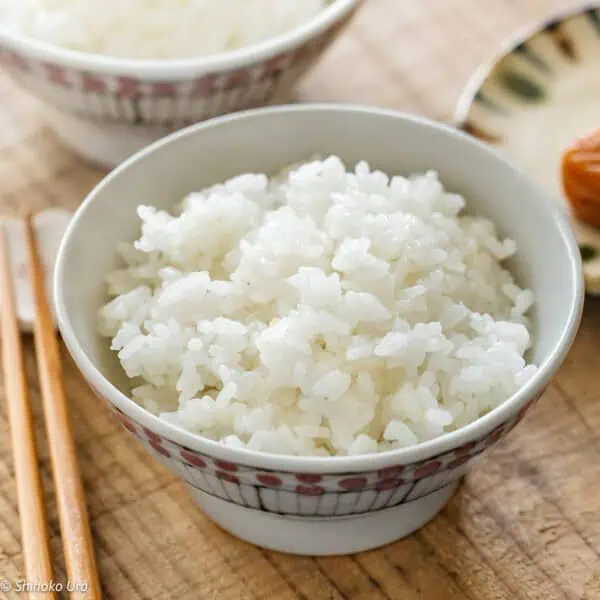
Plain cooked rice is a staple in Japanese cuisine that can be eaten plain or with added toppings for extra flavour. Here are some suggestions:
Umeboshi (Pickled Plum) :
Place a single umeboshi on top of your rice for a tangy, salty kick. Its vibrant red color also adds a beautiful contrast to the white rice. Umeboshi is not only tasty but also believed to have health benefits in Japanese culture.
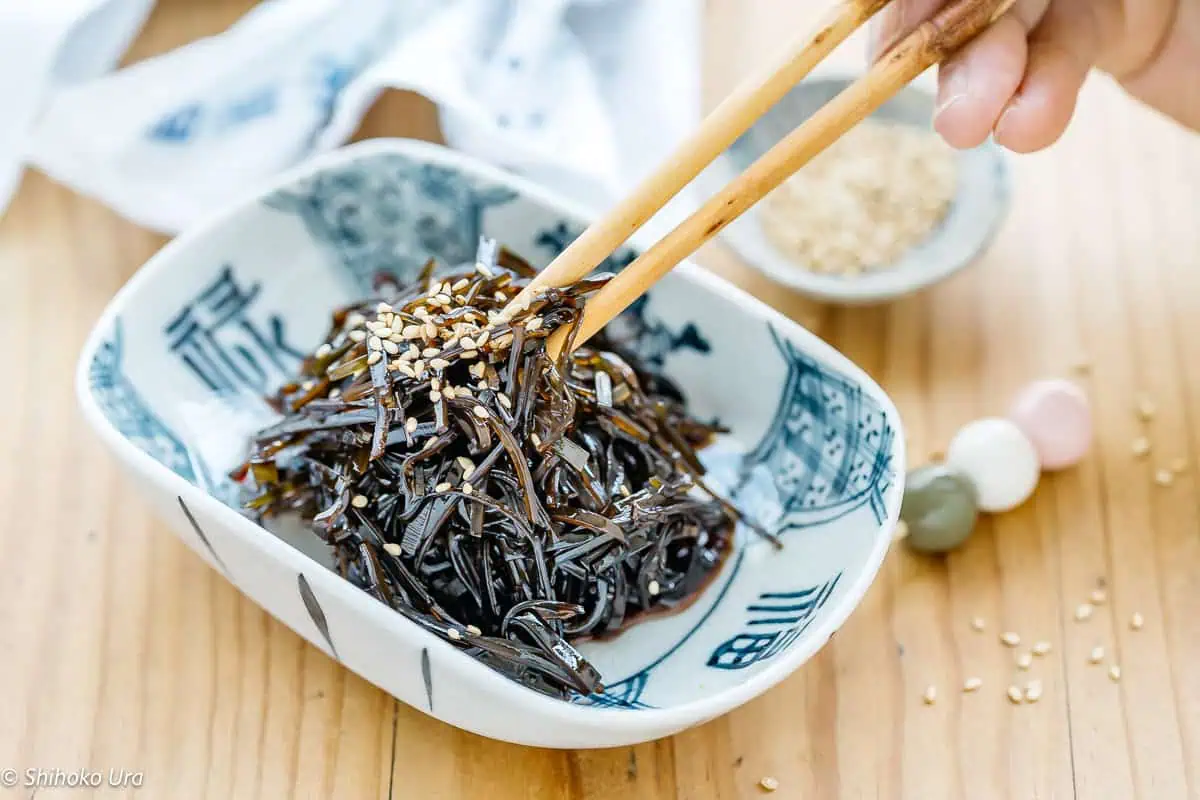
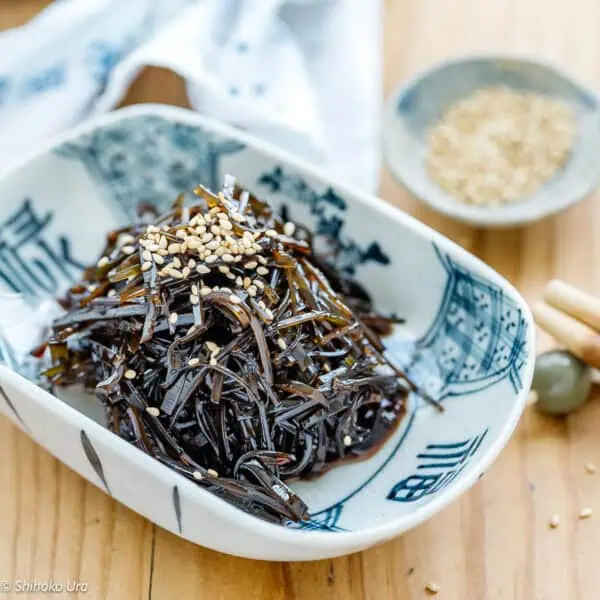
Kombu Tsukudani :
Serve rice with some kombu tsukudani for a savory, slightly sweet flavor. This seasoned kelp adds a nice texture and is packed with umami. It’s a great way to incorporate sea vegetables into your diet.
Furikake Rice Seasonings :
Shake some furikake over your rice for an instant flavor boost. These dry seasonings come in various flavors like nori (seaweed), bonito (fish), egg, and more. They add both taste and texture to the plain rice.
Salmon Soboro :
Top the rice with salmon soboro for a protein-rich option. This finely flaked salmon is seasoned and cooked to perfection to add a delicious flavor to the rice.


FAQ
A : In general the cups of rice to be cooked should be adjusted to the size of the rice cooker pot. In general, about 70% of the rice cooker’s capacity is best. For instance, if you have a rice cooker capacity of 5 cups of uncooked rice, it is best to use 3-4 cups of uncooked rice.
A : One cup of rice makes equivalent to 2.2 average sized Japanese rice bowls. Just the right amount for two people.
How to Cook Rice in a Rice Cooker ご飯の炊き方 炊飯器編
Equipment
- 1 rice cooker
- 1 rice measurement cup
- 1 straining bowl
- 1 mixing bowl
- 1 rice puddle
Instructions
- Using the measuring cup that came with your rice cooker, scoop a cup of uncooked rice from the rice container. Place the measuring cup on a flat surface in a mixing bowl and carefully level the uncooked rice with the back of knife. Repeat the process to measure two cups.
- Place the measured rice in a fine-mesh strainer and rinse the rice in cold water in a mixing bowl (do not use the rice cooker's pot) to remove excess starch quickly. *2
- After draining the rice from the first rinsing process above, gently squeeze and release rice grains about 30 times in the washing bowl without water. *3
- Rinse the rice by changing the water only a few times. *4
- Put the rinsed rice into the inner pot of your rice cooker. Add water. For most white rice, use a 1:1 ratio of water to rice.
- Check the water gage in the rice cooker's inner pot and adjust the water level. Place the inner pot on a level kitchen bench surface and check the water by both gages at eye level for more accuracy.*5
- Cover the rice cooker inner pot with plastic wrap and let it soak in the refrigerator for about an hour.
- Choose the "fast cooking mode" on your rice cooker. Press the start button or switch to begin the cooking process. If you haven't pre-soaked the rice then use the standard mode on the rice cooker.
- After your rice is fully cooked, immediately disable the rice cooker's keep-warm function.*6
- Allow the rice to rest undisturbed for 5-10 minutes if your rice cooker does not have a built-in steaming function. *7
- After the rice has finished steaming, open the rice cooker lid and cut the rice crosswise to divide it into four sections.
- Use a rice paddle to lift a section of the cooked rice from the bottom and gently turn it over.
- Carefully loosen the overturned rice. Repeat this process for all four sections.
Notes
Nutrition
Reference : Basic ways to cook and store delicious rice in a rice cooker


Bless you for saying 1:1 ratio! I’m tired of seeing improper ratios for rice in other recipes. It’s the fool-proof way to get perfect rice. 🍚
I’ve been using this recipe for over a year now, it was time to say thank you. My rice always comes out perfectly following these simple methodical steps. So thank you very much for sharing 🙂
Hi Thank you Liam for your lovely comment and 5 star rating 😀
Hello! I just found your website & I love it!
I have been searching for your rice pot online & found it! It is offered in 3 different sizes: 12cm, 16cm & 20 cm (diameter measured at the top). Which size is yours, please?
Thank you,
joal
Hi Joal, mine is 16cm 😀
what color is the staub rice pot that you used? is it cream? thankyou
Hi Seu, sorry I can not remember but it was some kind of special grey colour that I bought it in Japan.
perfect rice every time
May i know what size of your staub rice pot? Tq
Hi Habibaty, I think it is small.
Hi Shihiko,
The recipe looks good. Will the rice get stuck at the bottom of the Staub Pot thus wasting some rice?
Thanks,
Amelia
Hi Amelia, no it does not if you are careful with heat control 😀
Well Amelia, obviously it will stick unless you invest a better cooker which is non stick secondly not enough water. I can tell you cant cook , better spend more time cooking.
Lol! Well that was both rude AND an impressive self-own! I can tell you can’t cook b/c enamel cast iron Staub gear is a serious investment, coveted by professional chefs & far superior to the non stick garbage you’re suggesting.
Nice effort rookie
shut up richard
@cia 😂😂 thank you. Your comment truly tickled me.
Also this is a great recipe.
Thanks for the recipe! I’m gonna try it for tomorrow’s lunch.
Thank you Miku 😀
You do not soak the rice like I have seen in other japanese rice recipes, is there a reason for that? I like Tamaki Gold California Koshihikari rice very much, Seshuu-Mai Koshihikari not so much, Seshuu-Maiit has the smallest rice grain I have ever eaten and I find the mouth feel kinda of strange becuse of the tiny grain size!
Hi Solis, yes if you soak it, the grain absorb water and you need to change the amount of water to cook with.
Hi!
This worked out great, I used my le Cruset pot and for the first time in my life I am happy with the rice. It worked better than my Swiss made rice cooker, where I get a scorched bottom and mushy rice. Thanks so much for posting this recipe.
Monica
Hi Shihoko, before put rice in plastic wrap and fridge, should I cool the rice?
Hi Momo yes 😀
Hi Shihoko- I am interested in trying out your onigiri recipe. I am wondering if I can freeze the onigiri like you can freeze the rice here? Also, once you have frozen the rice, how would you warm or thaw it? Thank you for your very well detailed recipes.
Hi Giseslle, yes you can freeze onigiri rice balls. I would freeze without nori wrapped though. You can thaw back in room temperature or microwave 30sec-1 min.Every microwave is different so you need to adjust the time 😀
Hi Shihoko!
Just wanted to say thank you for this recipe, I had been struggling to get perfectly firm japanese rice and it would always end up on the mushy side. Made the change today and it was spot on!
You are welcome Natalia 😀
Shihoko san,
1st thing cought my atention is the small pot.. 😊
Where can we get that?
Sumimasen.. 😊
Keep posting good recipe’s..
Hi Arnel Tereso Ruiz san 😀 I boughthe it in Japan, though it is “satub” french brand and they are available world wide online.
this is strange – i have been cooking rice using this steam or absorption method for 20 years but i always use a 2:1 ratio, water to rice. Bring to a simmer, clap the lid on and heat turned down to lowest possible. 15 minutes for white and 40 mins for brown. No peeking! At end of this, put a clean tea towel under the lid and allow to stand for 5-10 minutes. I have always had beautiful rice and none of that horrible draining thru a sieve.. How can it work with half the amount of water?!! Could it be because i am nearly always using basmati? Either white or brown? Does japanese rice just need less water?
Hi Cam, yes I think so. I usually cook Japonica rice called “Koshihikari” which is quite different from Basmati rice.