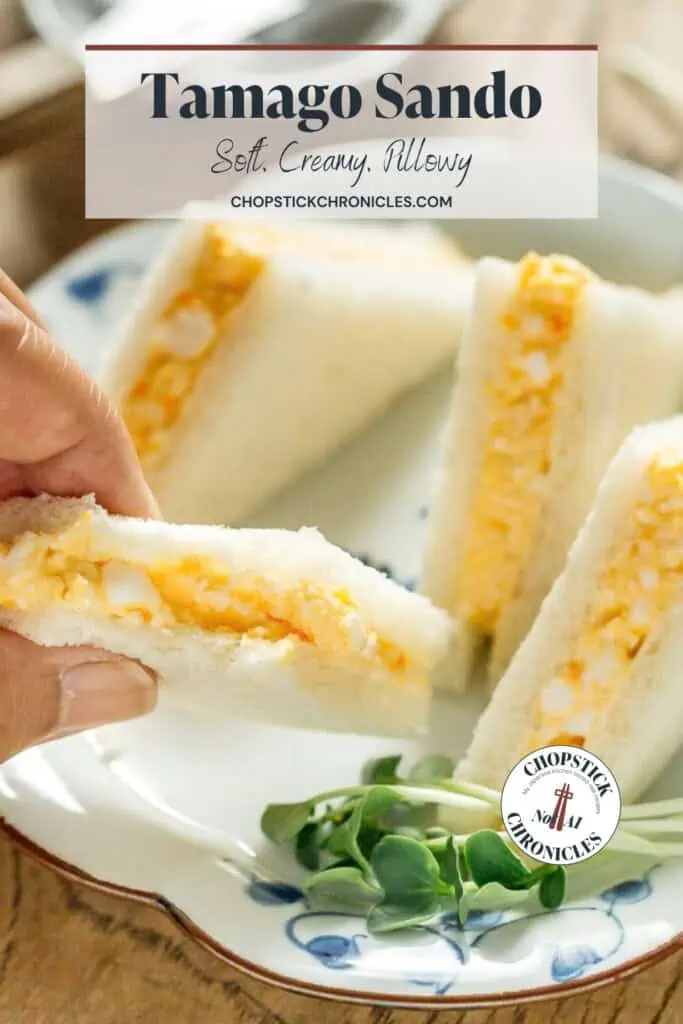
Tamago sando is a classic Japanese egg sandwich made with soft shokupan and a creamy egg filling. My mom often made these sandwiches for our weekend breakfast when I was growing up in Japan and it’s something I made for my children’s lunchboxes too, so it’s a very well loved staple for me. It’s one of the easiest Japanese foods to make outside of Japan, but a few simple things make a big difference. For an authentic and delicious tamago sando, I like to use thinly sliced Japanese bread (shokupan) and Japanese Kewpie mayonnaise for its rich, slightly tangy flavor. It’s simple but a perfectly soft and creamy homemade Japanese egg sandwich is just the best.
What Is Tamago Sando?
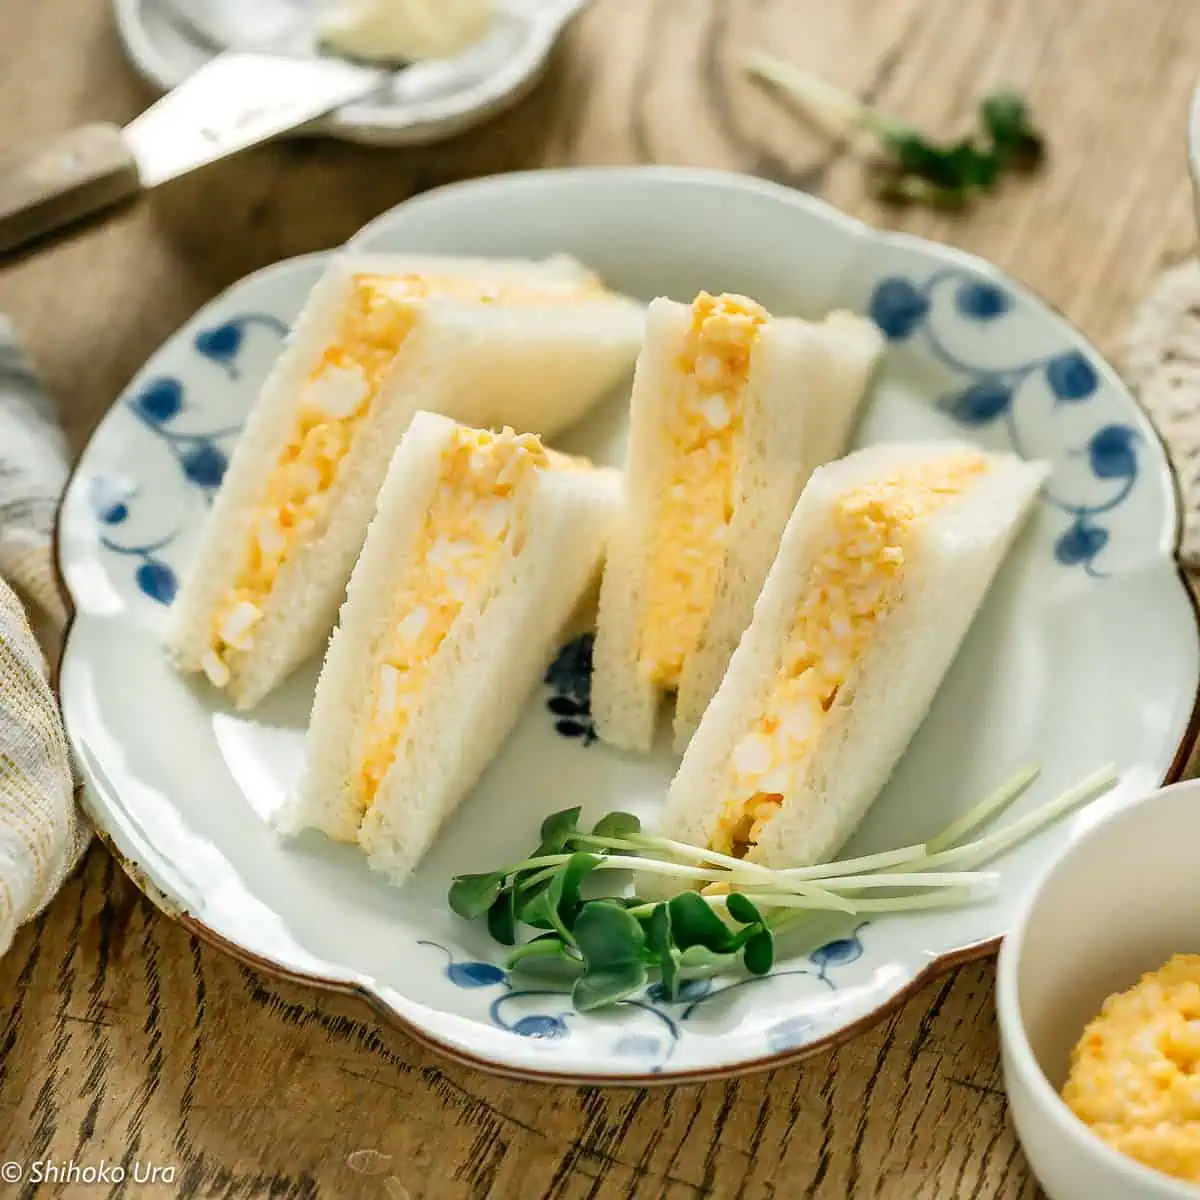
Tamago sando (卵サンド) is a Japanese egg sandwich. Tamago means egg, while sando is the shortened Japanese word for sandwich (sandoicchi). It is typically made with soft, fluffy shokupan (Japanese bread) filled with chopped boiled eggs mixed with Japanese mayonnaise. You will find tamago sando everywhere in Japan, from convenience stores and bakeries to sandwich shops, but it is also an easy sandwich that many families make at home.
Convenience store versions are known for their very soft bread, smooth creamy filling, and neatly trimmed crusts. Homemade tamago sando tends to be a little more rustic, and every family has its own preferred egg texture and seasoning. Compared with a typical Western egg salad sandwich, a Japanese egg sandwich is usually simpler, with the egg as the main flavor rather than additions such as celery, onion, or herbs. The soft shokupan and rich Japanese mayonnaise are also an important part of its distinctive taste and texture. In Japan, I like to buy the shokupan which are cut 8 or 10 slices per loaf (8枚切りor 10枚切り) so that the bread is not too thick and overpowering.
What Does Japanese Egg Sandwich Taste Like?
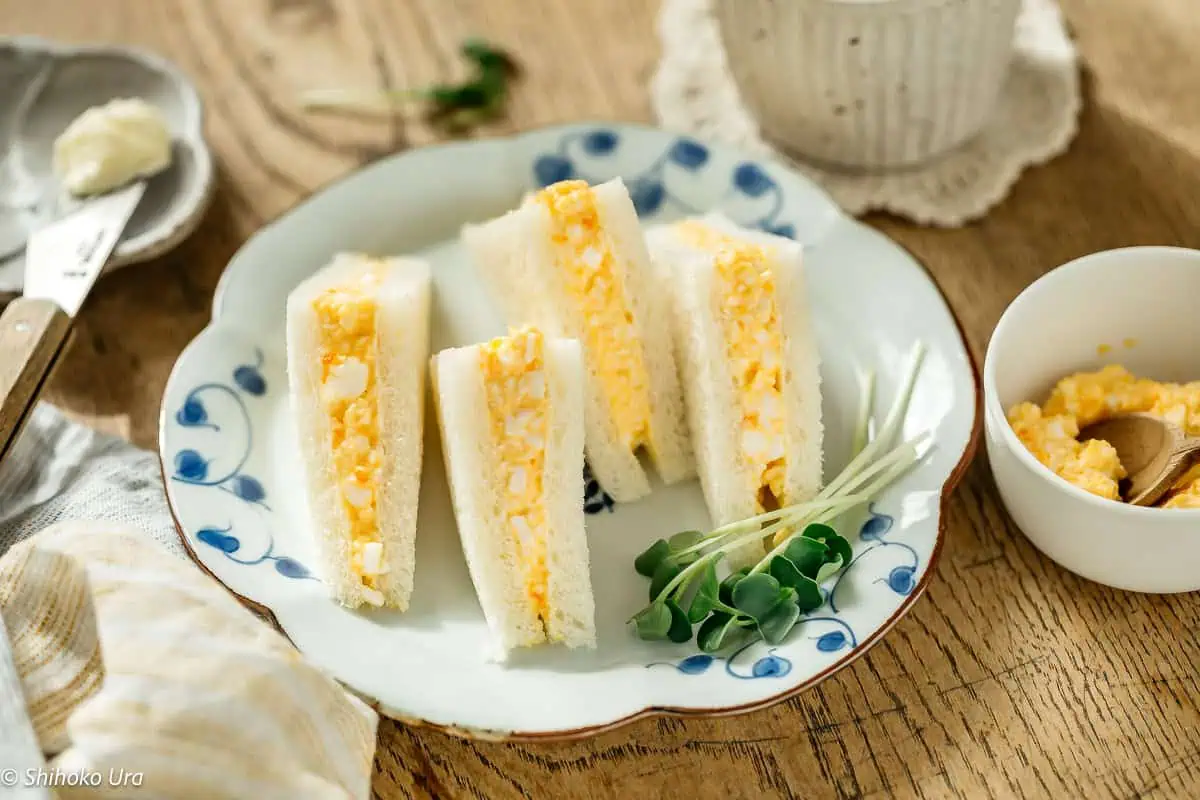
A classic Japanese tamago sando has a creamy savoury egg flavor with a touch of sweetness from the fluffy shokupan. The egg filling is rich and smooth with sometimes small pieces of egg left for a little texture. The yolks add richness and the Japanese mayonnaise brings a slight tang and saltiness. What I like most about tamago sando is that no single ingredient overpowers another. Each flavor is subtle, but when they come together, they create a soft, pillowy sandwich with just the right balance of richness, saltiness, and sweetness.
Why You’ll Love This Tamago Sando Recipe
- Simple to make: You only need a handful of everyday ingredients and no special cooking equipment.
- Perfect for breakfast or lunch: Once the eggs are boiled, the filling comes together quickly, making it an easy option for a busy day.
- Great for making ahead: Prepare the egg filling in advance and keep it in the fridge until you are ready to assemble the sandwiches.
- Easy to get the texture right: My method gives you a filling that holds together without becoming wet or runny, so the bread stays soft rather than soggy.
Ingredients You Need
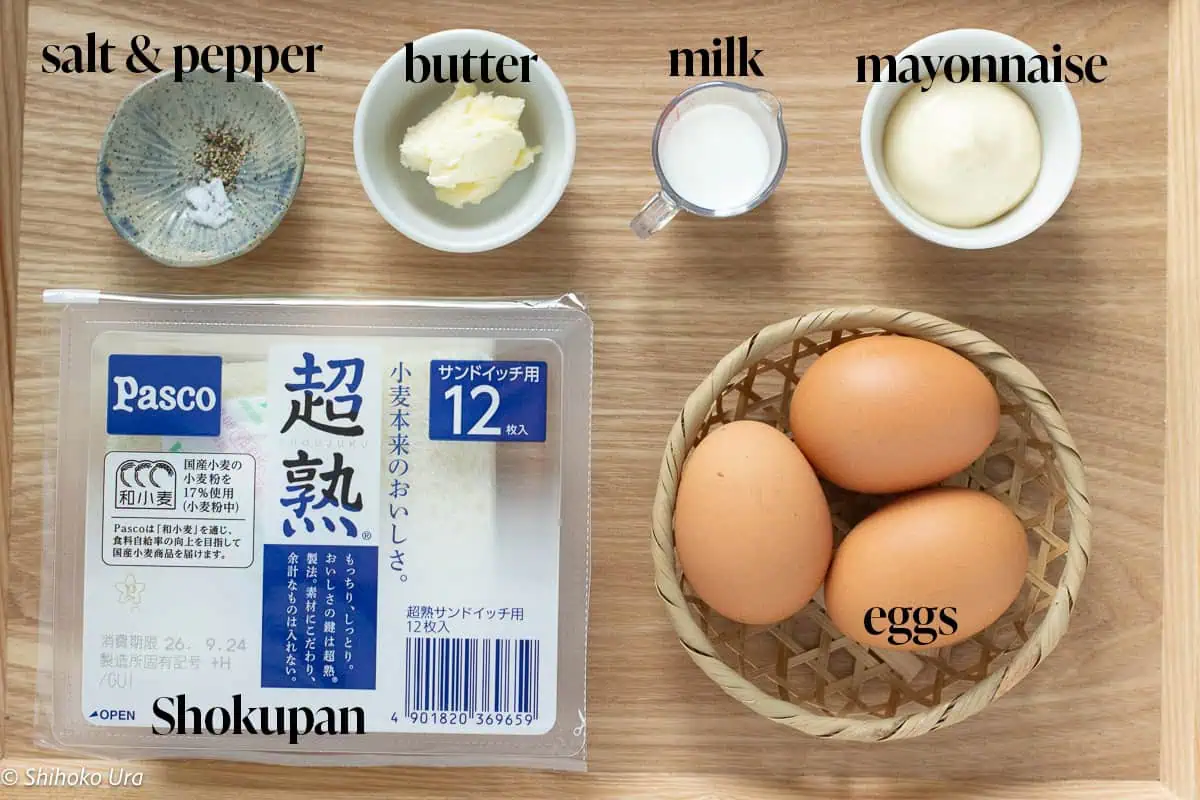
You only need a few ingredients to make tamago sando, so the quality and balance of each one makes a difference.
Eggs
I use medium eggs for this recipe. Eggs sold in Japan do not vary as much in size as those I have seen overseas, and the standard eggs I buy here are roughly equivalent to medium-sized eggs. How you boil them is important because we want the yolks fully set but still moist, rather than dry and crumbly.
Japanese mayonnaise
I use Kewpie mayonnaise for its rich, slightly tangy flavor and smooth texture. Japanese mayonnaise is made primarily with egg yolks, which gives it a richer taste than many standard mayonnaises. If you cannot find it where you live, you can make your own using my Japanese Kewpie Mayonnaise recipe.
Milk
This helps the filling be less thick and have a creamier consistency.
Shokupan
Soft Japanese shokupan is my first choice for tamago sando. Its fine, fluffy crumb and subtle sweetness complement the egg filling without overpowering it. I prefer thinly sliced bread for this sandwich. If you cannot buy it locally, try my Homemade Shokupan recipe. A soft white sandwich bread or milk bread is the next best substitute.
Butter
I spread a thin layer of butter over the bread before adding the egg filling. It creates a barrier between the moist filling and the shokupan. This helps prevent the bread from becoming soggy, especially if you are making the sandwiches ahead.
Salt and Pepper
Just a small amount is enough to season the eggs. I keep the seasoning simple so it enhances the egg rather than covering its mild flavor.
How to Boil Eggs for Tamago Sando
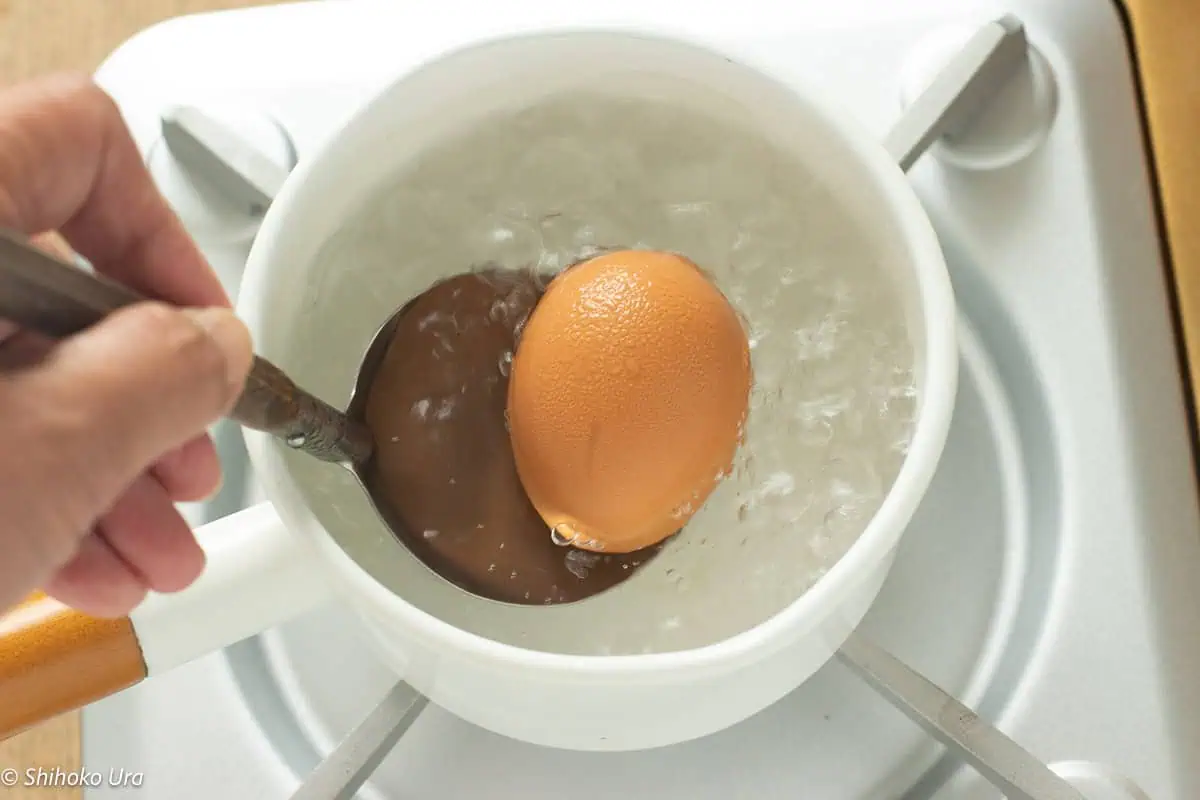
I tested the eggs at 8, 9, and 10 minutes, and found that 9 minutes gives me the best yolk texture for tamago sando. Bring enough water to a boil to fully cover the eggs, then carefully lower the medium-sized eggs into the boiling water. Once the eggs are in, keep the water at a gentle boil and cook for exactly 9 minutes.
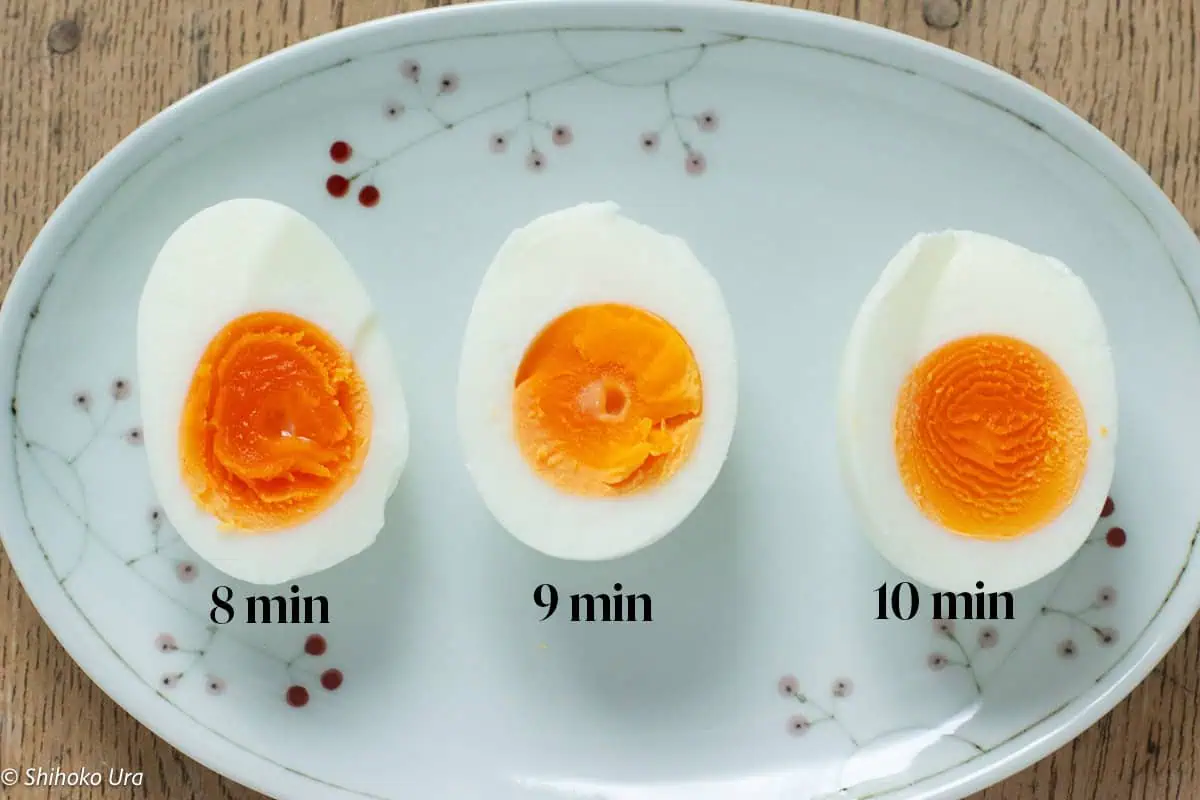
After 9 minutes, transfer the eggs straight into a bowl of ice water to stop the cooking and cool them before peeling. For tamago sando, I don’t want a runny yolk, but I also don’t want it dry and chalky. At 9 minutes, the yolks are fully set while the center stays moist and rich, which helps create a smooth egg filling without needing too much mayonnaise.
How to Make Tamago Sando
Once the eggs are cooked, tamago sando comes together quickly. The key is to keep the filling creamy but firm enough to stay between the soft slices of shokupan.
Step 1: Prepare the Eggs
Cook the eggs using my method above. Peel the eggs and pat them dry before making the filling so you don’t introduce extra moisture.
Step 2: Make the Egg Filling
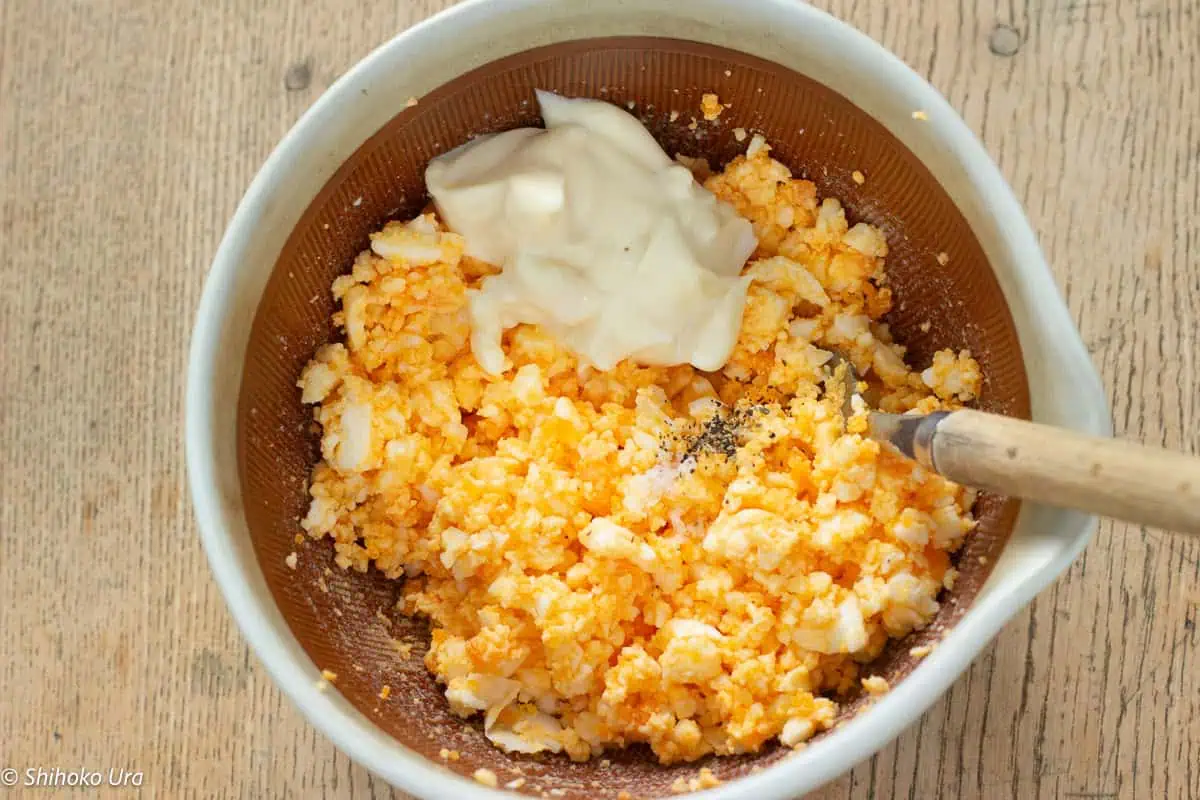
- Put all the eggs in a bowl and mash with a fork until fine and crumbly, then mix in the Japanese mayonnaise, salt, and pepper until smooth and creamy.
- Add mayonnaise and a bit of milk gradually rather than all at once. The finished filling should be moist and creamy but not loose or runny.
Step 3: Prepare the Shokupan
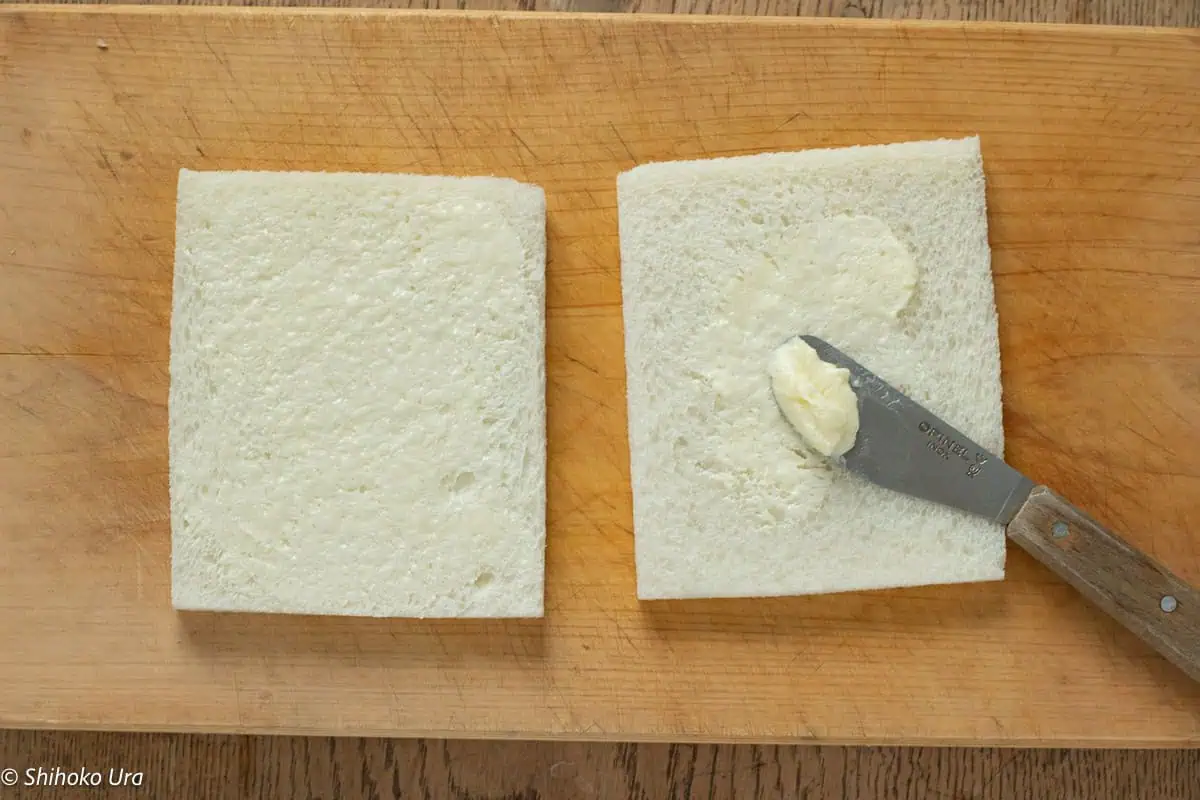
- Lay two slices of shokupan on your work surface and spread a very thin layer of softened butter over the inside of each slice. Make sure to spread it all the way to the edges. The butter creates a barrier between the bread and egg filling, which helps keep the shokupan from becoming soggy.
- I prefer to leave the crusts on while assembling the sandwich and trim them afterward. The crust gives the soft bread a little more structure while you fill and handle it, and you can make a neater final cut.
Step 4: Add the Egg Filling
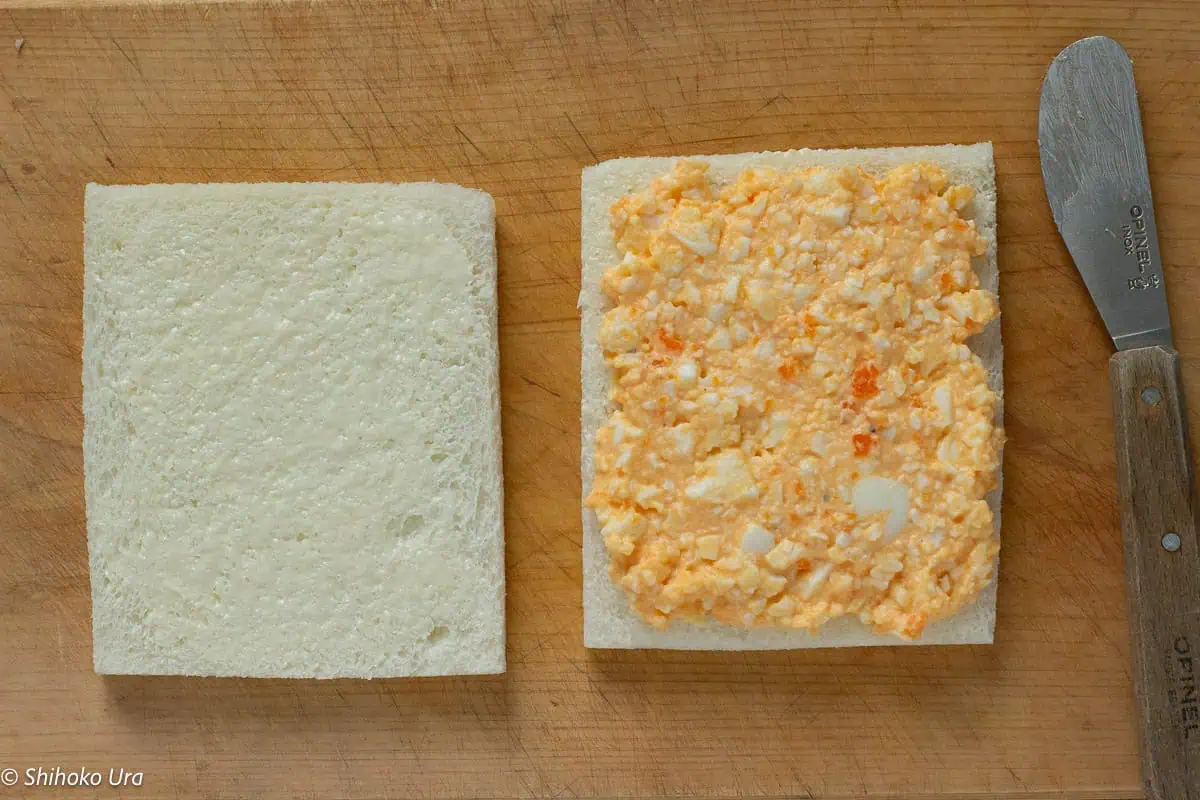
- Spread the egg filling evenly over one slice of shokupan, taking it almost to the edges. Keep the layer as even as possible rather than piling the filling in the center. This gives you egg in every bite and also helps create an even cut side
- Place the second slice of bread on top and press very gently with your palm. You only need enough pressure to settle the sandwich. Pressing firmly will flatten the fluffy shokupan and push the filling out around the edges.
Step 5: Rest and Cut
- Wrap the assembled sandwich snugly in plastic wrap and let it rest briefly before cutting. This helps the bread and filling settle together and makes the sandwich easier to slice neatly.
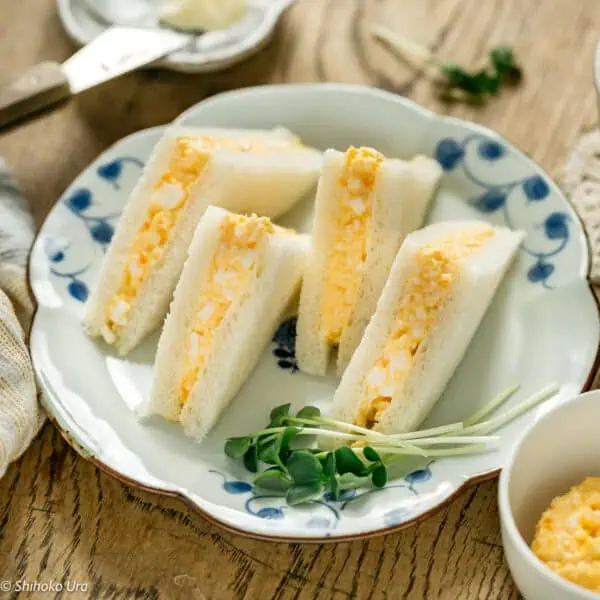
- When ready to serve, use a sharp bread knife to trim off the crusts (if you want), then cut the sandwich in half. Wipe the knife between cuts so the cut side stays clean and you can clearly see the soft bread and creamy egg filling.
- Serve soon after cutting for the best soft, pillowy texture.
Should You Cut the Crusts Off Tamago Sando?
You don’t have to remove the crusts, but tamago sando in Japan is often served crustless for a softer, more uniform texture from edge to edge. Japanese supermarkets also sell thinly sliced sandwich bread with the crusts already removed, so if you use this type, there is nothing more to trim.
At home, though, keeping the crusts on is perfectly fine if you want. I prefer to leave the crust because I think it balances the soft creamy filling.
If you do cut the crusts, don’t throw them away. Toast them until crisp and use them for panko breadcrumbs.
Shiho’s Kitchen Tips for the Best Tamago Sando
Nine minutes is my sweet spot for the eggs : I tested 8, 9, and 10-minute cooking times, starting the eggs in boiling water. I prefer 9 minutes because the yolks are fully set but still moist. Overcooked yolks become dry and chalky, which means you need more mayonnaise to bring the filling back to a creamy texture.
Add the mayonnaise gradually : Start with the amount in the recipe and only add more if needed. The filling should hold its shape on a spoon rather than spread or drip. Too much mayonnaise can make it wet and more likely to soak into the bread.
Soft bread really does make a difference : Very soft, fine-textured shokupan gives tamago sando its pillowy texture. I particularly like thinly sliced shokupan for this sandwich. If you can’t find Japanese bread where you live, you can make it at home with my Shokupan recipe.
Don’t trim the crusts too early : When I use regular shokupan, I assemble the sandwich with the crusts still attached. They give the soft bread some structure while I spread the filling and handle the sandwich. I trim them just before the final cut.
Rest before you cut: Wrapping the assembled sandwich snugly and chilling it briefly helps the filling settle and makes the sandwich easier to slice without pushing the egg out of the sides. Don’t leave it uncovered in the fridge, as shokupan dries out quickly.
For a clean cut side, use a sharp knife: Don’t press down on the sandwich while cutting. Use a gentle sawing motion so you don’t compress the fluffy bread. Also make sure to wipe the blade clean between cuts. This gives you a neat cut side with a clearly defined layer of egg filling.
Variations of Tamago Sando
A classic Japanese egg sandwich is best kept simple, but there are a few Japanese-style variations you can try.
Atsuyaki Tamago
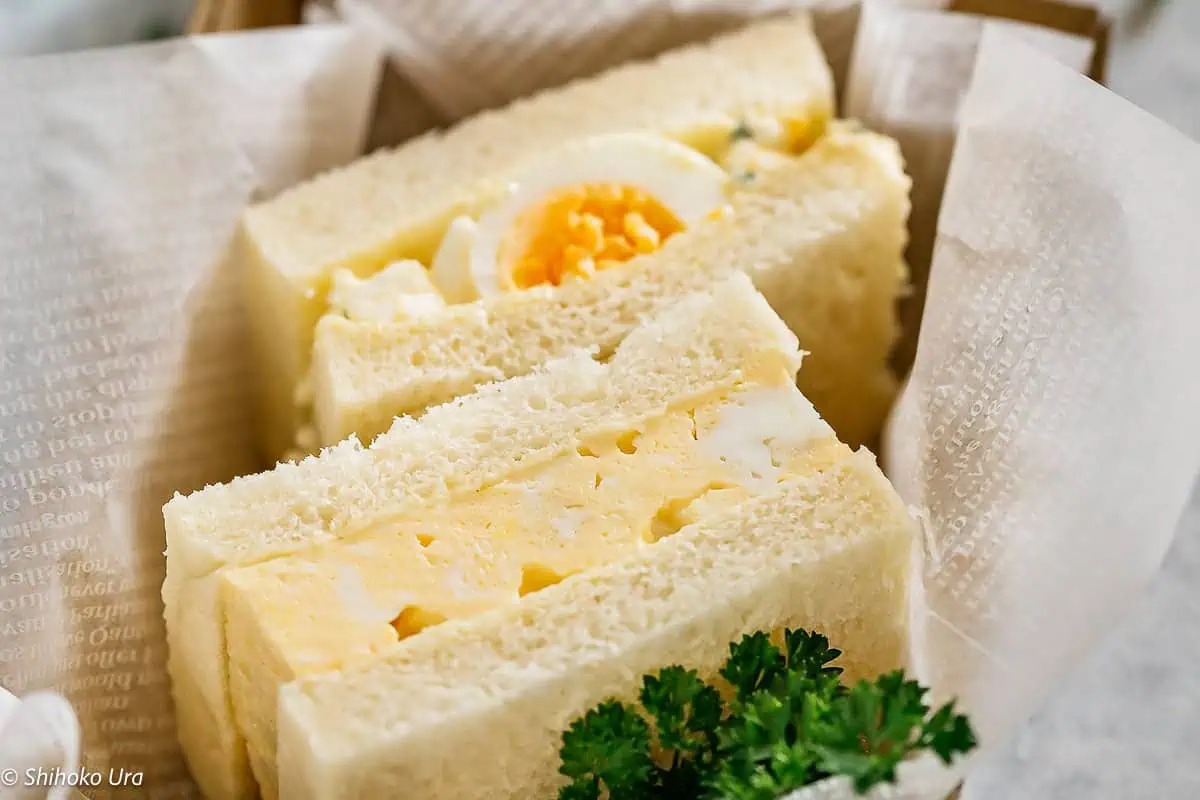
Instead of the creamy boiled egg filling, sandwich a thick piece of atsuyaki tamago (厚焼き玉子), a Japanese-style thick rolled omelette, between slices of soft bread. The tender, slightly sweet and savory omelette gives this style of tamago sando a completely different texture from the classic egg and mayonnaise version.
Soft-boiled Egg Center
For a richer version, place a soft-boiled egg in the center of the egg filling before closing the sandwich. A soft, jammy yolk works better than a runny one, which gets messy and adds too much moisture to the bread.
Karashi Mustard
Mix a small amount of Japanese karashi mustard with softened butter before spreading it over the shokupan. It will give the mild egg filling a bit of heat. Don’t use too much or it will be overpowering.
Cucumber
Add very thinly sliced cucumber for a fresh crunch. Lightly salt the slices, let them sit briefly, then pat them thoroughly dry before assembling the sandwich so the extra moisture doesn’t make the bread soggy.
What to Serve with Tamago Sando
Tamago sando is satisfying on its own, but I like to pair it with something light and fresh or a simple soup to make it a complete meal.
- Salad: Serve it with Asian Slaw or Asian Cucumber Salad for a fresh, crunchy contrast to the soft sandwich.
- Soup: A warm bowl of Corn Potage, Edamame Potage, or Pumpkin Soup turns tamago sando into an easy café-style lunch.
- Drinks: For breakfast or a light afternoon meal, pair it with Hojicha, a Hojicha Latte, Mugicha, or Matcha Latte. Coffee also goes very well with the mild egg filling.
Tamago sando works well for breakfast, lunch, picnics, or a bento. Because the filling contains cooked eggs and mayonnaise, keep the sandwich properly chilled until you are ready to eat it, especially when packing it to take away.
How to Store Tamago Sando
Tamago sando is best eaten freshly made, while the shokupan is still soft and fluffy. If you need to store it, wrap each assembled sandwich tightly in plastic wrap so no bread is exposed, then place it in an airtight container in the fridge. This helps prevent the shokupan from drying out and stops it from absorbing other refrigerator odors. For the best texture, I recommend eating it within 24 hours.
You can also make the egg filling ahead. Store it separately in an airtight container in the fridge and use it within 3 to 4 days. I prefer assembling the sandwiches closer to serving so the bread stays at its best.
I don’t recommend freezing assembled tamago sando. Freezing and thawing can change the texture of both the egg filling and the soft shokupan, and the filling may become watery.
For a bento or picnic, remember that tamago sando contains cooked eggs and mayonnaise and needs to be kept cold. Pack it directly from the fridge in an insulated lunch bag with an ice pack, particularly during warm weather, and don’t leave it sitting at room temperature for extended periods.
Tamago Sando ( Japanese Egg Sandwich) 玉子サンド
Video
Ingredients
- 6 slices thinly sliced Shokupan *1
- 1 tbsp Japanese mayonnaise *2
- 2 tbsp butter/margarine
- 1 tsp Japanese mustard (optional)
Egg Filling
- 3 eggs (left in room temperature)
- 1 tbsp Japanese mayonnaise
- 1/2 tbsp milk
- pinch of salt and pepper to taste
Instructions
- Bring water to boil in a saucepan over high heat.
- Once boiled, add the eggs and set a timer for 9 minutes.
- After 9 minutes, remove the eggs with a ladle and place them into a bowl of cold water.
- Remove the shells. Place the boiled eggs into a mixing bowl and squash them with a fork.
- In a separate bowl, mix mayonnaise and milk. Add it to the egg bowl.
- Combine all together.
- Place two slices of bread on a chopping board.
- Spread butter or margarine and mustard (if using) thinly over the bread.
- Place the egg mixture onto the bread and spread it evenly to cover the bread.
- Place the other bread on top of the egg and press it lightly to sandwich together. Repeat same for the rest of the bread slices.
- Wrap them in plastic wrap and let it rest briefly before cutting.
- Cut it in half with a sharp knife to serve. *3





What is the brand of the Japanese mustard & what US brand is comparable to iy?
Hi Jojo, This is the Japanese brad one that you can get from Amazon.
Great, it’s fun to learn something different from a different culture,
I subscribed to you tube and your blog
thank you, greetings from the Netherlands,
p.s;
good that there is also a translator on the blog
Ohh Thank you Wanda 😀
New favorite way to eat egg sandwiches!
Thank you Nellie 😀
Definitely a must make!
Hi Brandy Make it soon 😀 You will not disappoint!
I’m super excited to try these Japanese breakfast sandwiches. They look lovely! Thank you for sharing these versions with all of us.
Thank you Renee 😀
Yum! These Japanese sandwiches are a nice change from our typical lunch fare.
Thank you Taryn 😀
Thank you for sharing this recipe. A recipe for a sandwich ! But this IS a special sandwich. Yummmmm
Perfect for eating on a Shinkansen (when no one is watching of course)
Thank you Frank 😀 You can eat them on Shinkansen even people watching 😀
I need one of these in my life! Yum!
😀
I love the Japanses omelette version!
Me too 😀